Just updated with pics……..life is getting crazy busy & I forgot to embed the pics before it got published earlier today!
One of my most FAVOURITE things on the new JANOME MC15000 is the ACUFIL QUILTING. With the JANOME MC15000…….you guessed right: it is INCLUDED! YES, the Acufil tool is part of the HORIZON LINK SUITE software which comes included with the JANOME MC15000. Install the Horizon Link Suite software onto your computer (laptop or desktop) and then sit back in your comfy computer chair for some wonderful fun.
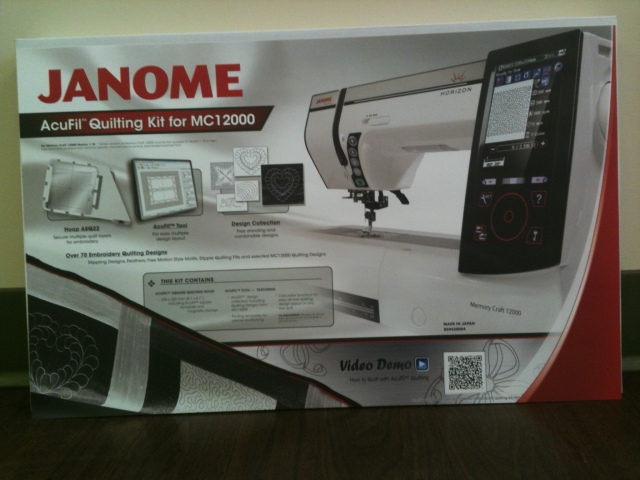
Acufil Quilting is available for the Mc11000 & Mc12000 but this is optional: the Acufil Quilting kits are purchasable add-on’s. There are 2 separate Acufil kits for the Mc11000 with 2 different Acufil hoops: the AQ and the ASQ hoops. These are smaller than the ASQ 22 Hoop for the Mc12000 & Mc15000. With the MC11000 the Acufil Quilting is worked on the screen of the machine. With the Mc12000 and Mc15000 this is done on the computer in the Horizon Link software: I find this much simpler & easier to use and the approx 8 inch square (22cm square) Acufil hoop is a really good size for quilting-in-the-hoop.
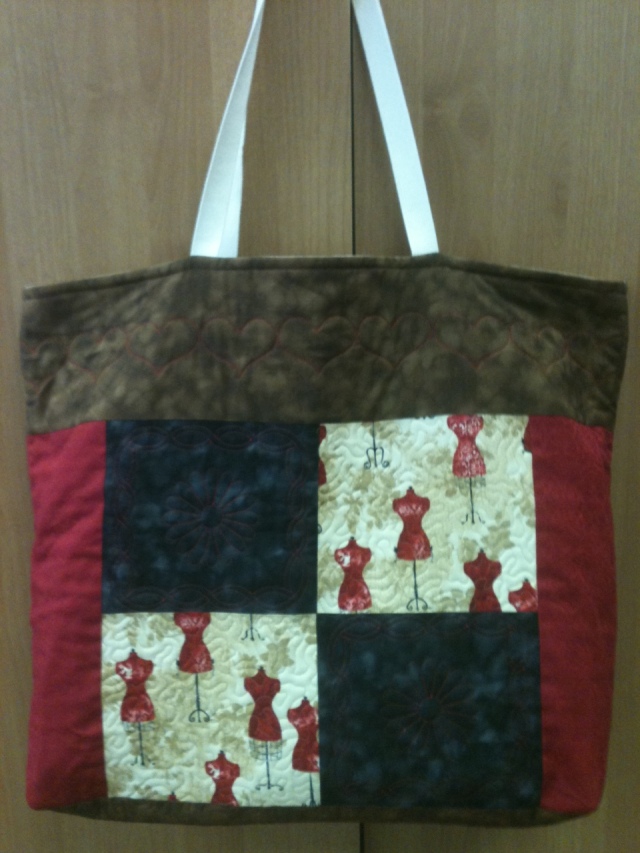
THIS ENTIRE TOTEBAG WAS QUILTED USING THE ACUFIL QUILTING SYSTEM ON OUR JANOME EMBROIDERY MACHINES. THE ACUFIL HOOPS MAKE VERY LIGHT WORK OF ALL YOUR QUILTING PROJECTS!
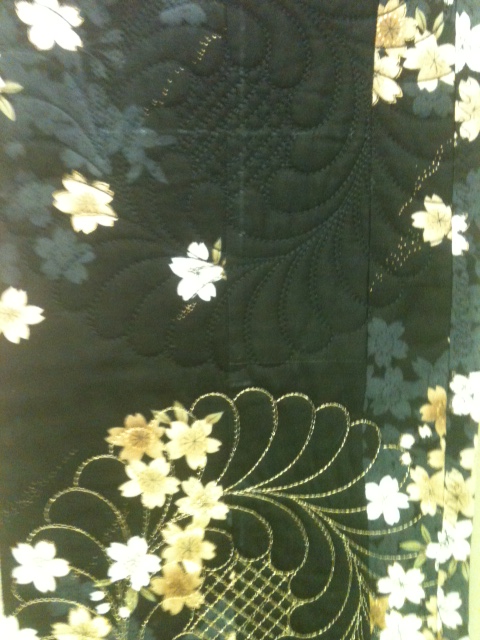
Notice the ACUFIL QUILTING IN THE BORDER OF THIS QUILT – EMBROIDERED IN BLACK AND GOLD METALLIC THREAD ALTERNATING
I am 100% convinced that our JANOME ACUFIL QUILTING is the way to go ……. allowing the embroidery unit and hoop to do the quilting work for you. No neck & shoulder strain as you “fight” with a big quilt to get it quilted. When you let the EMBROIDERY MACHINE do the quilting job for you, it is SO much easier and the quilting looks just perfect …… the JANOME MC15000 does a really great job of Acufil stippling and many other quilting design options. In addition to the Acufil quilting tool with its 100 quilting designs to choose from, there are also over 70 quilting designs among the 480 embroidery designs on the built-in embroidery design menu. Choose from many options including exclusive digitized designs from Quilting expert Leah Day of the 365 day Quilting Project with her simply stunning free motion designs. Janome has digitized these for you to use in your ASQ22 hoop. Now I cannot think of much more quilting fun than that!!
BTW: Leah Day is so excited about the fact that we have included some of her designs on our JANOME MC15000 + she wanted to learn how to do machine embroidery…….so she bought a JANOME MC 15000!! See her blog post about this.
I know I have done previous blog posts on this topic so you are encouraged to do a search for ACUFIL QUILTING in the search box on the home page to see this information.
This quilt (already featured on this blog during October 2013) was ACUFIL QUILTED in the white background part/main body of the quilt:
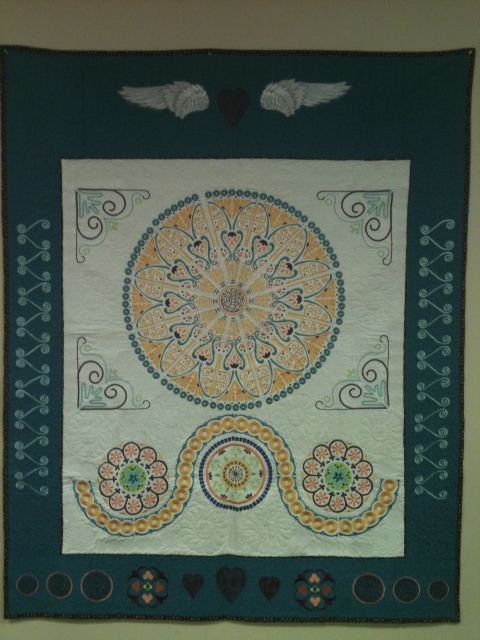
The white part of the quilt was exclusively quilted using the ASQ 22 HOOP and the ACUFIL QUILTING SYSTEM ON THE JANOME MC15000
I chose 2 of the circular style quilting designs included with the Acufil designs (in the ACUFIL TOOL on HORIZON LINK SUITE). I did this deliberately as there was a lot of circular stuff going on with the embroidery designs we had used from the wonderful collection of built-in designs on the Janome Mc15000.
- I resized these 2 designs multiple times in JANOME DIGITIZER MBX software as I wanted to redigitize each design several times so that the stitch count was increased or decreased accordingly so that I ended up with 7 different size designs.
- I then saved each design with a name of Q1 through Q7 so that I would be able to identify which design to use on all the various sections of the white background.
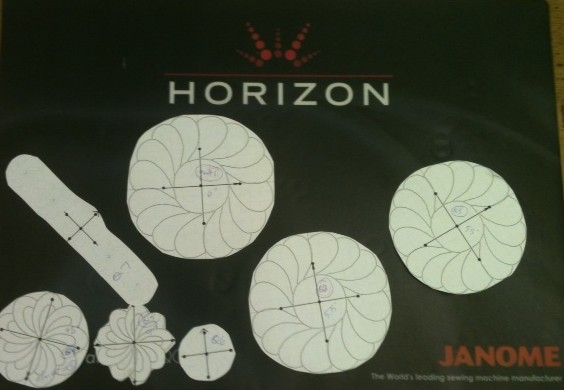
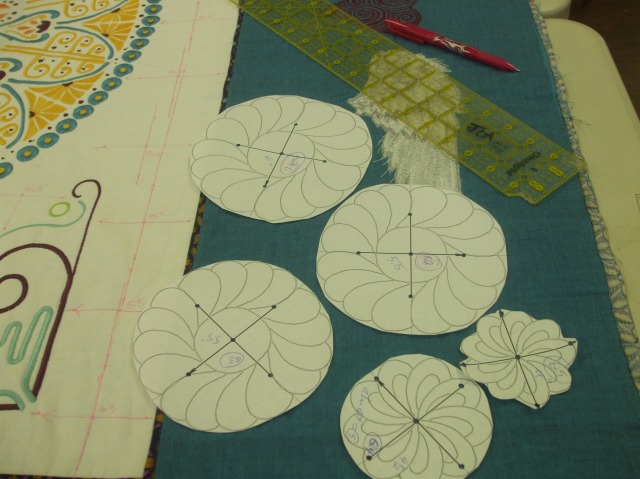
The 7 templates printed & holes punched in the cross hairs for marking onto the fabric – I first resized the acufil designs in JANOME DIGITIZER MBX to have a range of sizes of the 2 chosen designs.
- Next I printed a paper template of each design using the HORIZON LINK SUITE template printing option. Each template has a cross hair with arrow pointing to the top of the hoop: I punched 5 holes with my eyelet punch in each template on this cross hair & then trimmed away all excess paper around each template. This gave me clear sight when positioning the templates on the quilt and auditioning which design size was best suited to fill all my irregular spaces between & around the embroidery designs.
- Each design size chosen was marked through the template holes & then crosshairs were drawn in with a small ruler. I used an iron-away gel pen for the marking and made sure each arrow AND the design # was written in so that when I got to the hooping I would know what design to use for each hooping and what orientation to use for the hooping.
- This did not take as long as you might at first think. I was on a roll & it went pretty quickly. Once all of my white background was marked & “filled” with proposed designs, I set about hooping each one up individually in the ASQ22 hoop with its 6 big magnets.
- I did not even have to stand up from the machine between hoopings! Just popped off the magnetic clamps, moved the quilt to the next cross hair marking & then lowered the hard template under the needle & onto the hoop until the middle of the template was lined up with my marked gel pen crosshair. Then reclamped the 6 magnets, removed the hard plastic template & embroidered the next quilting design……….. all from my comfortable seated position!
- Each hooping took a matter of a couple of minutes to stitch as they are just little quilting designs – no dense stitch fill here. I am not lying to you when I tell you that the ENTIRE white background was quilted in less than one day at work between other tasks I was busy with. And this includes printing the templates & marking the fabric!
- Last of all, I laid the quilt out on a big table & checked I had not missed any spots. No, everything that I had marked was quilted. Then I simply used the iron to melt away all my little cross hair markings.
- Voila – one quilt done except for free motion in the blue border & adding the binding. And those shoulders of mine were not complaining loudly either…..this IS the way to go to quilt bigger quilts as far as I am concerned.
One last word about marking the fabric: There were LOTS of markings made on this quilt: both for the embroidery and quilting. I chose to use a Frixion gel pen which ironed away well. However, the marks returned after a recent aeroplane trip – the cold temperature in the baggage hold of the plane brought some of the marks back up! I am reliably told that once I wash the quilt these marks will go away permanently. I really do like these gel pens (Frixion is the brand name) as you do not need to wet the quilt to remove the blue wash-away pen markings – which used to be my favourite type of marking pen. However, it would be a good idea to test the pen on your fabrics first as the pink colour I used ironed away well on the white fabric but left a white line on the blue border fabric. Again, I am told these marks will wash out but I have not verified that as a fact yet.





Hi Liz I have the 12000, mbx 4.5 ,Horizon suit and the acufill I want to do crazy quilting is there a tutorial anywhere for this on any of these programmes
LikeLike
Hi Margaret,
We dont offer specific tutorials on this blog comment forum. Your best avenue would be to search on You tube or google the topic you want. You will more than likely get a lot of information that way. You could also look on http://www.janome.com and http://www.sew4home.com although I have not looked myself to see if they have crazy quilting in the hoop tutorials. Try Cindy Losekamp as she has great designs for piecing and crazy quilt stitching in the hoop.
Liz
JANOME CANADA
LikeLike
Hi Liz, Do you have a video to show how to put your quilt into the hoop for doing a quilt design?
LikeLike
Hi Dianne,
No I don’t, sorry. But have you checked all the information found on the websites especially dedicated to the Mc12000 & Mc15000? http://www.janomespecials.com/mc15000/video.htm is one of them. There are also webinar video’s specifically about working with Acufil – I would search the http://www.janome.com website as well as You Tube. ALSO: not to forget that your local Janome dealer is the first place you should go for help – they are the ones who should be showing you how to use the Acufil hoop.
Liz
JANOME CANADA.
LikeLike
Hi Liz cannot seem to find acufill to download the designs for the 15000 I have downloaded iTunes on my PC but still cannot find thanks val from Victoria
LikeLike
Hi Valerie,
I think you are confused. Acufil Tool is part of the software called Horizon Link Suite that came with the MC15000. Install this on your computer and open acufil tool to find the Acufil designs.
The AcuEdit and AcuMonitor APPS are what you download from the iTunes Store – something quite different from Horizon link suite. All the designs for the MC15000 are IN AcuEdit – you do not need to download them. Just establish a wireless connection between the iPad and your machine and you will be able to open these designs.
If you wish to download designs from the internet, you would do that to your PC computer. Not to be confused with Horizon link and the IPad apps.
We would recommend you contact your dealer in Victoria to get some lessons on using the machine and the various software options open to MC15000 owners. I am not able to do this on this forum as it involves a lot of information. Your dealer is your first place to go for this assistance.
Liz
JANOME CANADA
LikeLike
Please help, I have the mC15000 and I am trying to do the acufil. Everything is fine except that the bobbin thread is too tight the back looks awful. I am using the yellow dot bobbin holder. I cannot access the adjustment screen on page 146 of the manual. The one that allows you to adjust tension. Thank you, Joyce
LikeLike
Hi Joyce,
I do NOT use the yellow dot bobbin case for Acufil quilting. It is set with a higher than normal tension and therefore WILL pull the top thread to the back. Like you, I don’t like that so I use the red dot bobbin case (normal bobbin tension) and also often adjust my needle thread tension UP (increase) to keep a good balance between my top & bottom. You can also use the BLUE dot bobbin case which has a lower tension than the red dot & then you would probably not need much adjustment of top tension on needle thread. You will need to experiment to find what works best for your purposes and also bear in mind that different threads, batting and fabric can have an bearing on these adjustments.
I cannot understand why you cannot access the adjustment menu: it is right there on the screen. All you need do is touch the icon at the top of the screen – the one to the left of the hoop icon OR you can go to SET menu and make adjustments there too. I seldom, however, do that.
I LOVE, LOVE, LOVE Acufil so perservere and master the skills involved in getting your quilts the way you like. It is SO well worth it.
Liz
JANOME CANADA.
LikeLike
Hi Liz. Is there a link to a manual for the Acufil Tool program? Also, is there a link to a manual for the Acufil Quilting System? Thanks.
LikeLike
Hi Linda,
Whether you are using Acufil tool for Janome MC12000 (a kit you would have purchased as an add-on to the machine) or whether you are using the included software (Horizon Link Suite) for Janome MC15000, the manual is built into the software. Open up the software and look for the little blue question mark in the top right corner of the screen. You may browse this on your computer and/or print it for a binder. It will tell you a LOT about how to use Acufil Tool.
Liz
JANOME CANADA
LikeLike
Thanks Liz for your quick reply.
Yesterday I did a test following the instructions in the blog and was able to successfully resize an AcuFil stippling pattern without increasing stitch size. Fantastic.
I’d like to know if there is also a way to increase the size of the AcuFil quilting patterns other than stippling without increasing stitch size?
Many thanks,
Bronwyn
LikeLike
Hi Bronwyn,
So glad that worked for you. Donna & I knew many of you were going to be so pleased about this.
And YES, we referred to stippling in the blog post but I have just done it with one of the feather border parts and it worked as expected. I made it large enough to fit the GR hoop – so pretty big – and it stitched out with normal size quilting stitches – not big long ones.
So BINGO! Increase or decrease to your heart’s content following our instructions.
Liz
Janome Canada.
LikeLike
Hi Liz,
Thanks for your reply. I have repeatedly tried to increase the size of Quilting Designs 31 and 34 following the instructions in the blog and each time the stitch length has increased along with the pattern size. I am sewing on an MC12000 NOT an MC15000 and using Digitizer MBX Version 4.0
I would be grateful for any suggestions. A more detailed step by step guide might assist.
Many thanks,
Bronwyn
LikeLike
Hi Bronwyn,
After your previous email I tested a couple of the designs within Acufil Tool, increased the size considerably & then stitched them out on the Mc15000. And found that except for a few small exceptions, the stitches were small & not big, long stitches. I had not tested the designs you list here. Hence my previous reply to you.
I have just spoken with Donna who supplied the information about increasing/decreasing the size of the stippling in the blog post published on 13th Dec. She told me that she was specifically referring to the STIPPLING only. She explained that the stippling used to be read by the Digitizer MBX as a manual digitized object & not as a run line. However, this has changed recently, and hence we discovered somewhat by accident that it now reads the stippling as a run line. This means that we can increase or decrease the stippling design size in MBX and get the results we want & expect.
HOWEVER, the other designs included in Acufil Tool may or may not be read by Digitizer as a run line. It will depend on how they were originally digitized and whether they have been redigitized or not. You will be able to see what it is being read as in the Resequence bar in MBX – it will show as a run line or as a manual object.
So, I needed to qualify my previous response.
The fact that you have an Mc12000 and MBX version 4 should not have a bearing on this at all.
I will send through a request to Janome in Japan that they consider re-digitizing all (or more of) the Acufil designs so that they too will work as we wish. Then we can cross our fingers & hope that our wishes are granted!
Happy Christmas.
Liz
Janome Canada.
LikeLike
I have Digitizer MBX Version 4.0 and a Janome MC12000. I can resize Acufil designs but I have not been able to adjust the stitch count and have been advised by Janome Head Office Australia that it is not possible to do so. Thus I can produce a larger design but the stitches are also correspondingly larger. Could you offer any suggestions? Many thanks, Bronwyn
LikeLike
Hi Bronwyn,
Please refer to the blog post we published on 13th Dec – very recently as it covers this very topic. At one point I do not believe we were able to do this resizing but it seems there have been some changes to the character of the stitches or how the Acufil software reads them and now we can. Full instructions of how to do this are contained in this blog post.
Liz
Janome Canada.
LikeLike