

It’s so big that my husband and my dad had to stand on chairs to hold it up!!
It’s done. I can’t believe that it’s finally finished!!! I have so enjoyed this project and sharing all these tips and tricks along the way with you. ( please refer to parts 1-4 of this series right here on Janomelife. There are links to these at the bottom of this posts).
I finished up today by putting the binding on my massively large oversize queen quilt. I found the same set up very helpful: cleared away space on the table so that my sewing table can support it. At this stage in the quilting game, you can leave your quilt stacked on top of itself during the binding process because you only need access to the very edge.
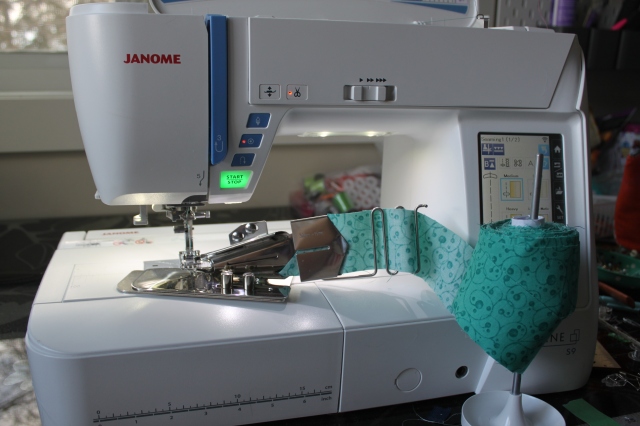
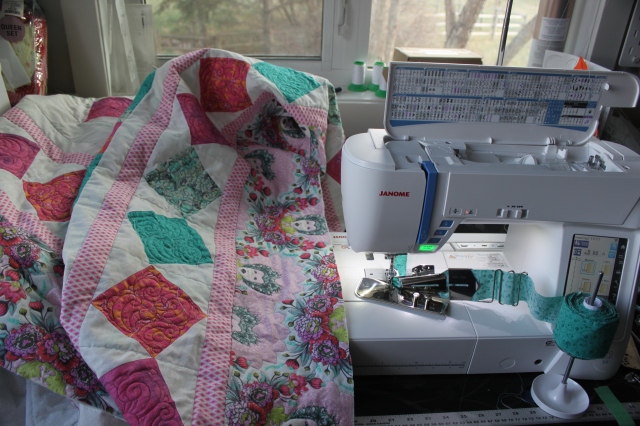 Using the Janome Quilt Binder has some amazing benefits: less fabric used (only 2″ strips instead of 2.5 “); less time spent (only sewing the edge once instead of twice, plus all the time spent pressing and folding over your binding), and the ability to have a perfect binding every time. I also used the Tape Stand to hold my rolled up binding strip. This was so helpful to avoid choking myself on a necklace of binding. (I know you’re laughing at this visual, but we’ve all done it haha).
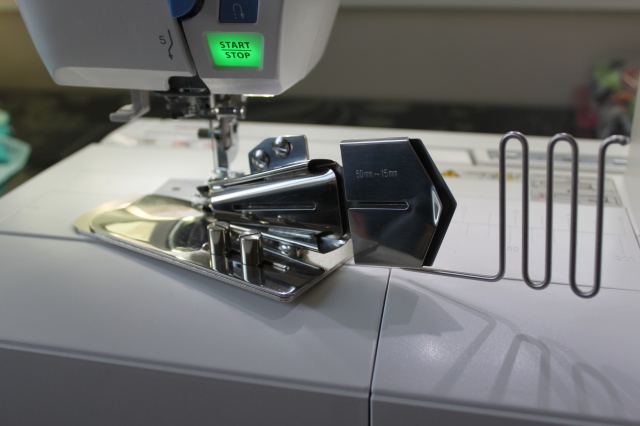
For detailed info on how to install your Quilt Binder to your machine, click here. What I love about this attachment is how adjustable it is to suit your individual preferences. It’s easily adjusted with the location of the mouth of the binder, and also the angle that it’s placed at.

A few other tips that I found were very helpful were joining my strips at a 45 degree angle, and then trimming down the excess to a 1/4″ seam. Don’t forget to take those dog ears off too! Having as consistent and smooth a width as possible makes the strips feed through the binder much easier. I also found leaving my seams unpressed helped them to feed through smoothly to one side.
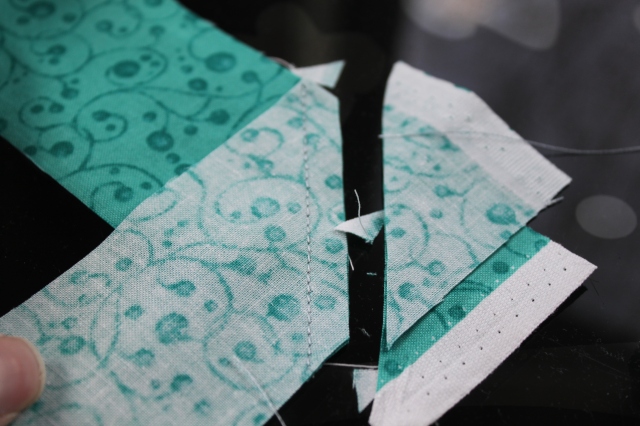
Make sure you put your fabric strip with the WRONG side facing you, so that as they pass through the mouth of the binder they are right side out.

Don’t worry about the thickness of the quilt and it possibly getting stuck. I had no problems with this at all! The foot for this attachment has a shorter toe, so it is easy to maneuver your binding underneath it. There are tons of other fabulous posts on this Janomelife blog about using the Quilt Binder, so make sure to check them out by doing a search in the search box to the right on the home page – just type Quilt binder in this search box.

I also really appreciated the indented line on the foot, showing optimal placement of your needle for stitching. This spot, about 2.5, was perfect for having enough seam allowance and also stitching close to the folded edge. If you want to use a decorative stitch for sewing your binding down, you can definitely do so. In fact, you could mirror your chosen stitch to have the base of the stitch line up with the foot indent.
It took about an hour to do the binding from start to finish: cutting the strips, joining them, setting up the machine and stitching the binding. In my opinion, it was much, much faster that the traditional method of attaching binding (plus no need to poke my finger sewing it on by hand!)
I really hope you have enjoyed this series on Quilting your Large Quilts on a Domestic Sewing Machine. I had lots of fun showing you all different techniques.

To find the previous posts: Part 1 , Part 2, Part 3 and Part 4.
Until next time,
JanomeGirl


and one other thing.. looks like the pattern is smaller than this queen size. do patterns generally or sometimes come w instruction to enlarge? or is this something one learns how to do w experience? thanks again
LikeLike
Hi Eileen,
I will refer your queries to janomegirl – one of our educators – who made this quilt and showcased the quilting of it in this series of posts. We will get back to you.
So glad you found Janomelife as we have TONS of info on all sorts of sewing, quilting, embroidery etc including your Mc15000!
Liz
JANOME CANADA
LikeLike
hello. although I’ve had my 15000 several years, this is my first time browsing janomelife. I have zero quilt making experience but this quilt and series of tutorials makes me want to try. I’ve found the quilt pattern through other comments but am wondering about this beautiful fabric. I assume has something to do w queen of hearts/Alice in wonderland? are these pieces cut individually or purchased in strips/blocks etc? thanks for the inspiration!
LikeLike
Hi Eileen,
Sorry for the delay. I have the info now: Fabric is Tula Pink and it is called 16th Century Selfie. Janomegirl says she thinks the whole line is called Elizabeth.
Hope that answers your query.
Liz
Janome Canada
LikeLike
Hi I really enjoyed this video of the binder. I have been contemplating for some time wondering if I should spend the money. I was not aware that a binding cut at 2 inches could be used. A sewing machine parts dealer told me a 3 inch strip was the only size that could be used. That would be too wide for me. I generally cut my strips 2 and 1/4 inches. Is this size possible. Thank you in advance for your response. Connie Taylor
Get Outlook for Android
________________________________
LikeLike
Hi Connie,
You cannot cut the strips at 2.25. Please cut at 2 inches or just under like 1 and 7/8 inches.
Liz
JANOME CANADA
LikeLike
When you do your binding…Are the feed dogs up or down?
LikeLike
Hi,
Feed dogs would be up as this is not a free motion technique.
Liz
JANOME CANADA
LikeLike
How do I make the perfect corner with the Quilt Binder? Any pics to show?
LikeLike
Hi Leslie,
We have done quite a few posts on janome life with step by step pics and also video’s. Just do a search in the search box and all our quilt binder set posts will come up. You can also pop over to the Janome booth at Quilt Canada and I will be more than happy to show you how we do corners. We are planning ongoing demo’s on the booth during the show but I will give you a special one on one demo!
Hope all is good with you. See you soon!
Liz
JANOME CANADA
LikeLike
Lovely! Could you show how to did the corners? That is the tricky part.
LikeLike
Hi Cindy,
Sure, we can do this in the coming months. Keep watching.
Liz
JANOME CANADA
LikeLike