Note: While I’m referring to the Janome CM17 , this information can also be used on other select Janome sewing machine models.
There’s a lot of features on the Janome CM17, Janome’s top-of-the-line sewing/quilting/embroidery machine. There’s a bit of learning to do the various applications on this machine, but I find that I get a lot of questions about the simple things and wanted to address some of these in this blog post.
Why won’t my needle threader work?
One of the first things you need to do before you can start stitching with the Janome CM17 is to thread the needle. The Janome CM17 has an automatic needle threader that is a dream to use and such a timesaver. I really don’t think I could thread the machine needle without a lot of “special” words if it didn’t have this feature, but you need to use it correctly. It’s not hard, but there are a few things you need to do to ensure that the automatic needle threader can thread your needle.
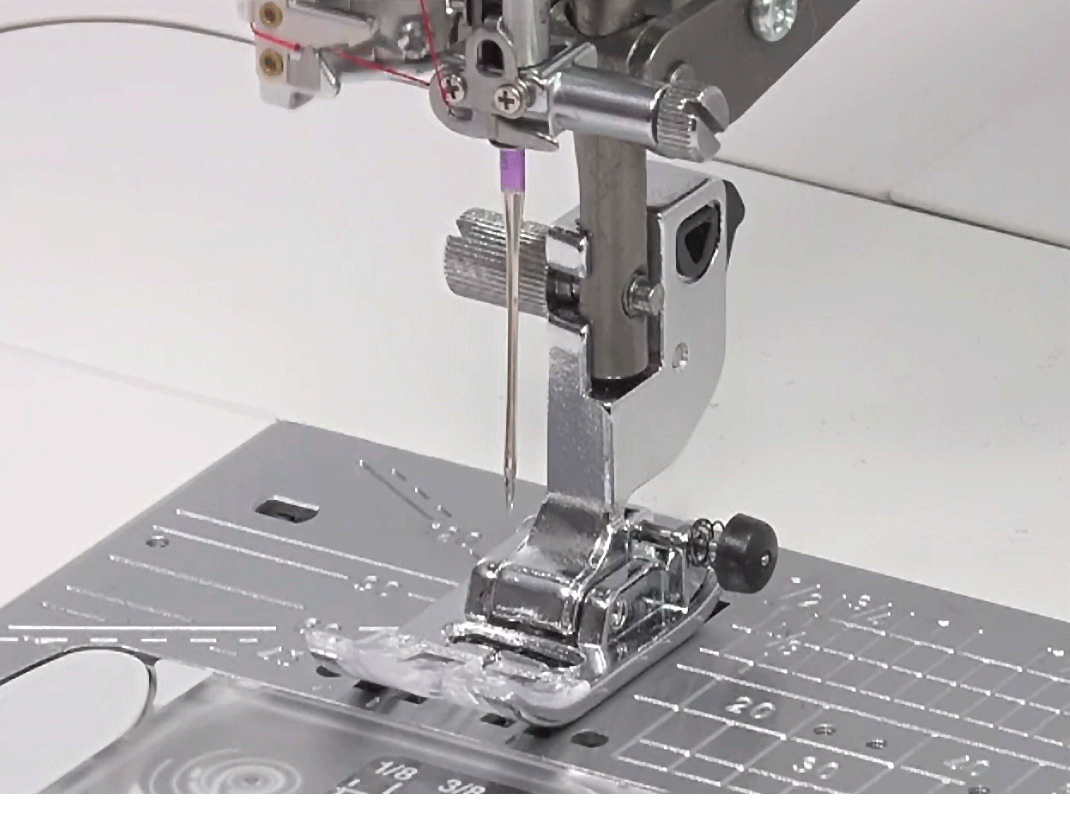
First, don’t use a needle smaller than a 75/11 with the machine’s needle threader. Most of the time you are probably using needles at least this large but keep this in mind. If you have want to thread a smaller needle, like a sz9, for example, don’t use the automatic needle threader. The little wire hook of the needle threader and the two strands of thread looped over the wire hook can not make it through the smaller eye of the needle. the
Instead, thread the needle by hand using the Janome AcuView Magnifiers which comes with the machine, but are also available separately for certain machines. See your Janome Canada dealer for details.
Next, use the needle up/down button to bring the needle to the top of its rotation. This is a step that many users forget and then wonder why the needle threader won’t thread their needle. The Janome CM17 is a smart machine, but it does need just a little bit of your help sometimes. 😉
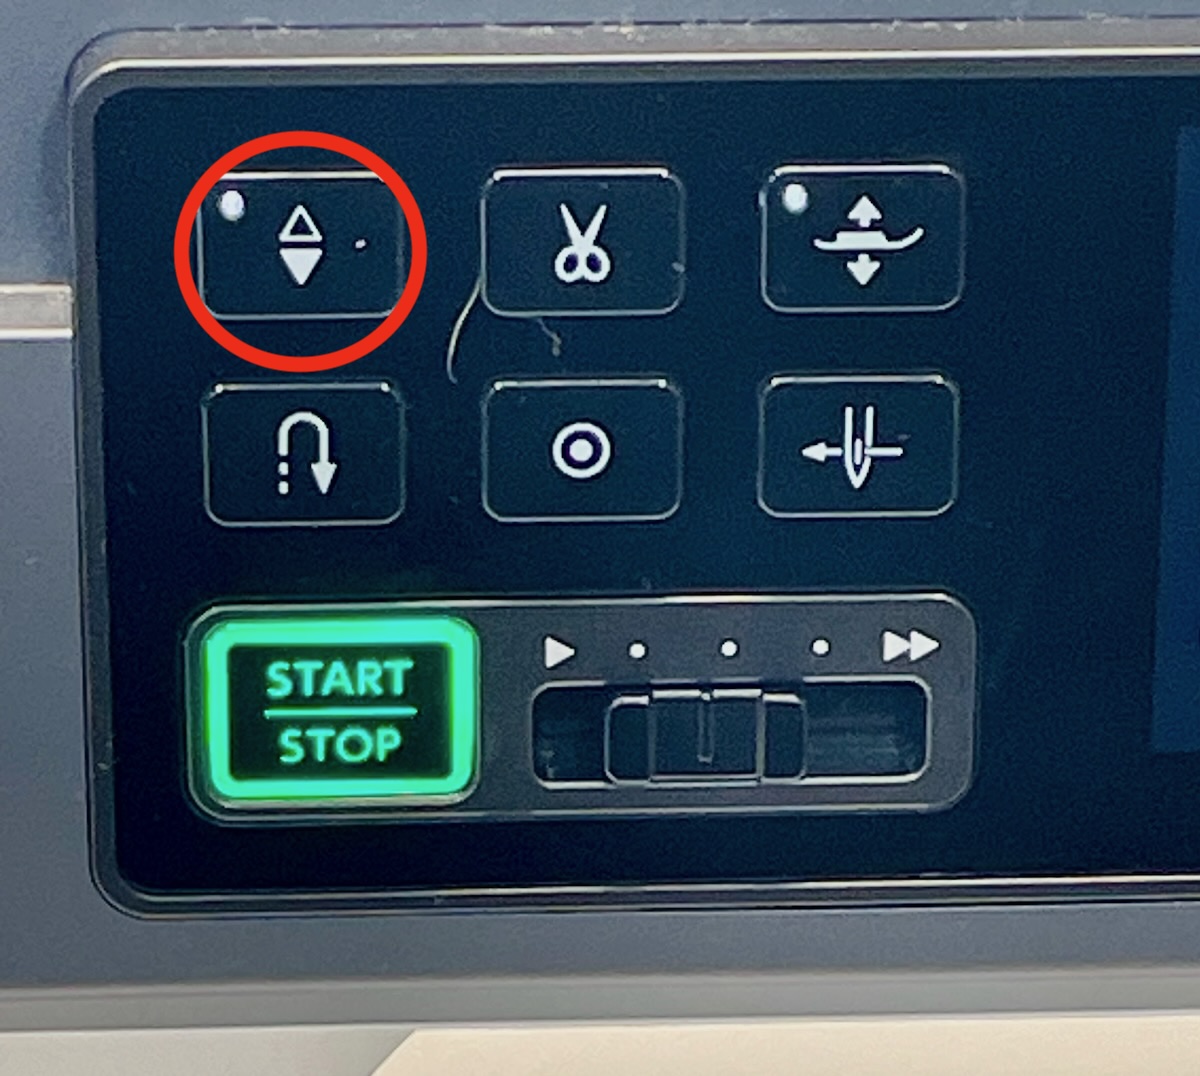
Having done this, lock your machine. Again, this is a step that many users neglect and it’s a really important one. Locking the machine prepares for threading through all of the guides and tension disks and ensures that the needle threader can operate properly.
The next step is the most important – and the most fun – press the needle threader button and watch the Janome CM17 thread your needle. The button will not illuminate and will not work if the needle is not in the highest position, or if the machine is not locked, so review the previous steps if it’s not working.
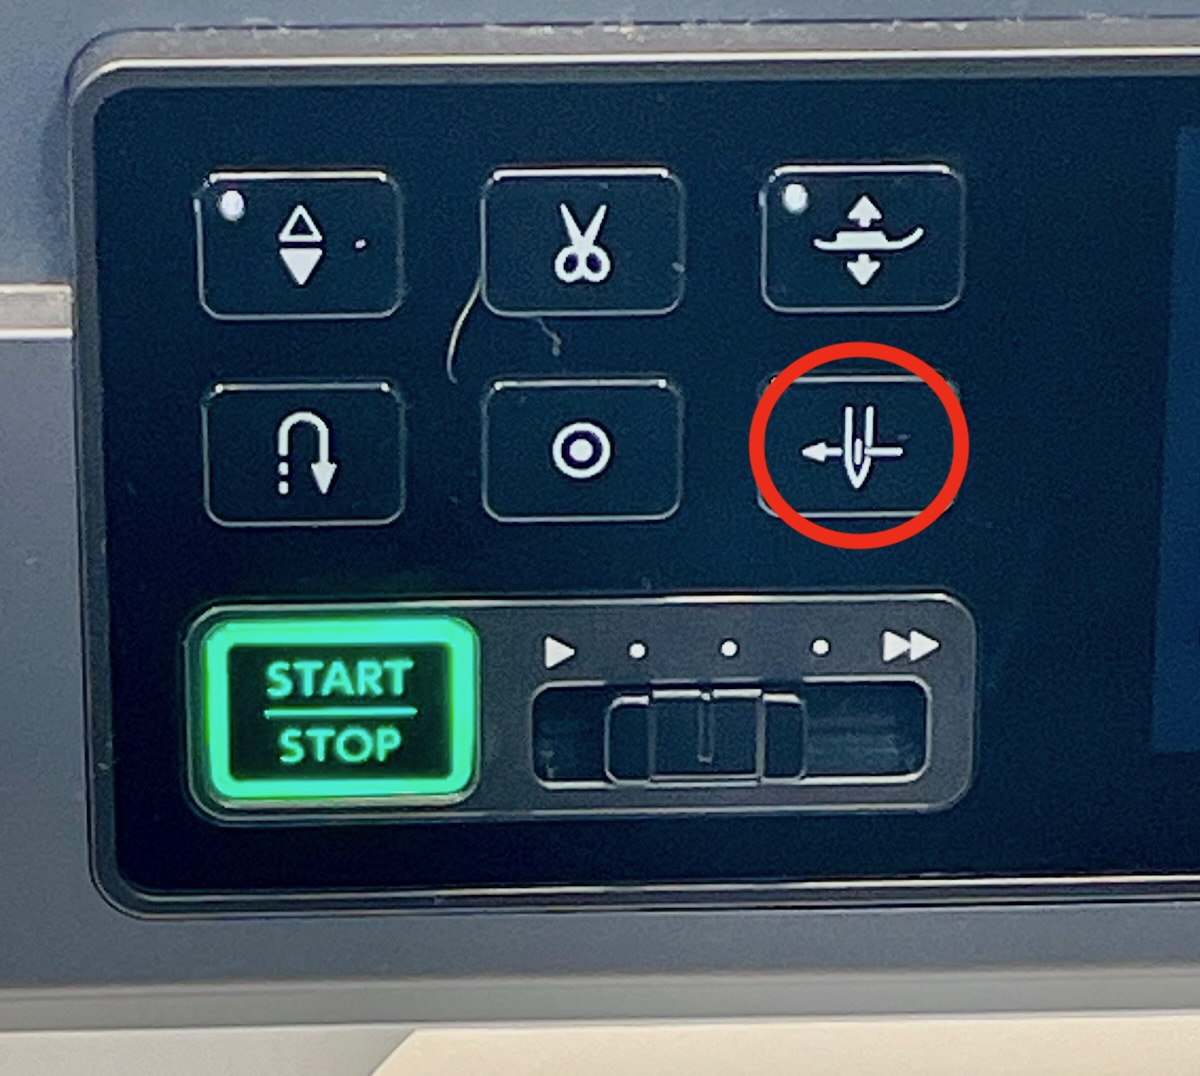
I’ve got to admit that it never gets old watching this automatic needle threader work it’s magic. Once the needle is threaded, pull out the thread from the back of the needle eye and you’re ready to start stitching…almost!
I’m having trouble winding my bobbin!🧵
You’ll need a properly wound bobbin to make a proper stitch. There are a few things to keep in mind with the bobbin on the Janome CM17 and other Janome machines, as well.
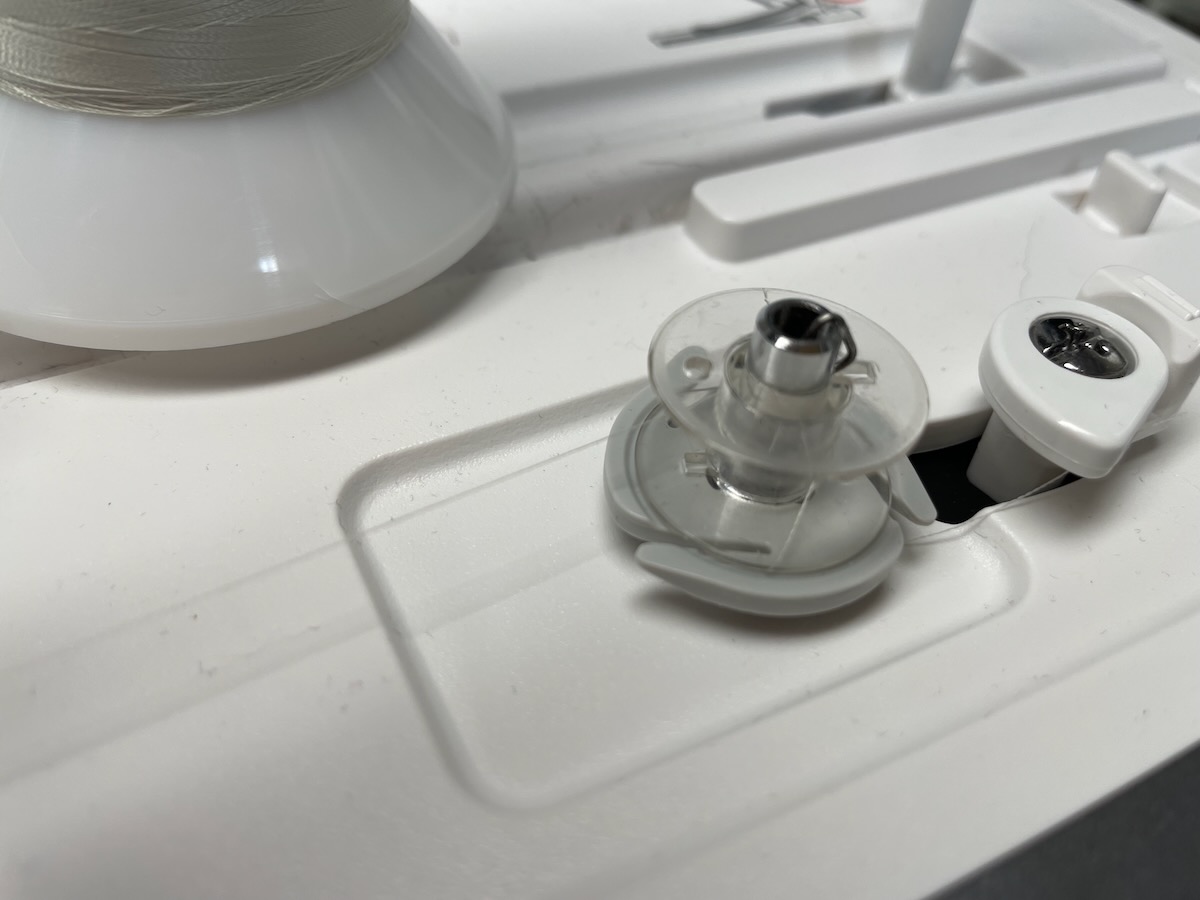
First, use only Janome “J” bobbins. Many problems are caused when using a generic bobbin which is not quite the same size, or the same composition. Save yourself frustration and use only “real” Janome bobbins, which have a “J” on the centre post. You can get these at your local Janome Canada dealer.
Next, place the spool or cone of thread on the spool pin and follow to the proper thread path to use for winding a bobbin. Consult your machine’s Instruction Manual; review on the free Janome AcuAssist App; review the onscreen diagrams built-into the machine, or, more information on this can be found HERE!
Place the empty bobbin on the bobbin winder spindle and wind the thread clockwise around it about 5 times. Use the cutters on the bobbin plate below the bobbin winder spindle to cut off the excess thread.
Press the bobbin winder stopper towards the bobbin and press the bobbin winding button. The bobbin winder will stop automatically once the bobbin is full.
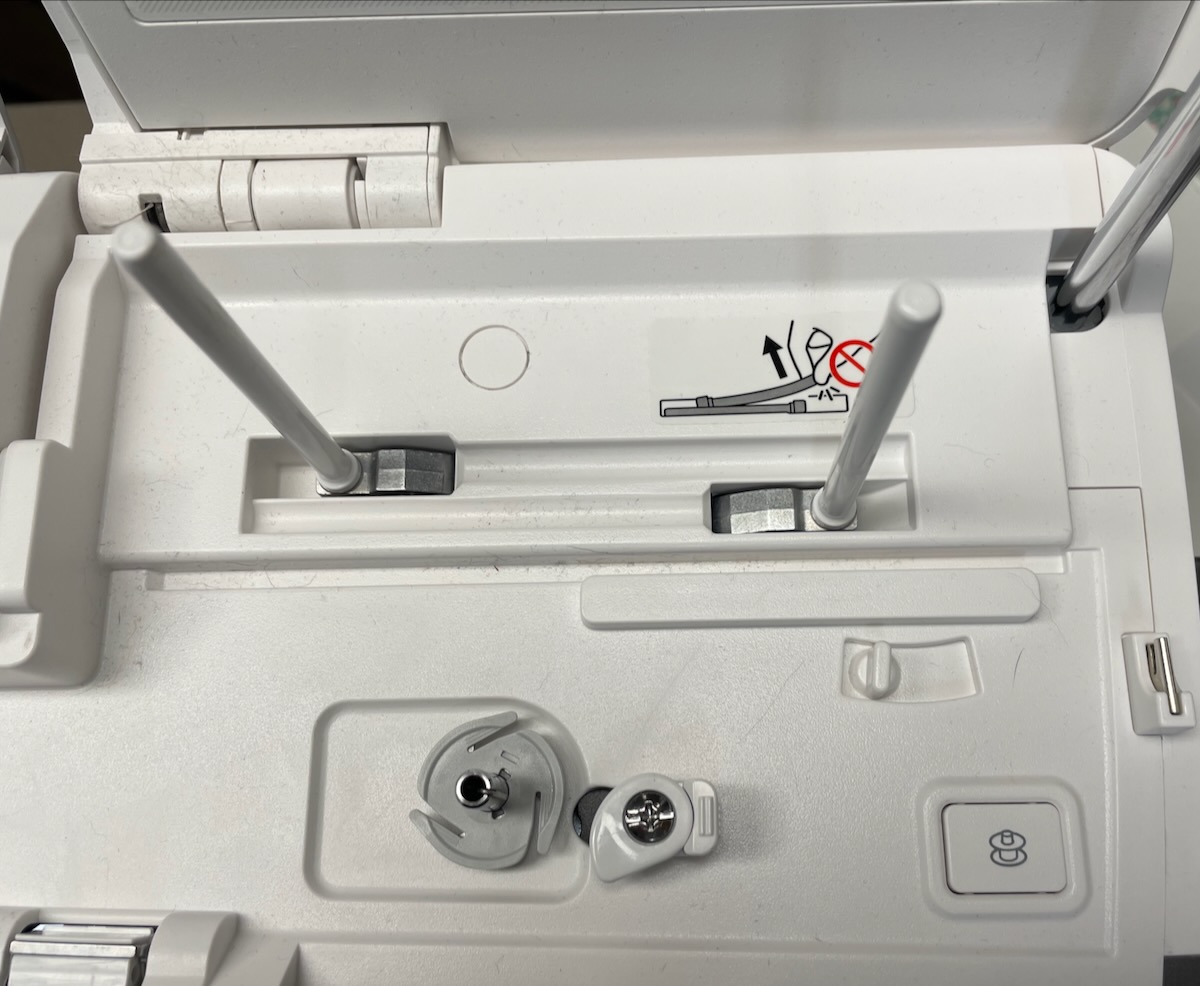
If you get thread winding underneath the bobbin plate, the thread has likely come out of the thread guides. Stop and cut the thread. The bobbin plate (the grey piece underneath the bobbin pin) can be carefully pulled up and off the bobbin winder spindle. Remove the excess thread and replace the grey piece.
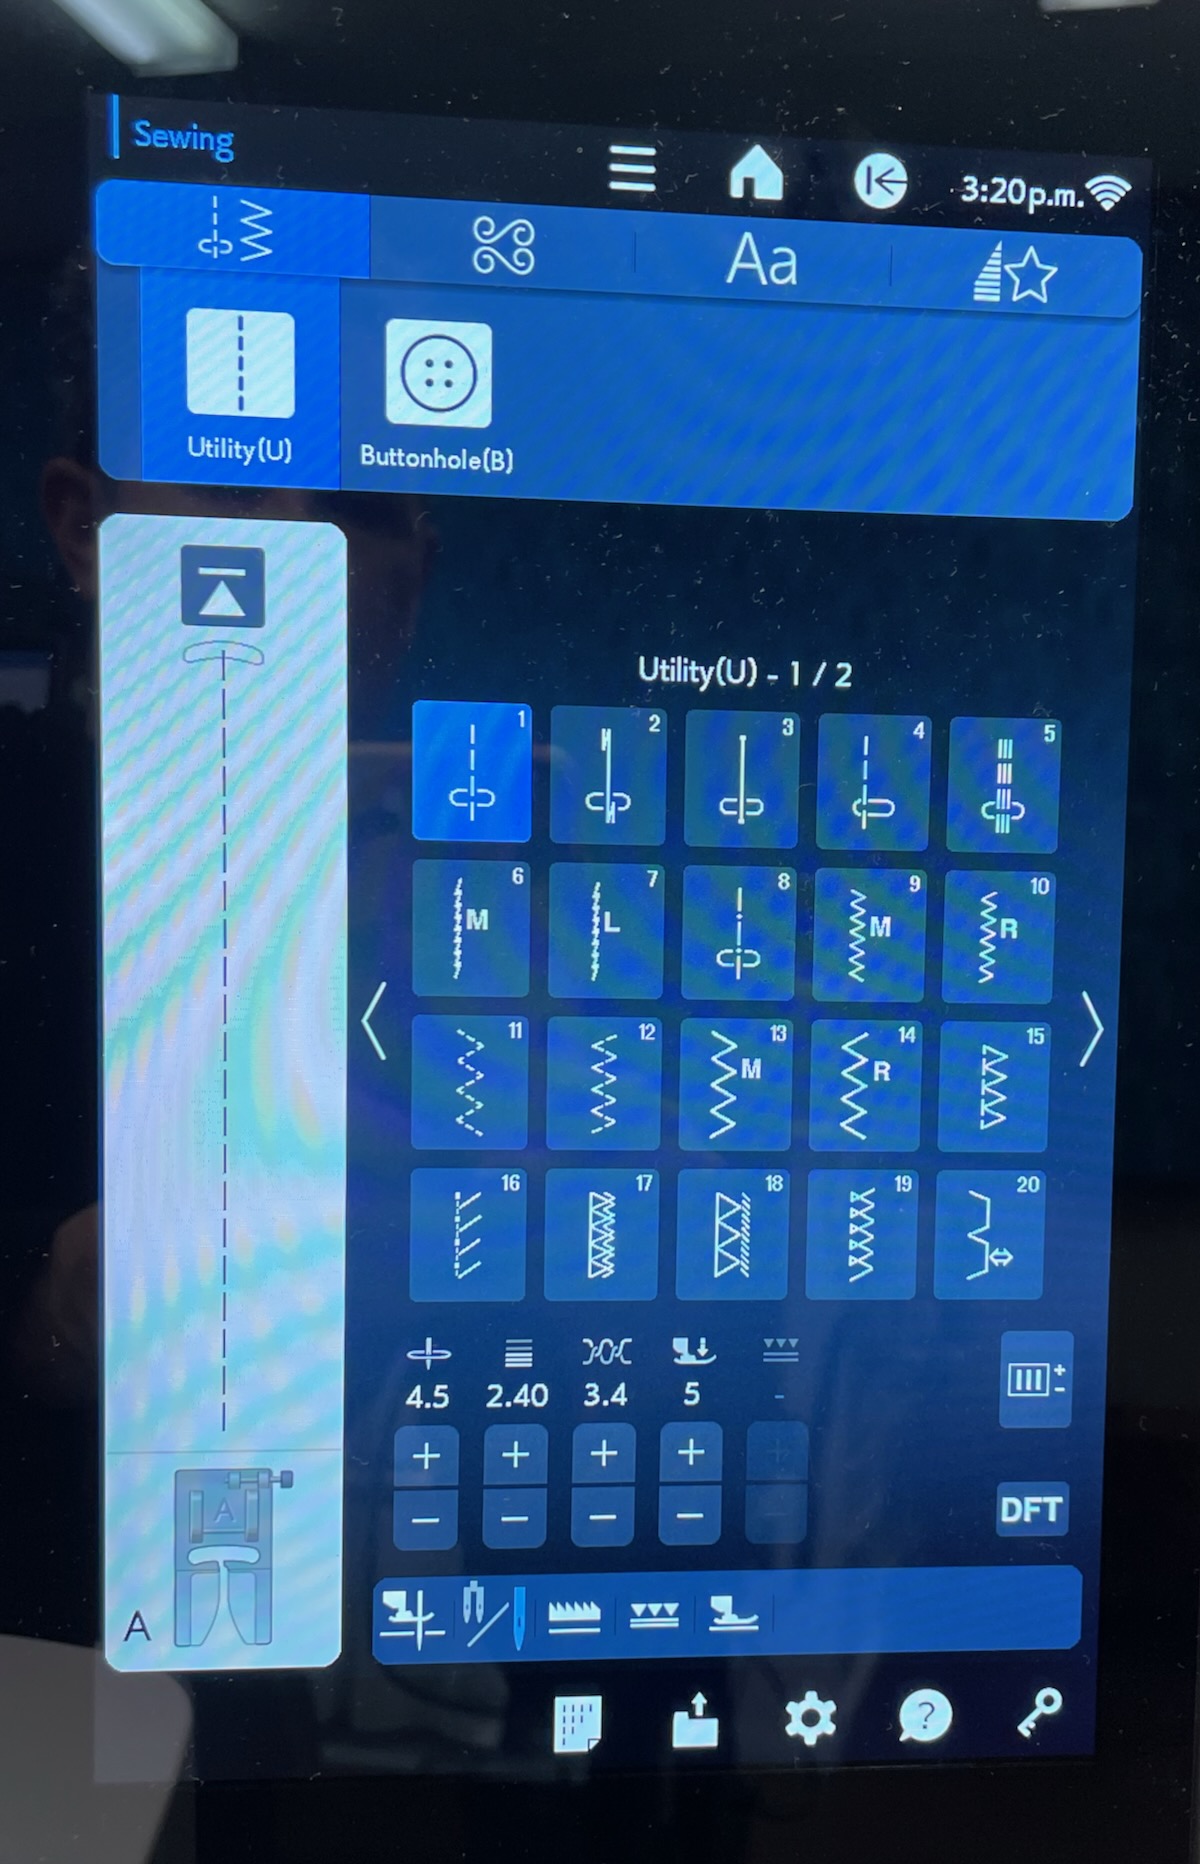
Why can’t I see the stitch I want to use?
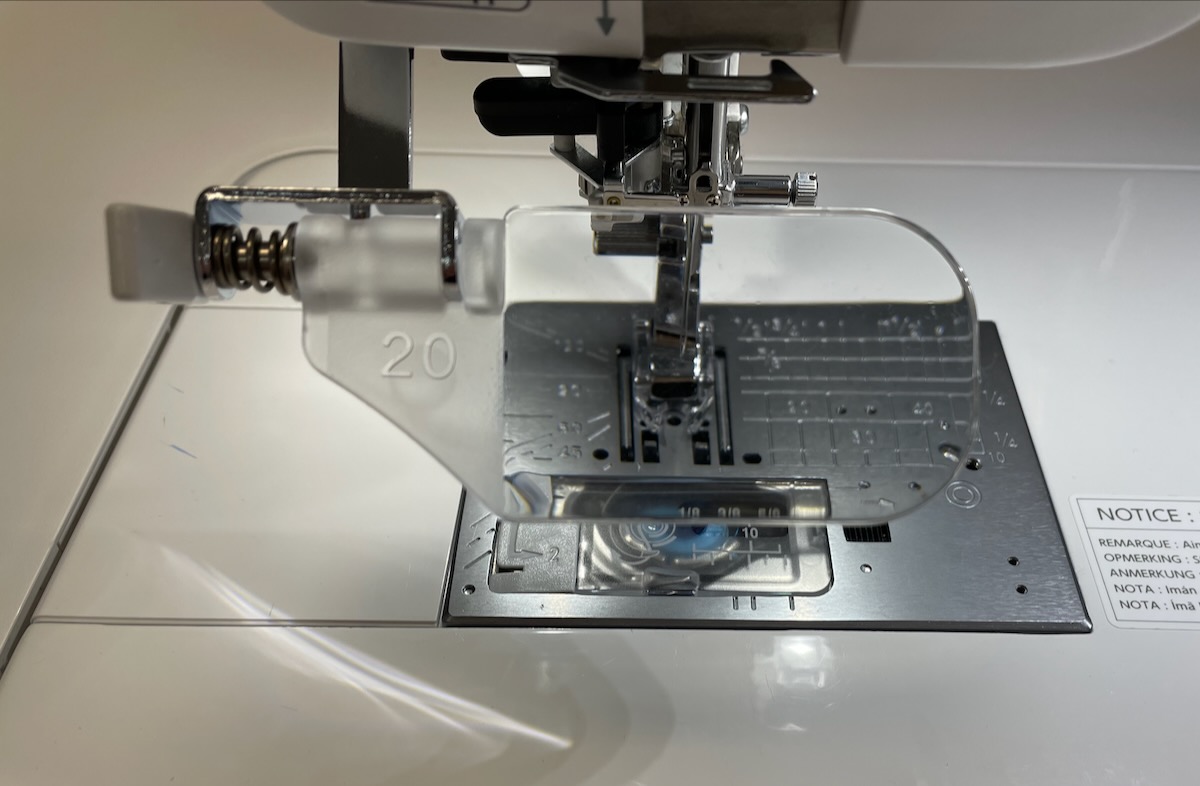
Now that the Janome CM17 is all set up for stitching, you need to think about the type of sewing you’ll be doing. On this and other Janome models, there are 3 needle plates and the needle plate rules which stitches you can use. If you have the “wrong” needle plate installed, your stitch choices will be limited. For example, with the straight stitch needle plate installed, you won’t be able to sew decorative stitches.

Many users encounter this situation and panic. If you aren’t seeing the stitches you want to use on the Janome CM17, check and replace your needle plate with the appropriate one. If you are still encountering problems, turn the Janome CM17 off and on and this should resolve any machine confusion.
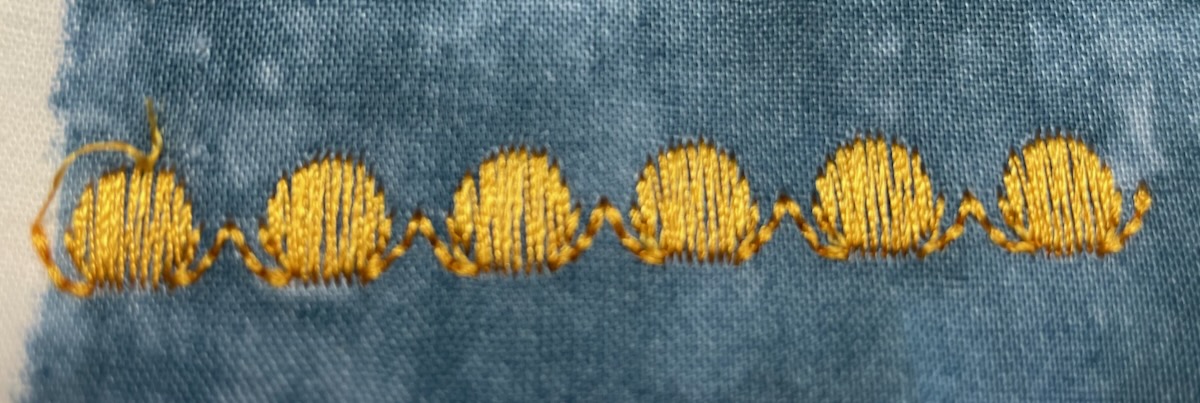
My decorative stitches are bunching up! ☹️
This is an issue that I hear about very frequently. No matter what Janome machine you are using, you need to use a stabilizer behind your fabric when working with decorative stitches. Fabric alone is not usually enough to produce perfect decorative stitches. The more dense the decorative stitch, the more or heavier stabilizer you will need to use.
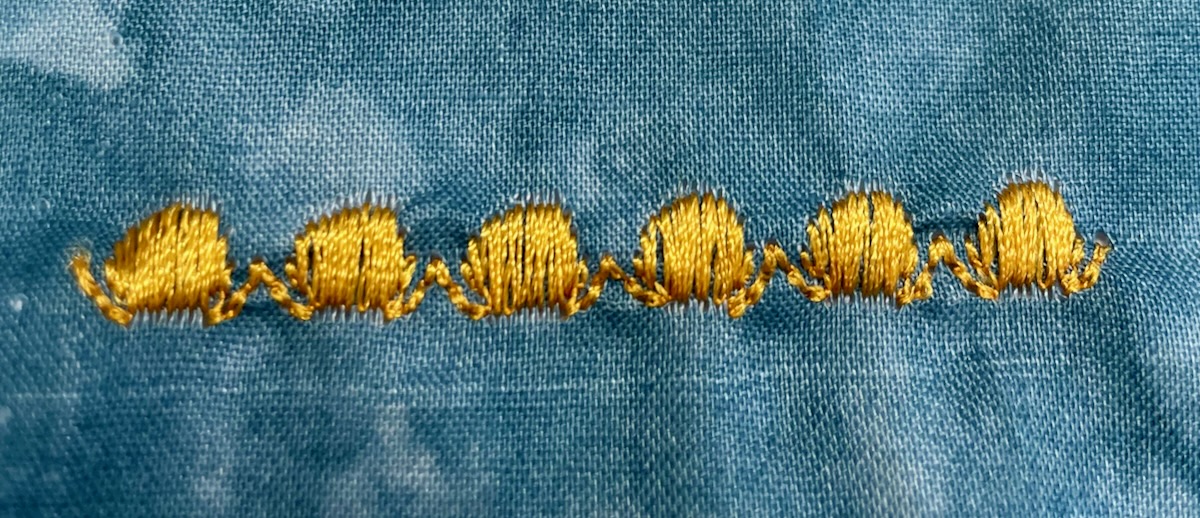
I always suggest that you do a test first before committing to your project when using decorative stitches. If your stitches are bunching up with 2 layers of stabilizer, you may need 3 or even 4 layers – this is why you need to do a test piece first. I like to use tear away stabilizer for most of my projects but if you’re a garment sewer, you may prefer to use another type of stabilizer that can be left in the garment, like an iron-on cutaway.
My free motion quilting stitches are not the same length! 📏
There is a perfect solution to this on the Janome CM17, Janome Continental M8 and the Janome MC 9480QC Professional – the Janome the A.S.R. (Automatic Stitch Regulator)!
The Janome A.S.R. (Accurate Stitch Regulator) ensures that your quilting stitches are the same length. This accessory comes standard on the Janome CM17 and Continental M8, but may be an additional purchase on some Janome models, like the Janome MC9480QC Professional. It does take a bit of practice to learn how to use the Janome A.S.R. (Accurate Stitch Regulator) but, if consistently even quilting stitches are a goal for you, it will definitely help you achieve it! For more information on using the Janome A.S.R. (Accurate Stitch Regulator) click HERE!.
I hope this helps you with some issues you may be having with your Janome CM17. It’s a powerful machine that is so helpful in your sewing, quilting and embroidery, but you do need to spend some time learning how to use it.
Knowledge is power and once you have the knowledge, you’ll be able to use the power of the Janome CM17 to create amazing projects in your studio. 😀
Kim Jamieson-Hirst of Chatterbox Quilts, a Janome Canada Artisan in Calgary, Alberta.