
Today, we’ll be continuing our look at Janome’s amazing computer software, Stitch Composer, which is part of the Horizon Link Suite software included with the Janome MC15000 Quiltmaker and its pervious versions. For a review of my previous posts on this spotlight on Horizon Link Suite, click on the link HERE. Use the Search Box at the right of the Janome Life main page to find even more posts about Horizon Link Suite, and all things Janome.

Since, as always, I have SEW much information to share, this post is Part 1 of 2 on Stitch Composer, so be sure to click the FOLLOW tab on the main page of Janome so you get an e-mail notification when new blog posts are published.
So, what exactly IS Stitch Composer? Stitch Composer allows you to design and create, or “compose” your OWN stitches. Is that not the coolest thing?! Janome is always about choices and empowering you with the tools to be your own designer of your own creativity. Many Janome machines come with the Stitch Composer software on a separate CD, so they too, share in this Top-of-the-Line added feature. The Janome Skyline S7, Skyline S9, MC 9400QCP, MC 9450QCP, and fabulous new Janome Continental M7P ALL come with the Stitch Composer CD included.
Whenever people tell me they’re not creative, can’t draw, etc. my suggestion to them is to always start with their name. It’s less intimidating, and we’ve all had plenty of practice printing and writing it, so, why not continue by stitching it?! You can also bring in a photo, artwork, etc. as a “Backdrop Image“, which you can trace, so you don’t always have to start creating from scratch.

After I imported my newly created stitches into the machine, I used the machine’s editing capabilities to experiment making it more narrow and closer together- just like with any other stitch in my machine. Amazing!
There are some terrific Stitch Composer lessons on the Janome website, but I’ve included the link to the Getting Started exercise HERE and another lesson HERE As well, there’s a great video on Janome America’s You Tube Channel. Even though you may not have the machine being shown, the process is the same regardless of which sewing machine you may have which has Stitch Composer.
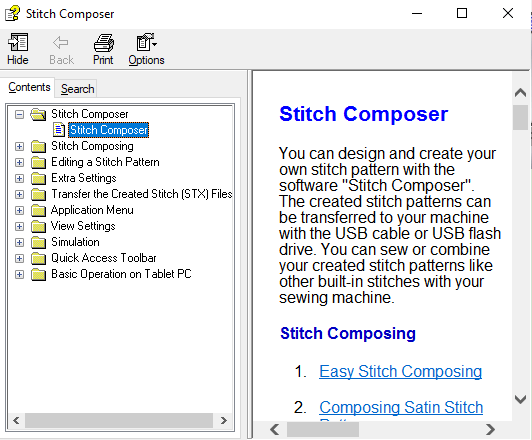
When you open the Stitch Composer software, or pretty much any of our Janome software, the first place I recommend people look is to the upper right hand corner to find the little blue question mark. That question mark is literally the answer to your questions as it’s a built-in, printable instruction manual.


While looking at the photo below, put your ear to your left shoulder while you continue reading. I’m serious! It’ll help get your head around this. What you’re looking at in essence is the needle plate of your sewing machine; specifically, the opening for the needle to swing left and right of centre. Centre needle position is “0” on the graph. Above that, or, it’s actually to the right, is 4.5mm, and below “0”, or, to the left, is another 4.5mm, for a total of 9mm, which is the width of the needle plate opening on the Janome MC 15000 Quiltmaker, Continental M7, etc.

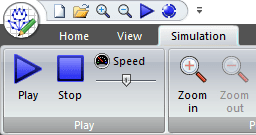
You need to keep this in mind as you create your stitch design; it can only be as wide as the opening in the needle plate of your sewing machine. Although 9mm is pretty impressive, it’s relative, so you want to avoid anything being too detailed, too fussy. As well, we’re using Millimeters – there’s no way to change to Imperial (believe me, I’ve tried! lol!) so you don’t want to make your stitches too small by clicking too close to one another. This is especially true around curves. Imagine trying to rip out stitches which are less than 1mm apart! Everywhere you want a stitch, click the mouse of your computer, and the software assigns a number to that stitch. There’s even a Simulation built-in to the software, so you can see your new design stitch out before taking it to the sewing machine! How cool is that?!

In Part 2 of this Spotlight on Stitch Composer, I’ll show you how to transfer your newly created stitches from your computer to your sewing machine…….Coming up tomorrow so not long to wait!
Stay Tuned! Happy Creating!


Great tutorial, but I do not see that I currently have this program. I do have the Janome 15000. How can I access it?
LikeLike
Hi Pamela,
You will have received 2 CD’s in your MC15000 box – they are packed with the instruction books. One is called Horiozn Link Suite and needs to be installed on your PC. Once installed, you should easily see Stitch Composer on the menu.
Liz
JANOME CANADA
LikeLike
Thank you, we moved in the last year, so I will try to find it.
LikeLike
This is very information article for increasing embroidery skill and we can surely increase our knowledge by following your articles.
LikeLike