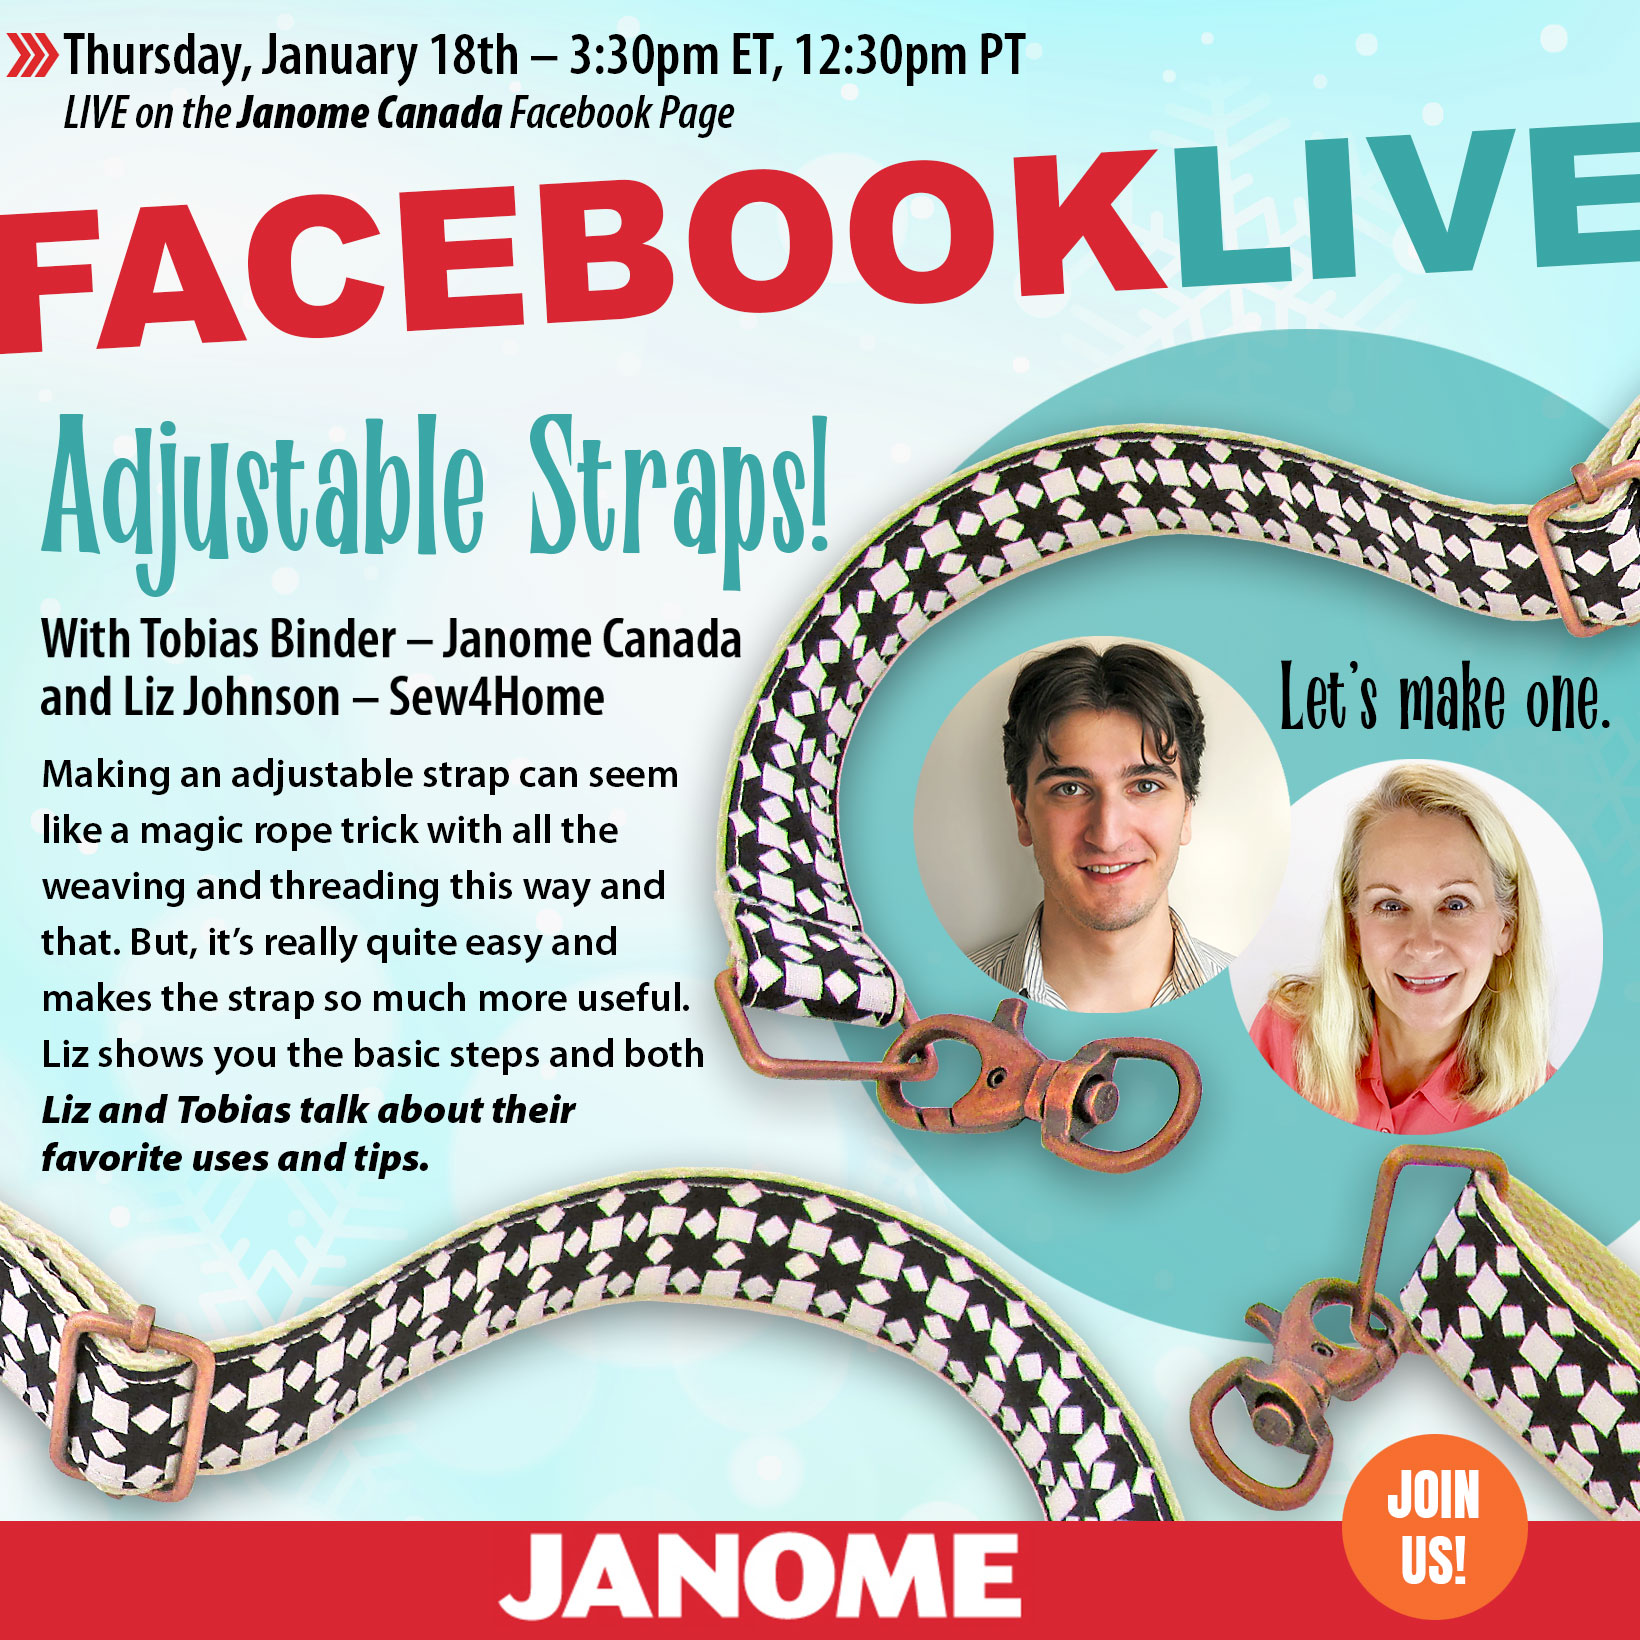
Join us LIVE at 3:30pm EST on Janome Canada’s Facebook page. Liz from #sew4home and Tobias from #janomecanada will be discussing their favourite tips and tricks on making adjustable straps!
To view the full instructions on making adjustable straps, check out this previous blog post.
If you miss the live, we’ve got you covered! The full video will be stored on our Youtube channel, under the LIVE tab.
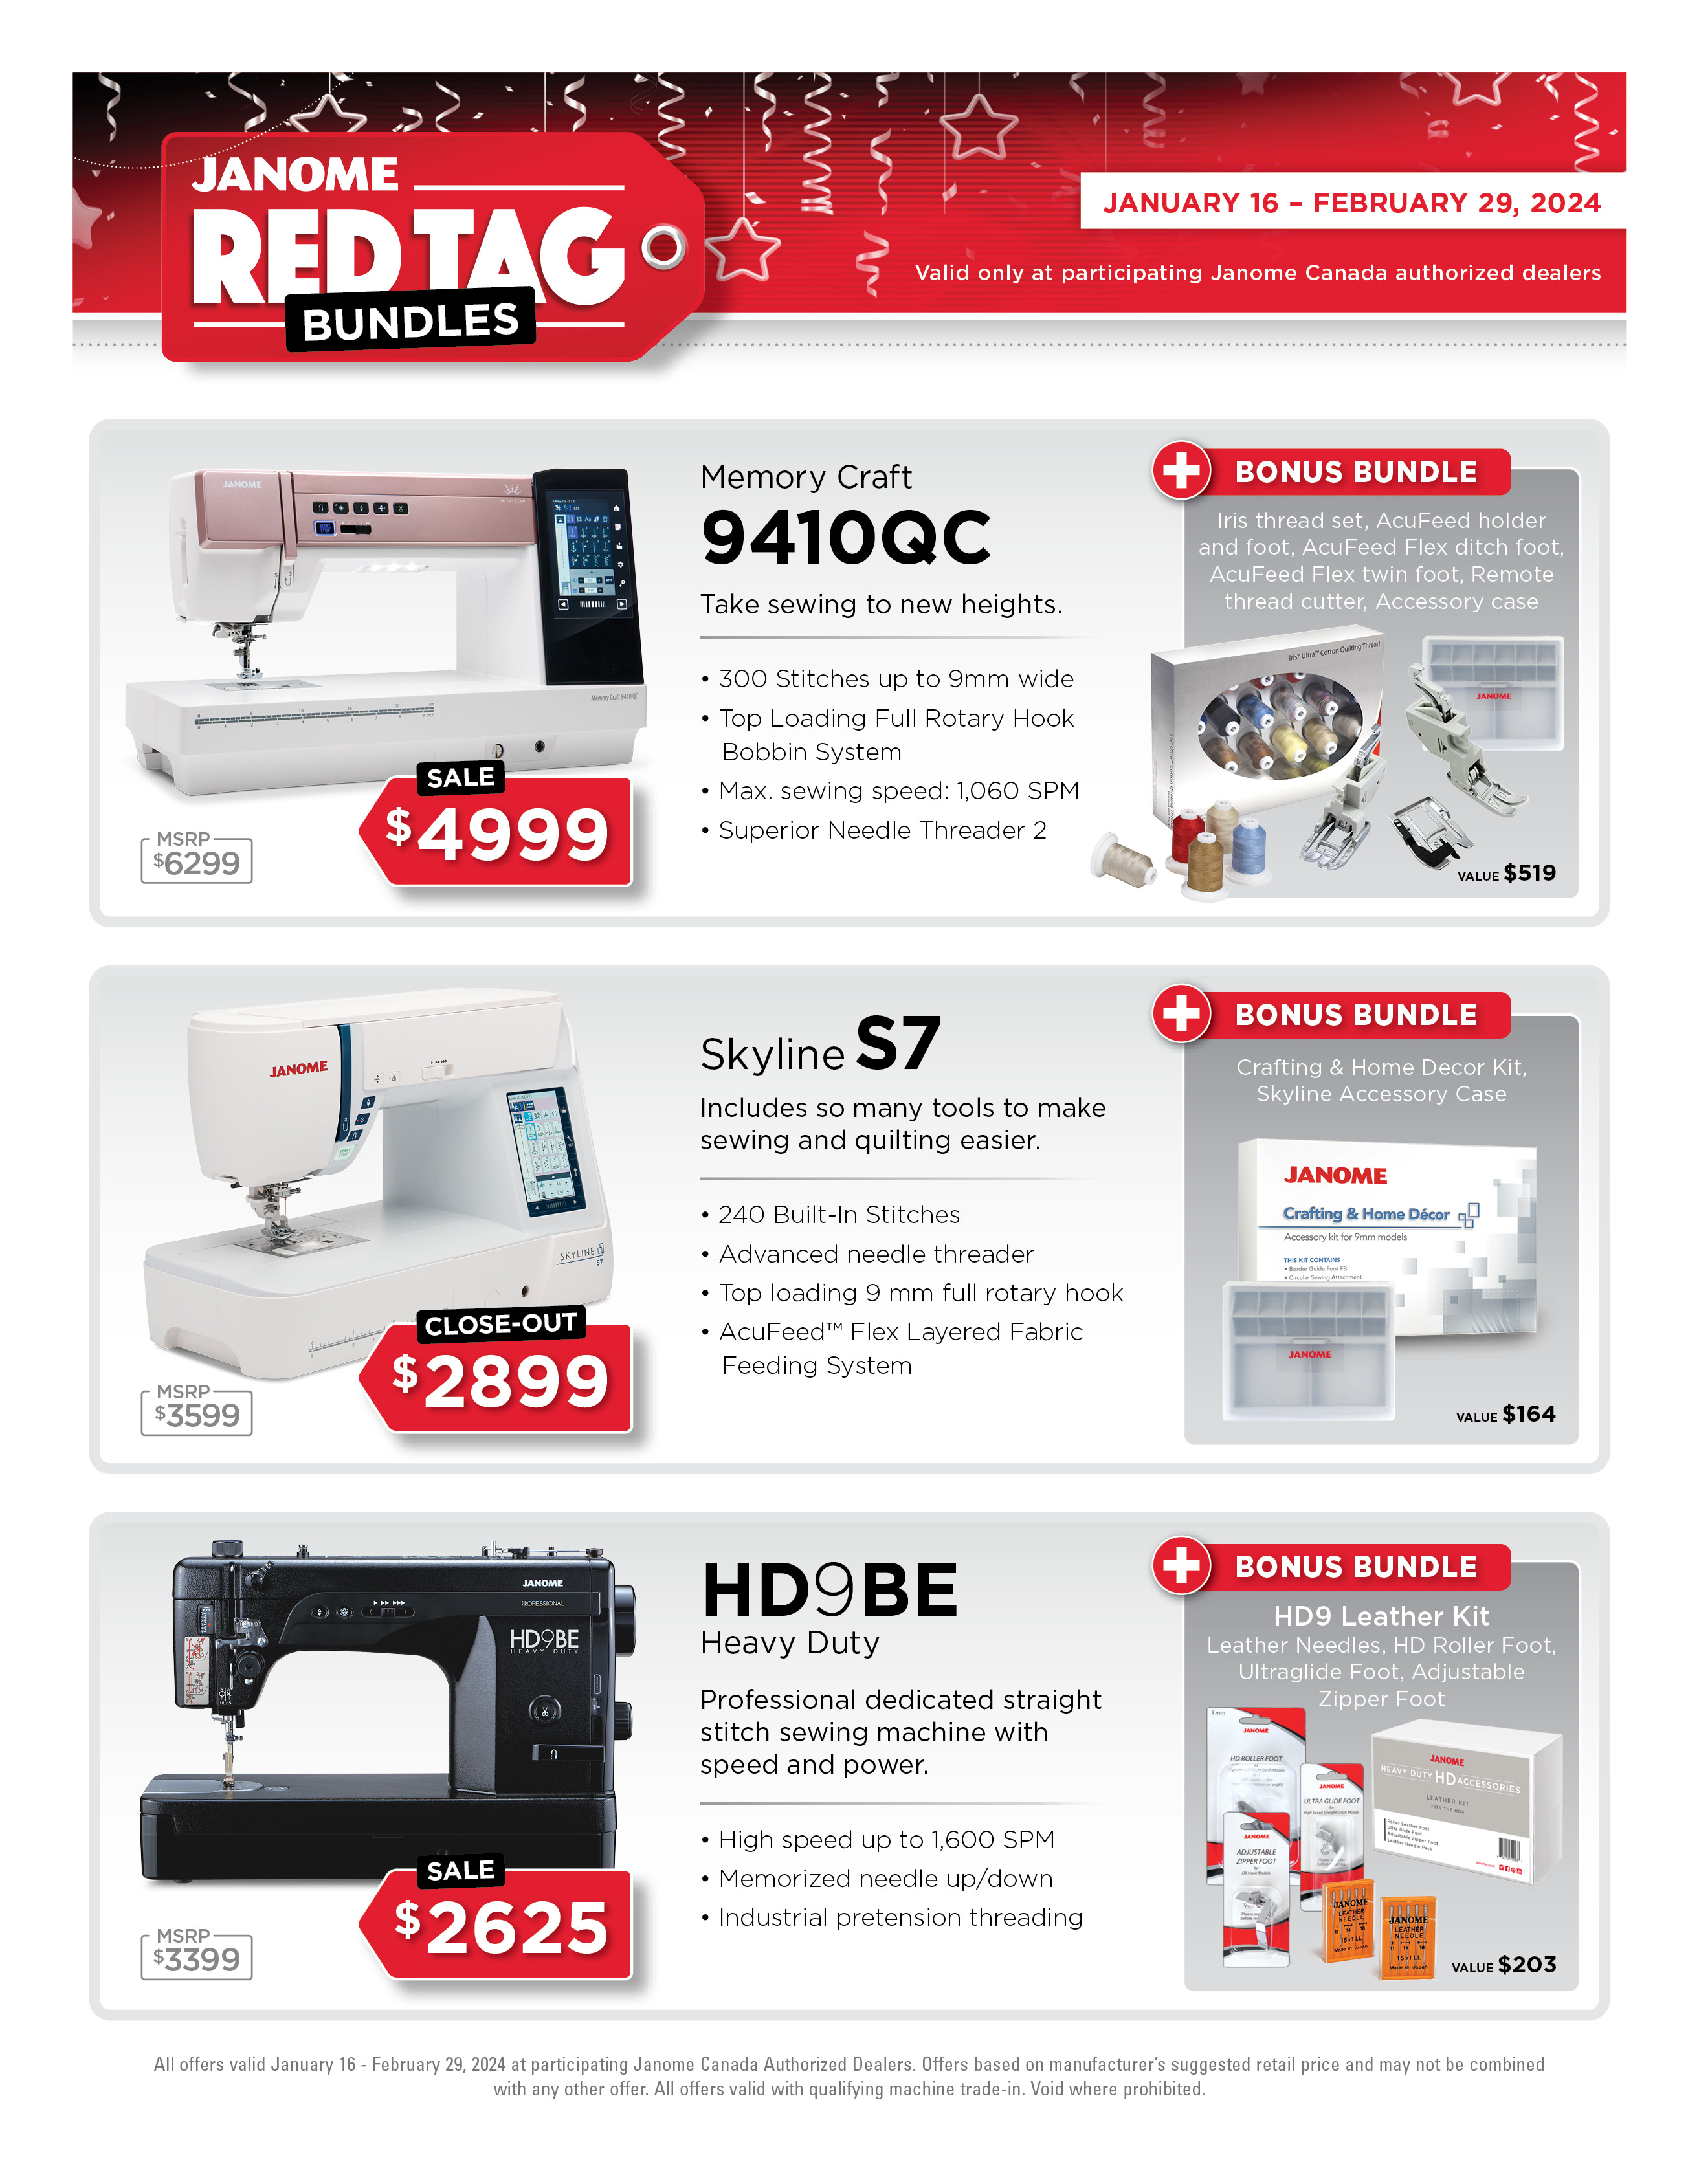
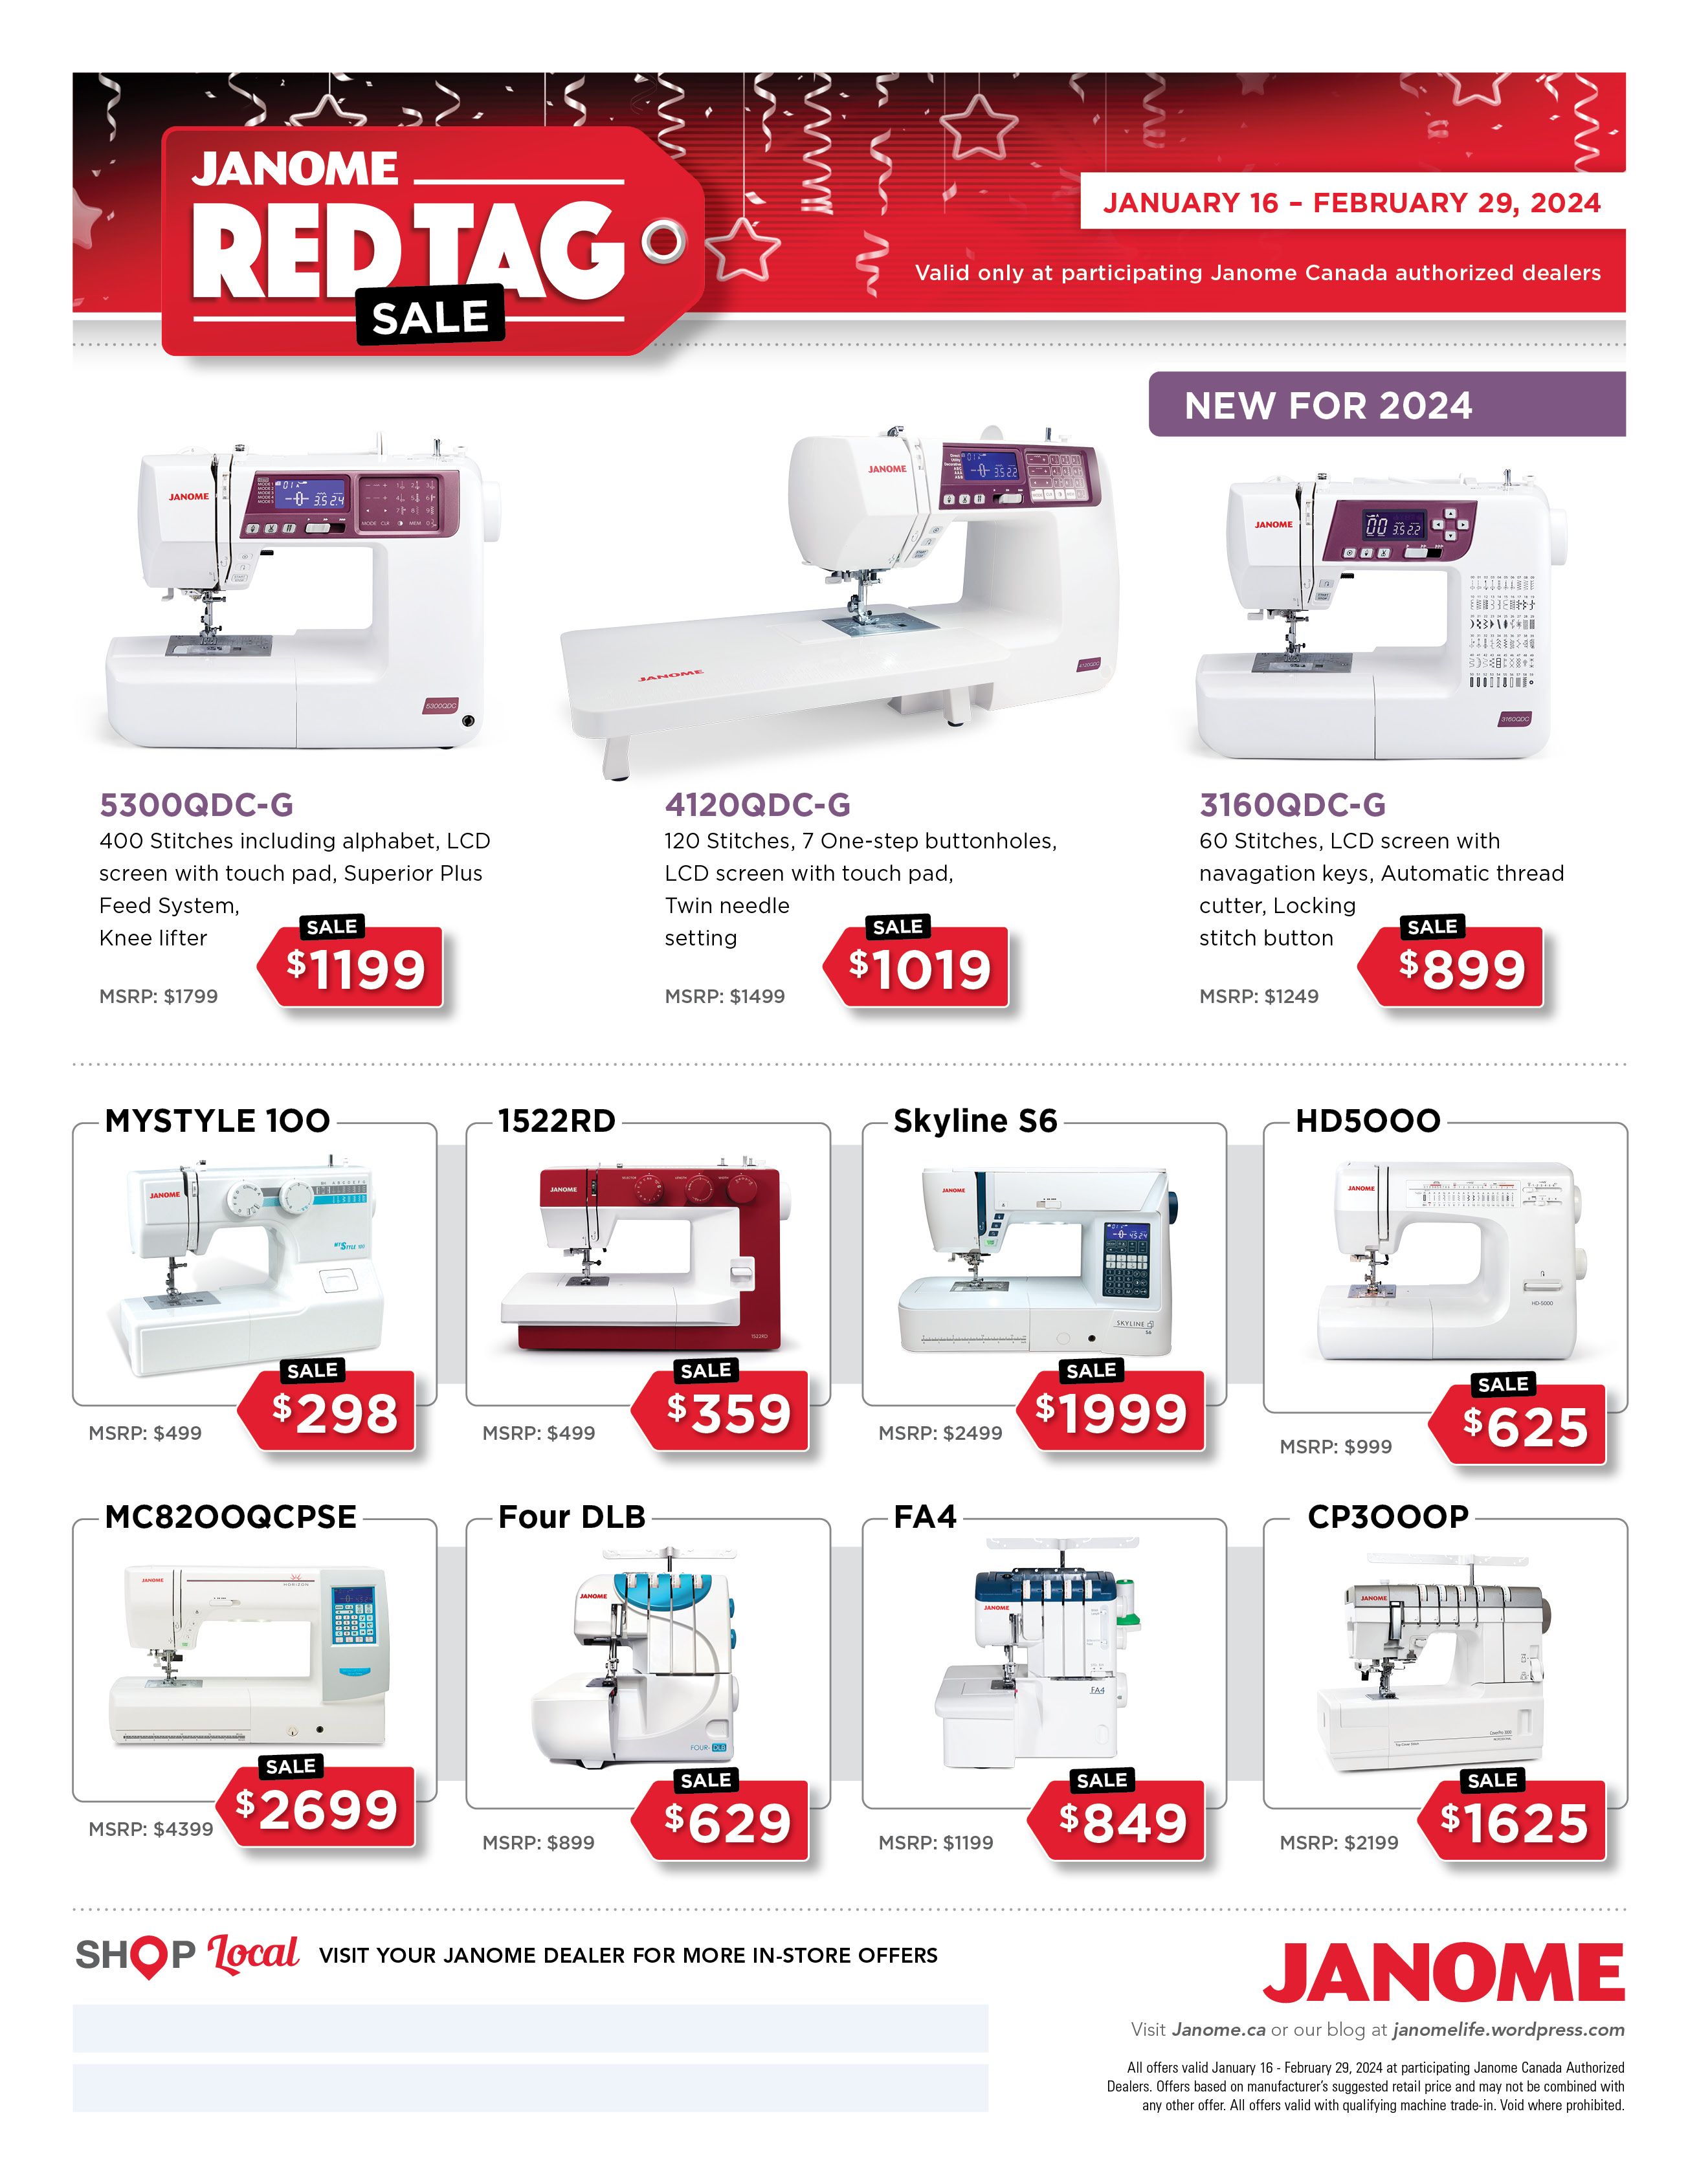
The Janome Red Tag sale is here! Get the ultimate sewing, quilting and embroidery combo for $12,499. This includes the Accurate Stitch Regulator (A.S.R.) and Artistic Digitizer Jr!
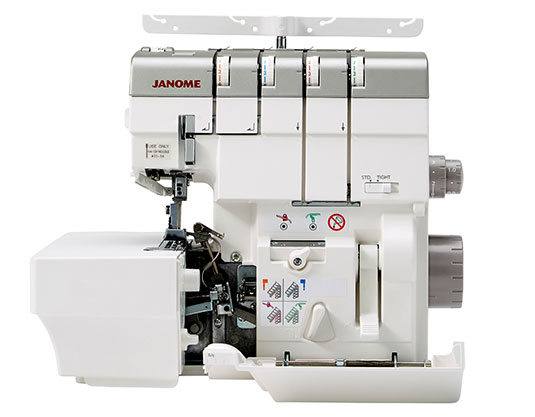
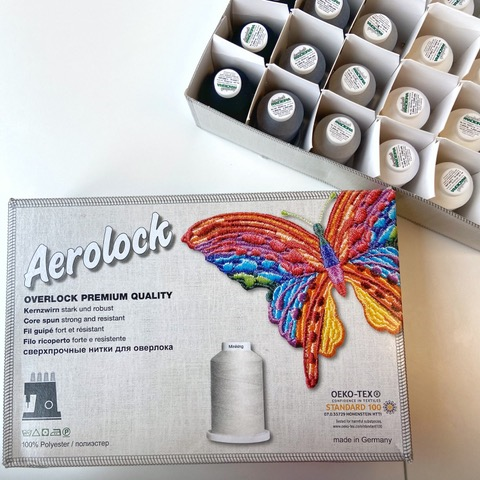
Or how about upgrading to the fantastic Janome AirThread 2000D serger? As a bonus: you will get a travel case and a box of premium quality Madeira Aerolock thread!
A stand-out deal on this flyer is the Janome Skyline S7. Not only is it listed at an incredible price, it comes with extra accessories and an accessory case!
We also have some great pricing on entry and mid-level machines. Our favourite? The Janome 1522RD! A perfect machine for travelling, or a lucky beginner. It has a generous sewing bed, and comes with everything you need to get started!
Have a look at the Red Tag Sale flyer to see what else is being offered. Or visit your Janome dealer to test drive one of these amazing machines!
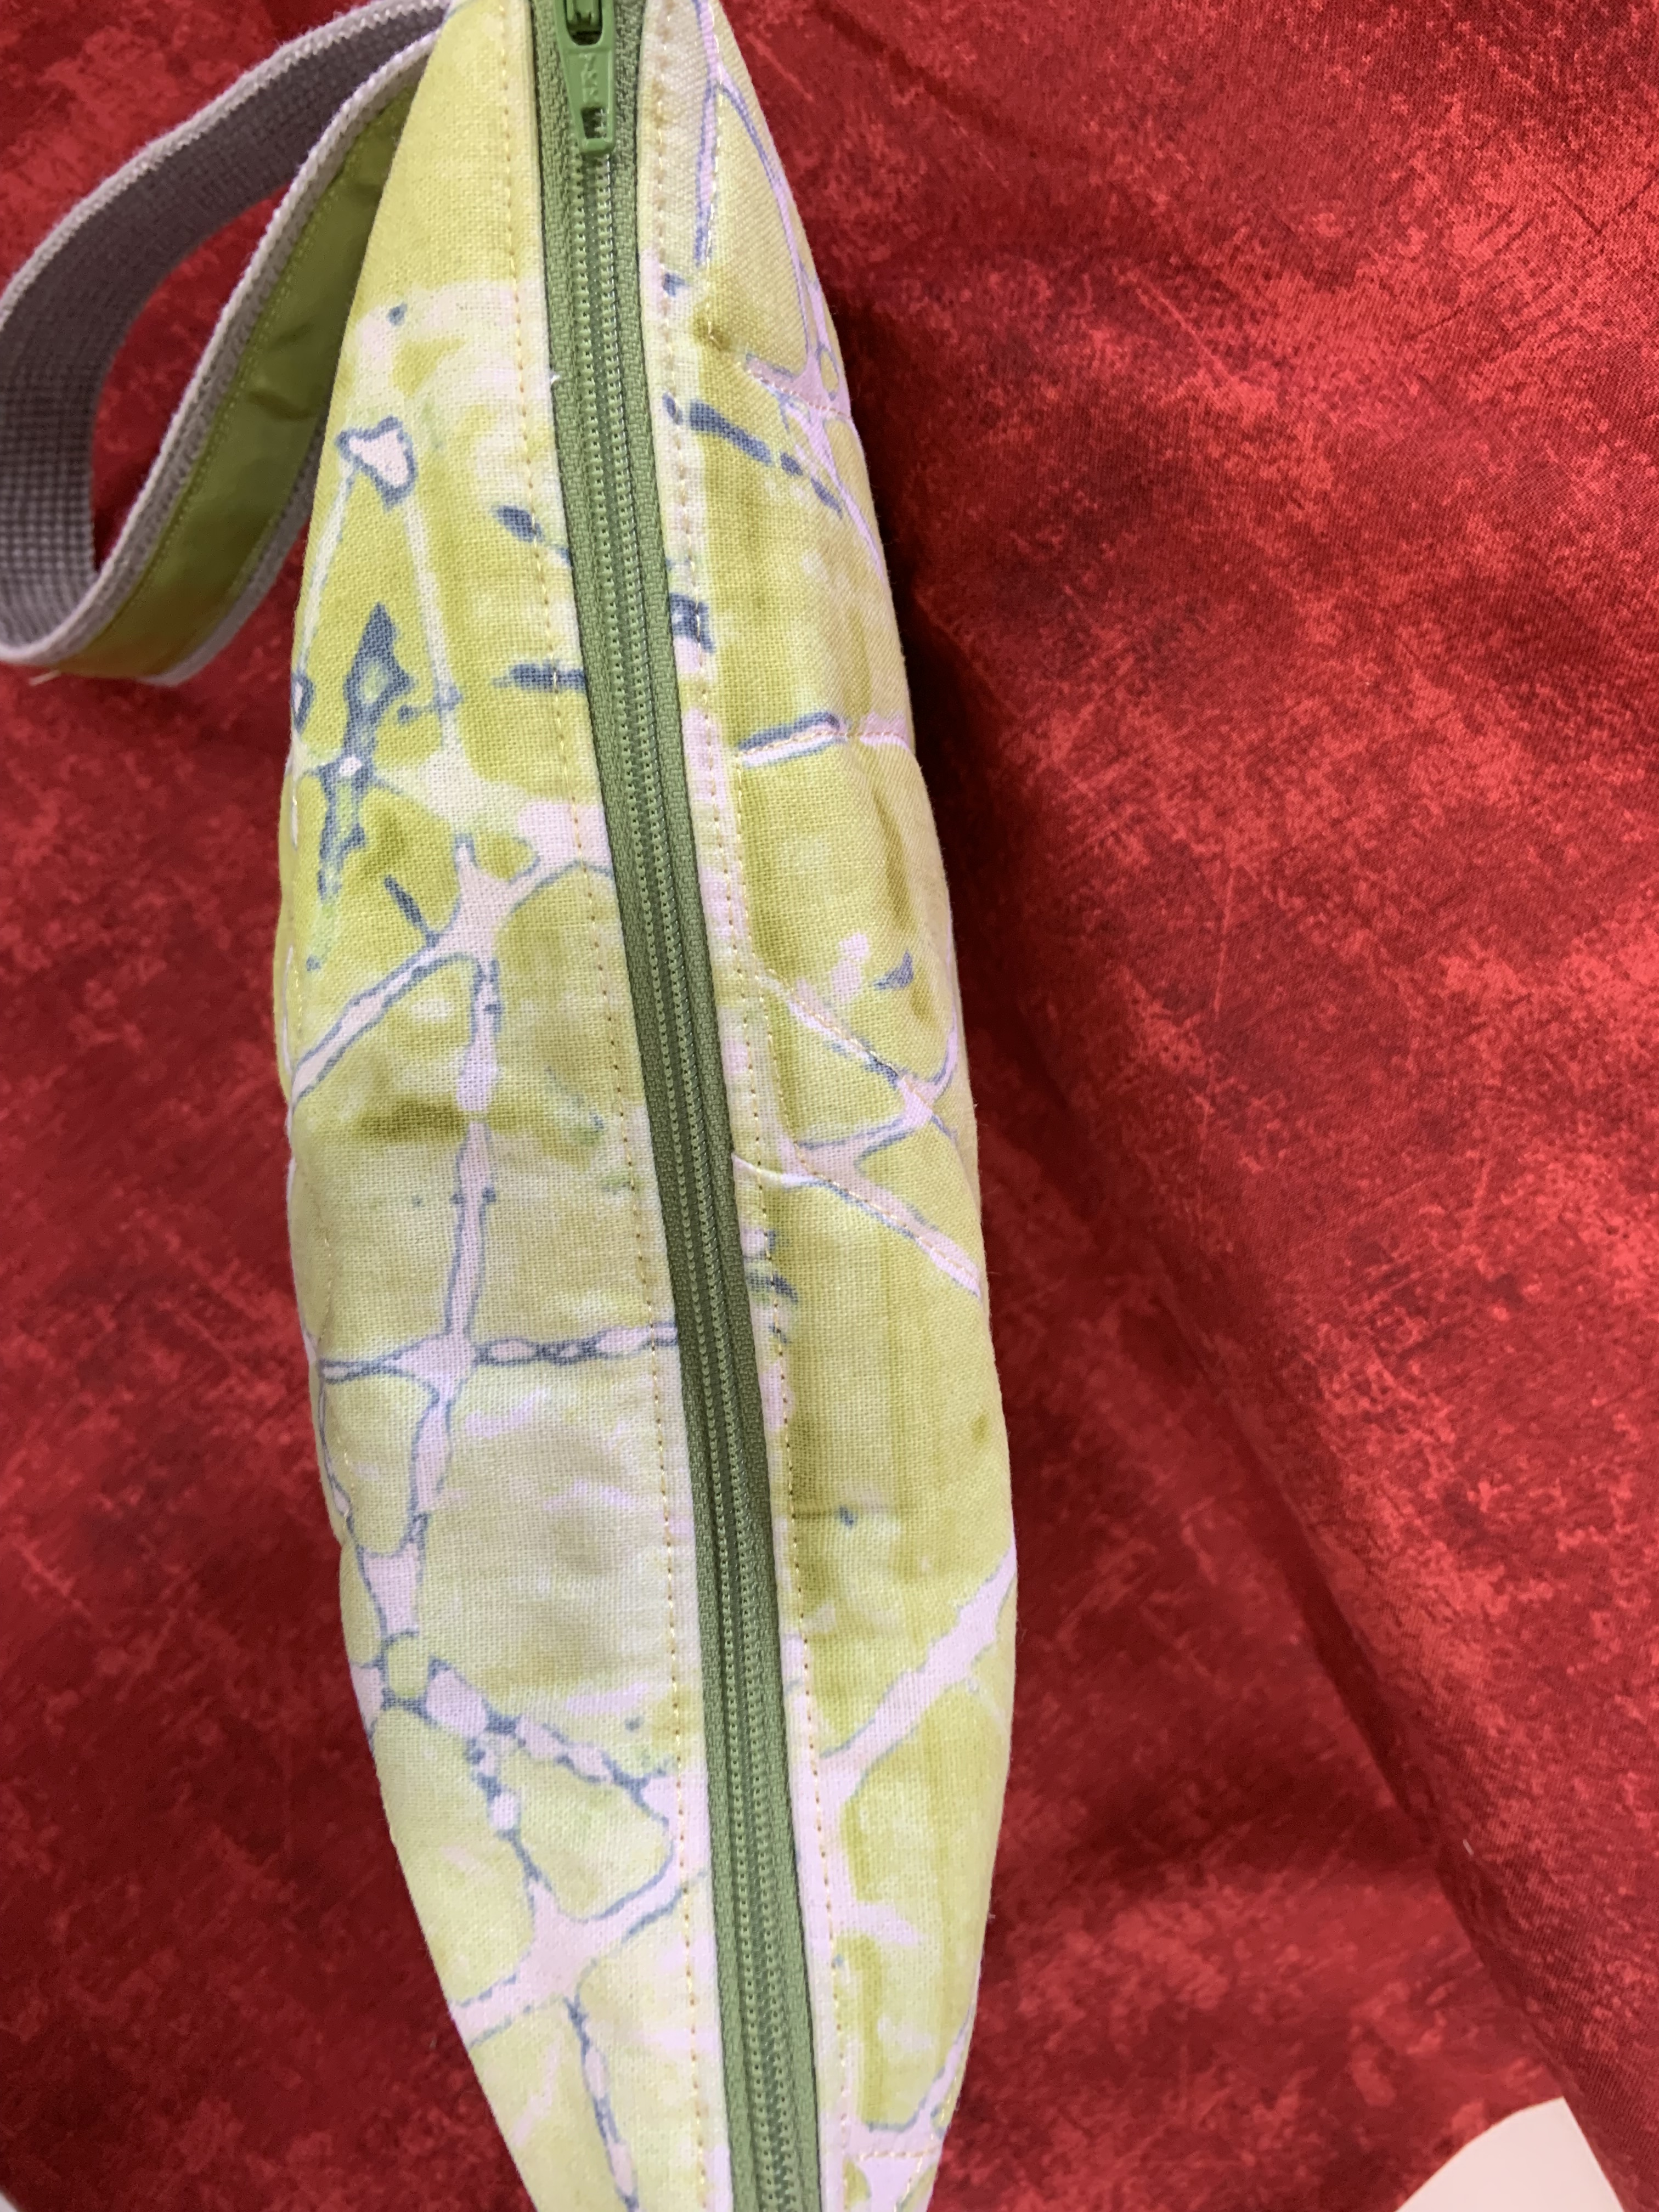
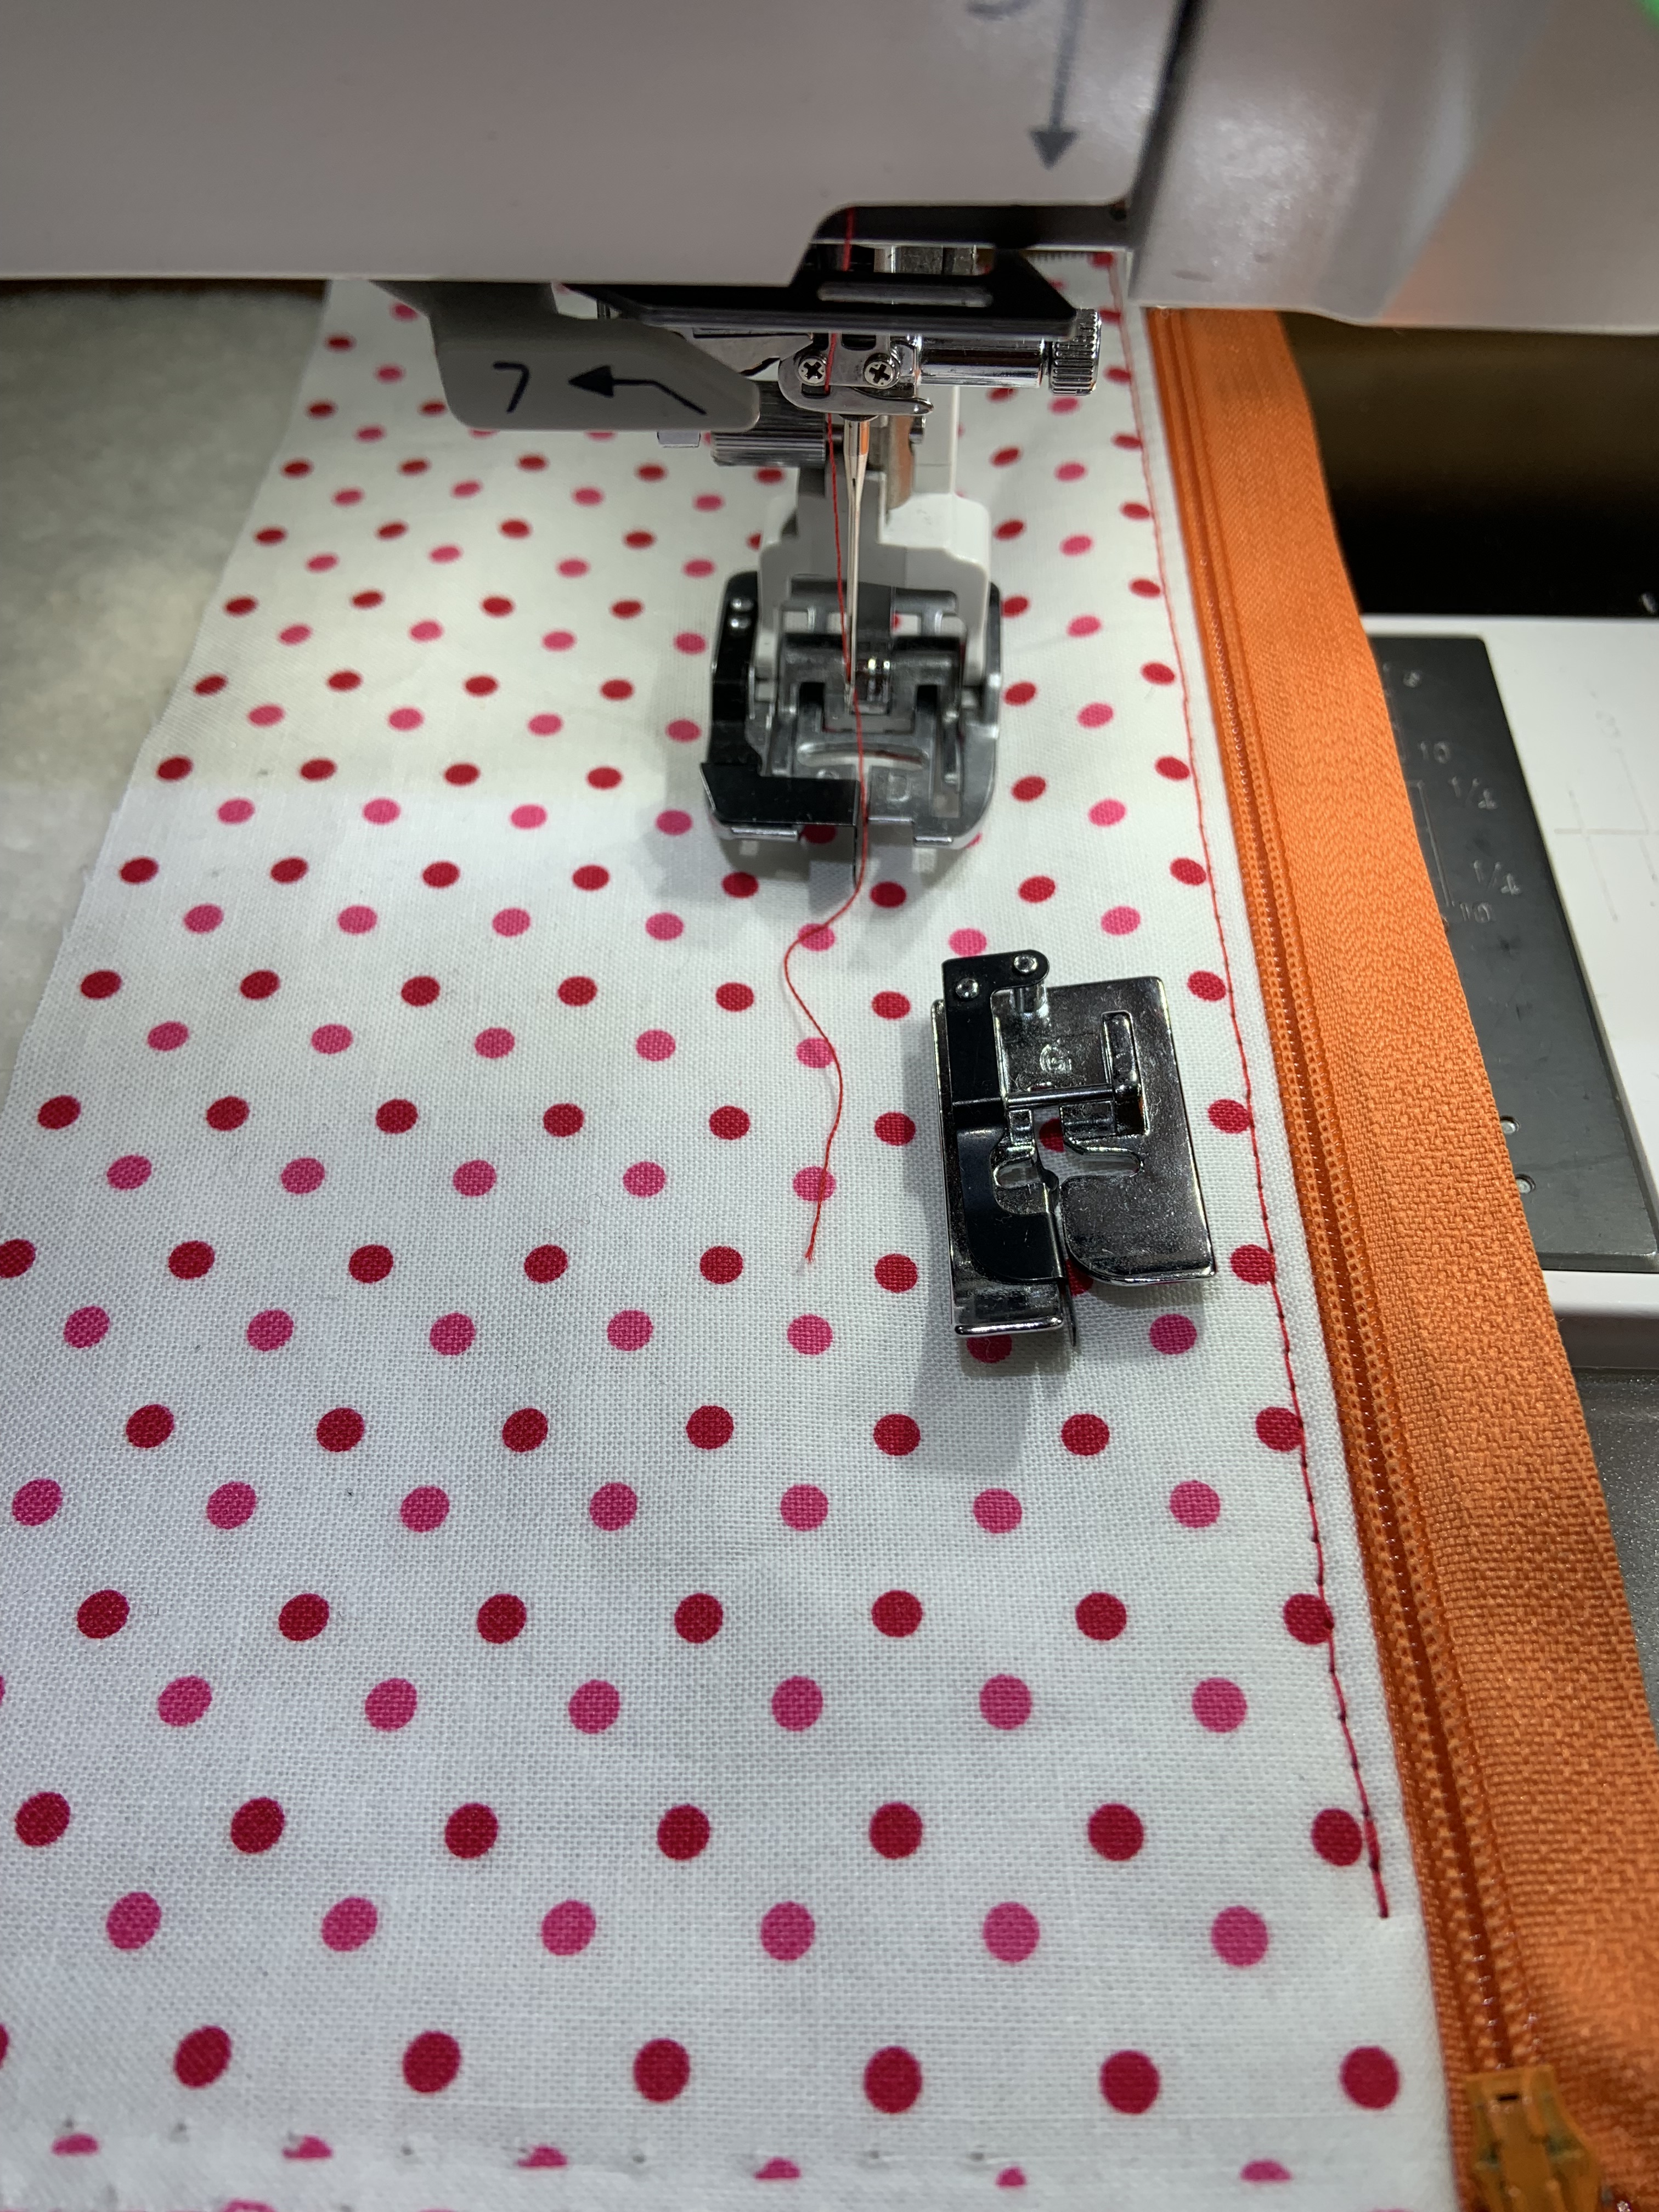
I have discovered a new way of using this amazing AcuFeed Ditch Quilting D Foot. Not only is it great for doing all those wonderful quilting in the ditch but have you tried sewing on a zipper with batting? That is exactly what I have been doing. The AcuFeed attachments give you superior stability by taking full advantage of a wider stance. Engage the exclusive AcuFeed fabric feeding system and feel your project moving together under the needle with full precision.
The accuracy of the topstitching on the edge of the zipper is perfect. I make a lot of bags whether cosmetic bags or totes and I love a great topstitching.
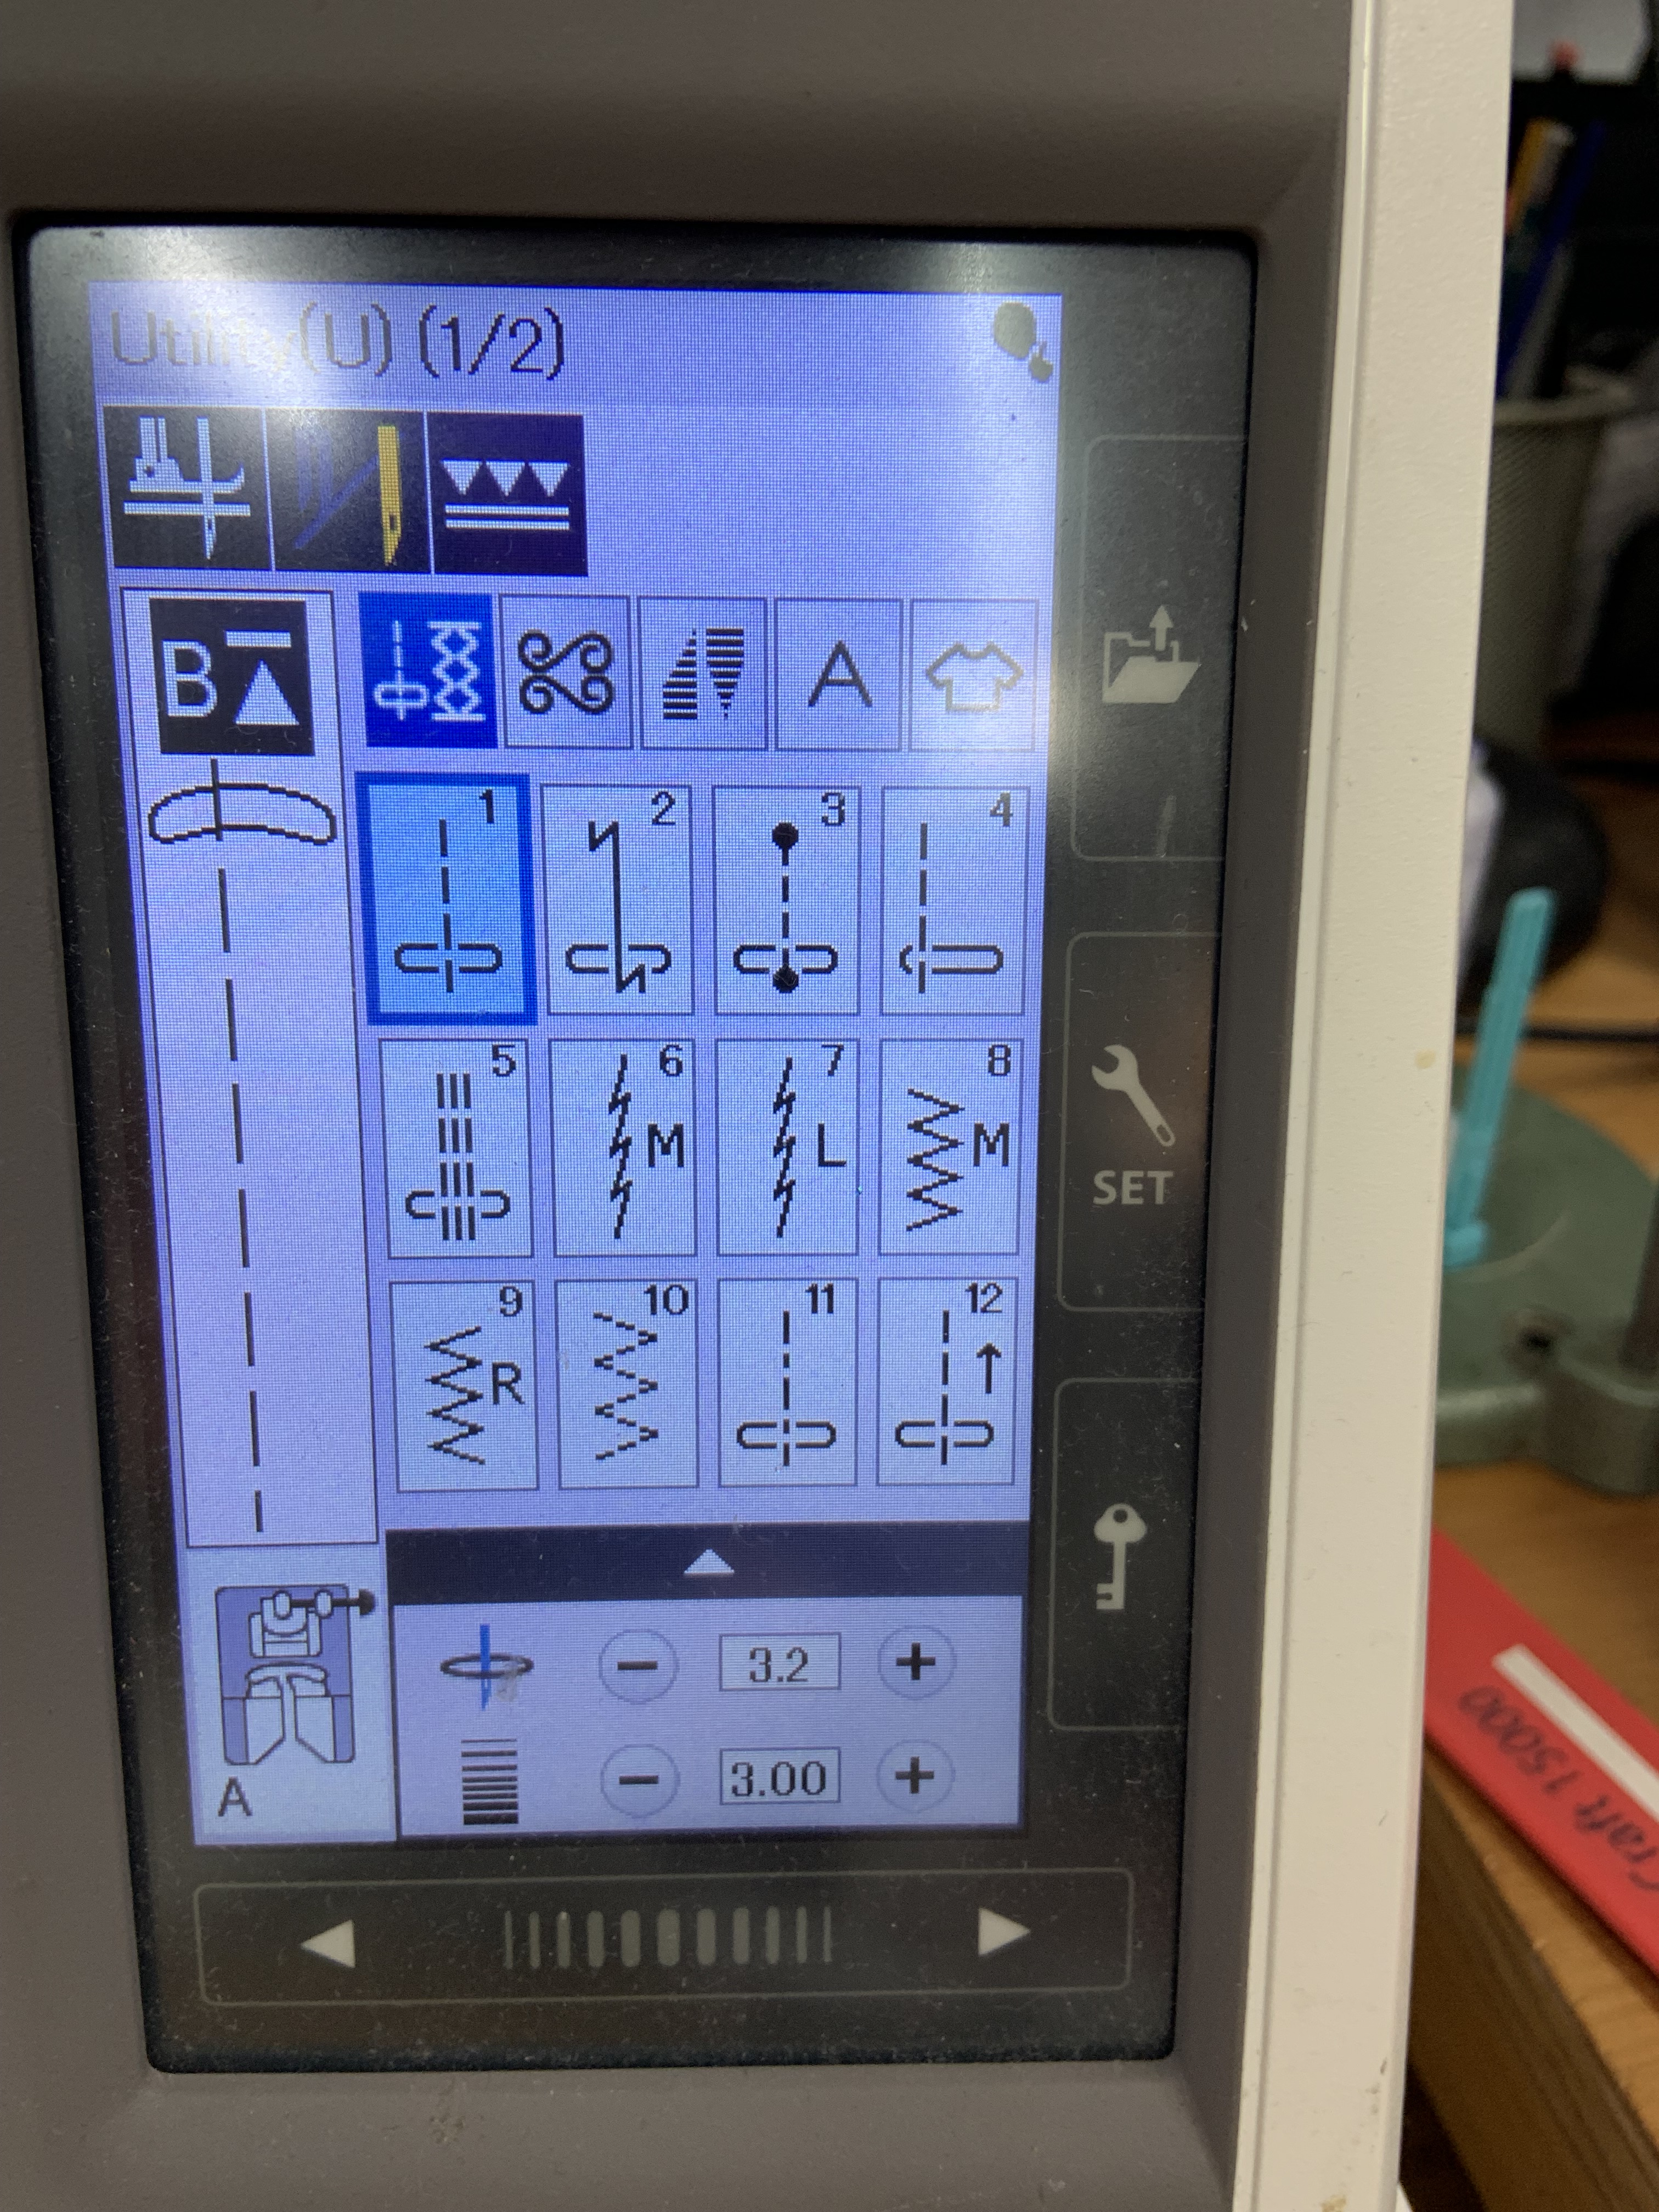
To do this great topstitching you will need the Acufeed Ditch Quilting Foot Part number 846-413-006 for 7mm machines and part number 202-103-006 for 9mm machines. If you don’t know if your machine is 7mm or 9mm you can always double check with your dealer. I also changed the plate to the zigzag needle plate.
I did this topstitching with batting behind the fabric. Stitch the zipper right sides together as usual then fold it back ready for topstitching.
To start set your machine to straight stitch. I used a longer stitch length than normal. I also moved the needle to the left at a position of 3.2. This allows the stitching to be off centre.
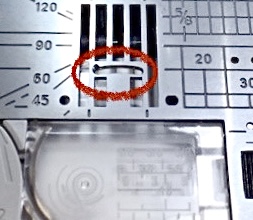
Don’t forget to change the plate to a zigzag plate. Its the one with the wider opening which allows your needle to move side to side
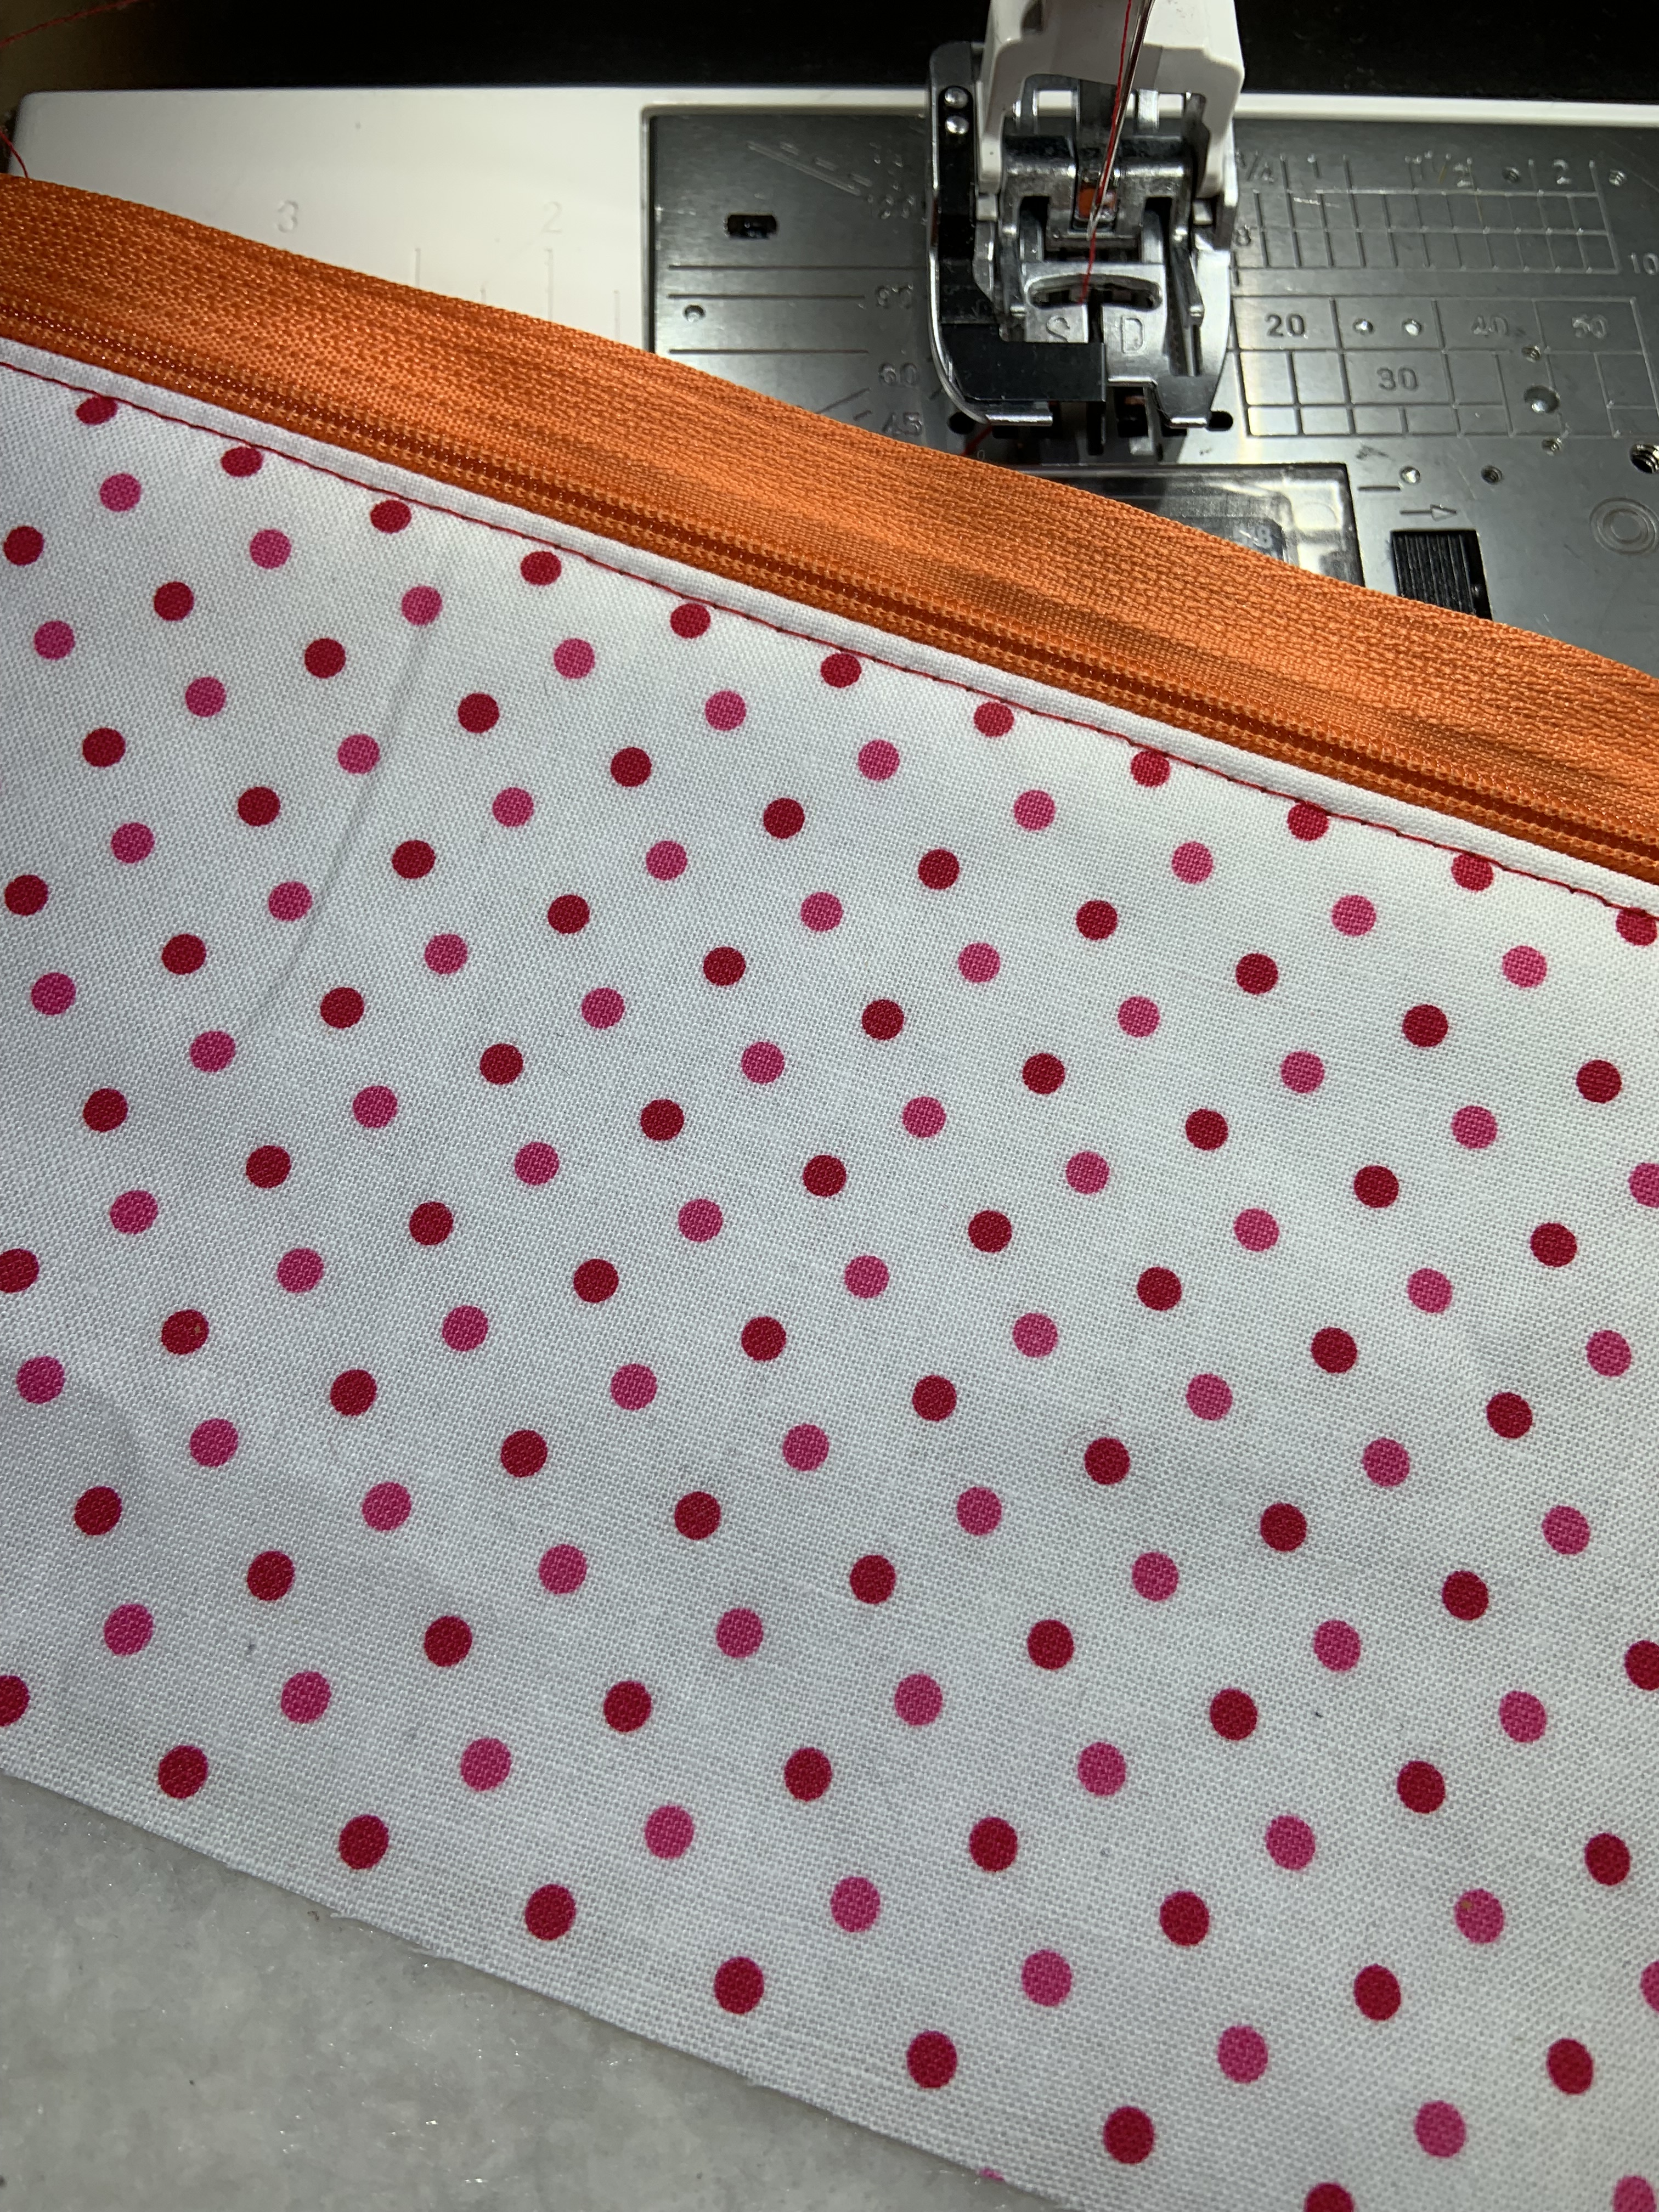
Now use the guide to glide down the edge of the fold and stitch down the fabric. This will give you a perfect seam along the edge of the zipper and have that professional look to it.
You can also do great topstitching with your regular quilting ditch foot. Try using it to do the edge of a flange or any other topstitching you may want.
Talk to your local dealer to order the right one for your machine.
Creating isn’t typically neat and organized. This can become a problem if you are sewing in common areas of the house. You need to be able to put everything away quickly and keep little hands, pets and/or stray cups of coffee from getting close to your sewing supplies.
Your Janome machine may have come with a cover but if you are going to have it out in the common areas of your house you may want to make a personalized cover to fit in with your decor. Our friends at Sew4Home have a great free Fitted Sewing Machine Cover pattern perfect for not only covering your sewing machine but it also has storage pockets to keep everything you need close
Photo from Sew4Home.com
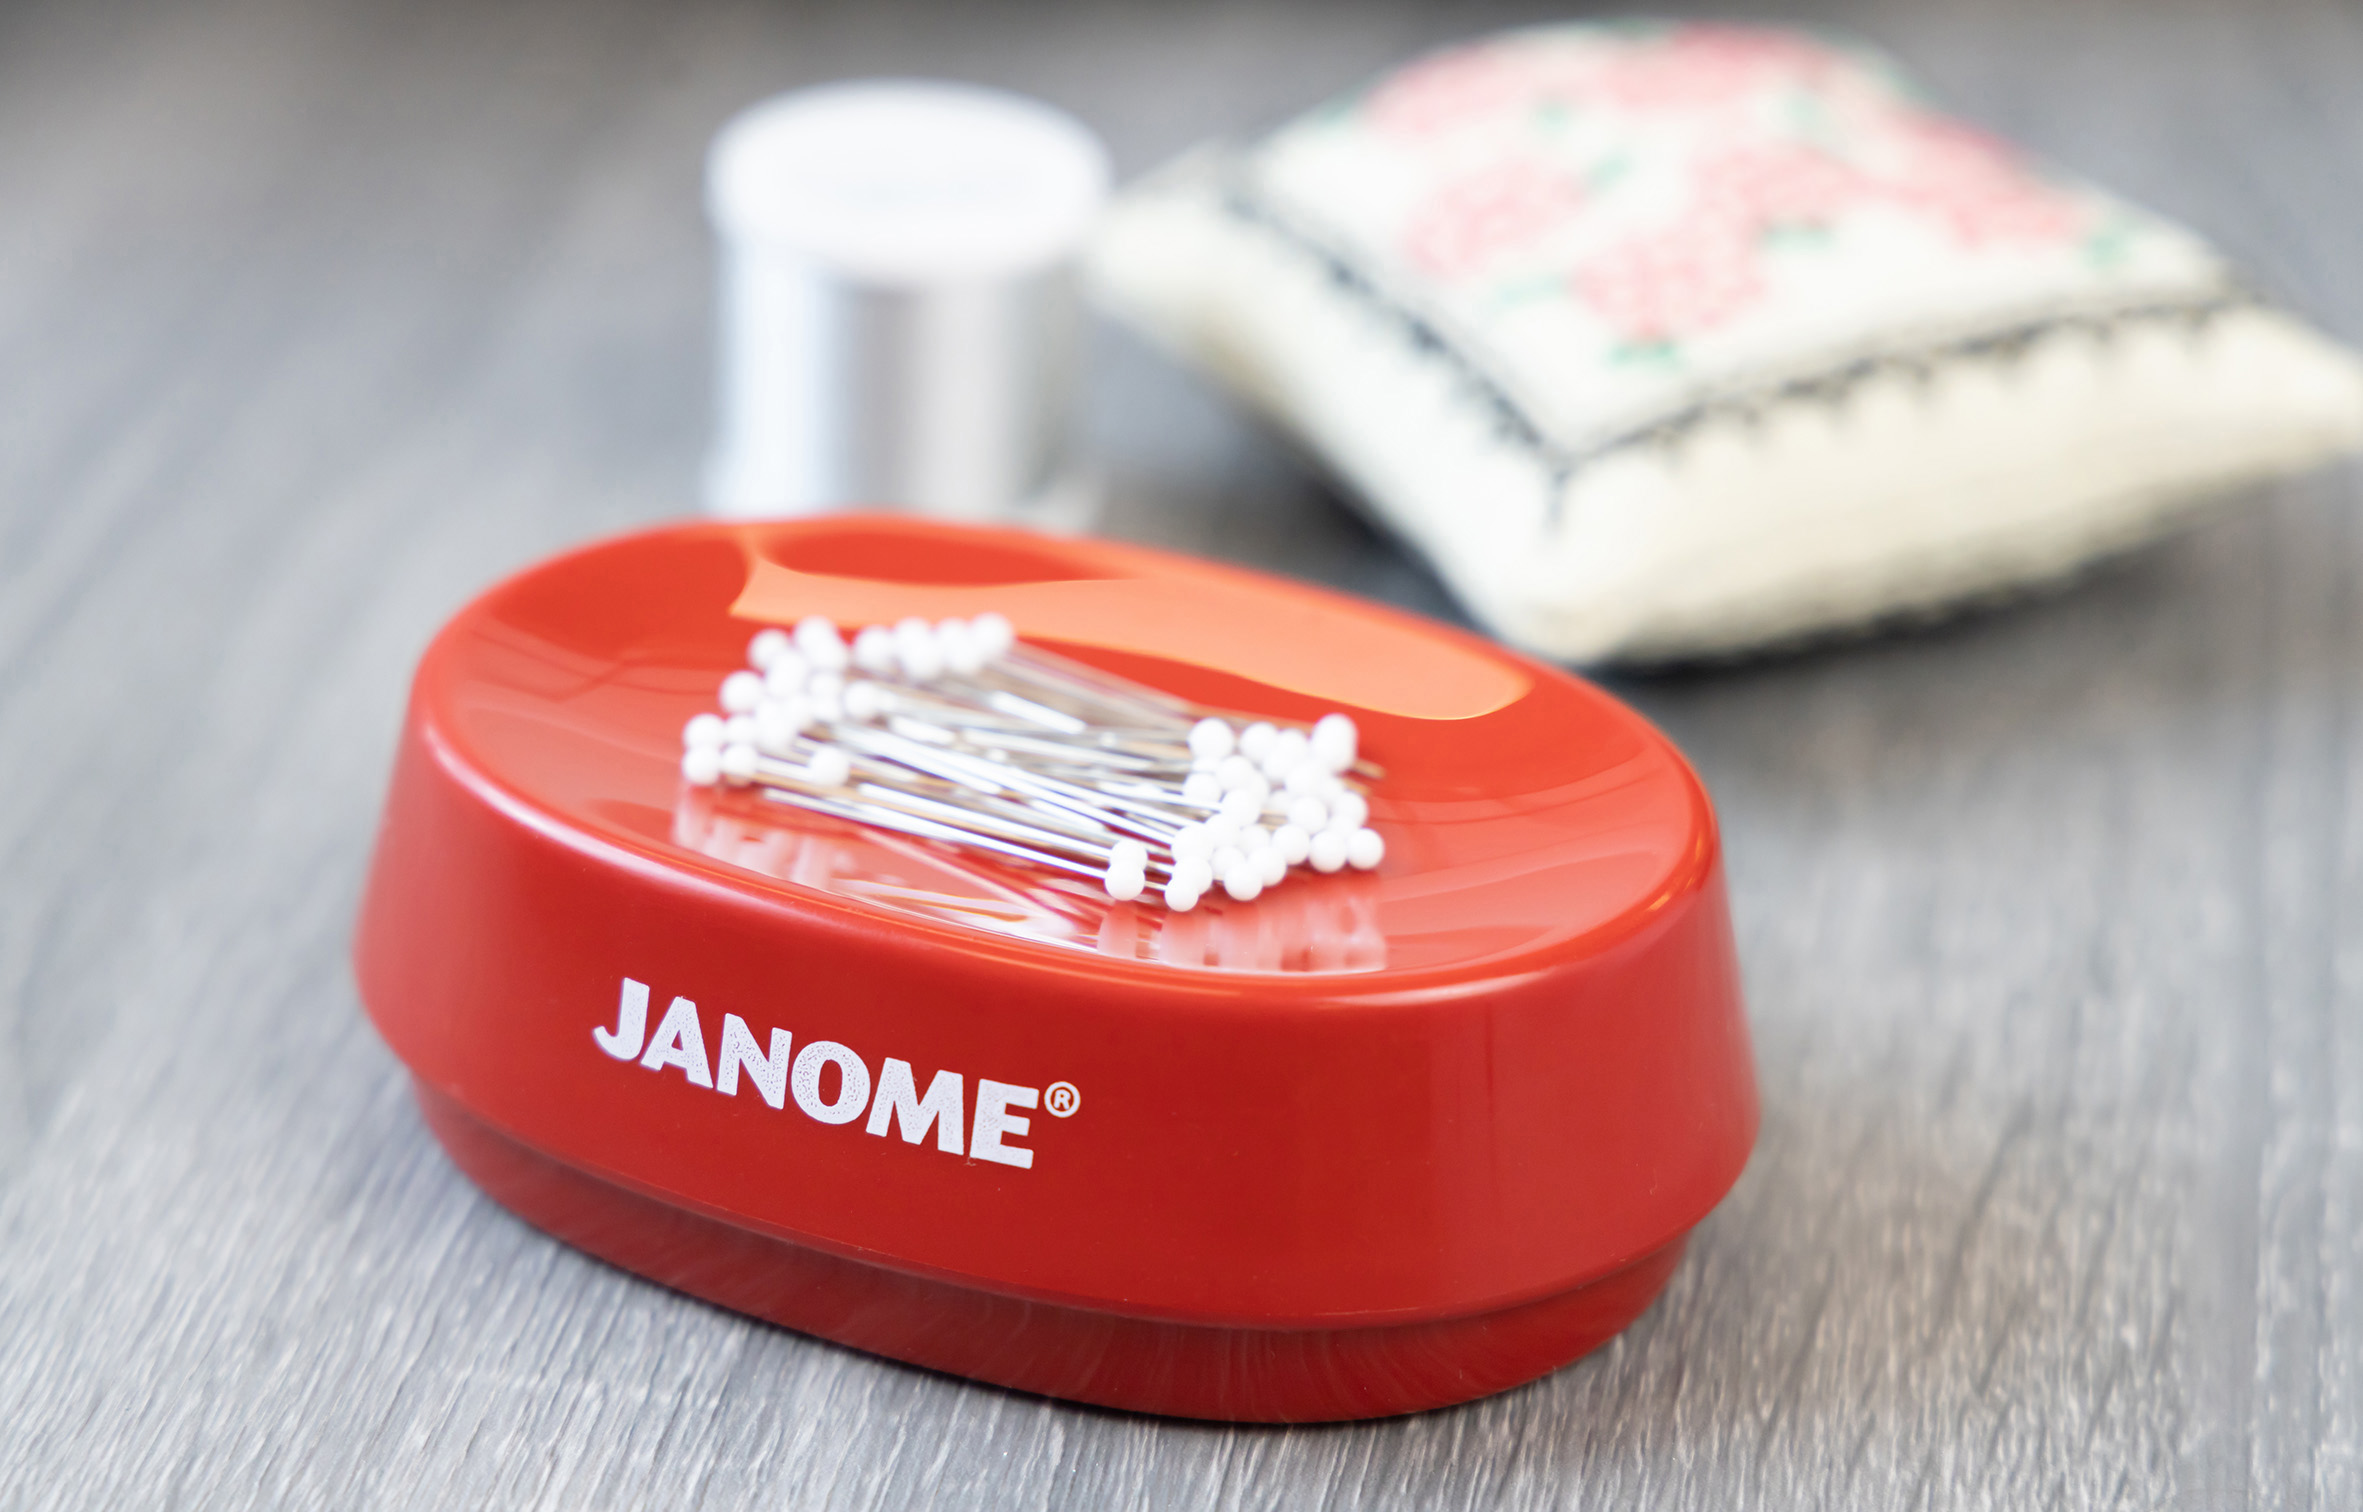
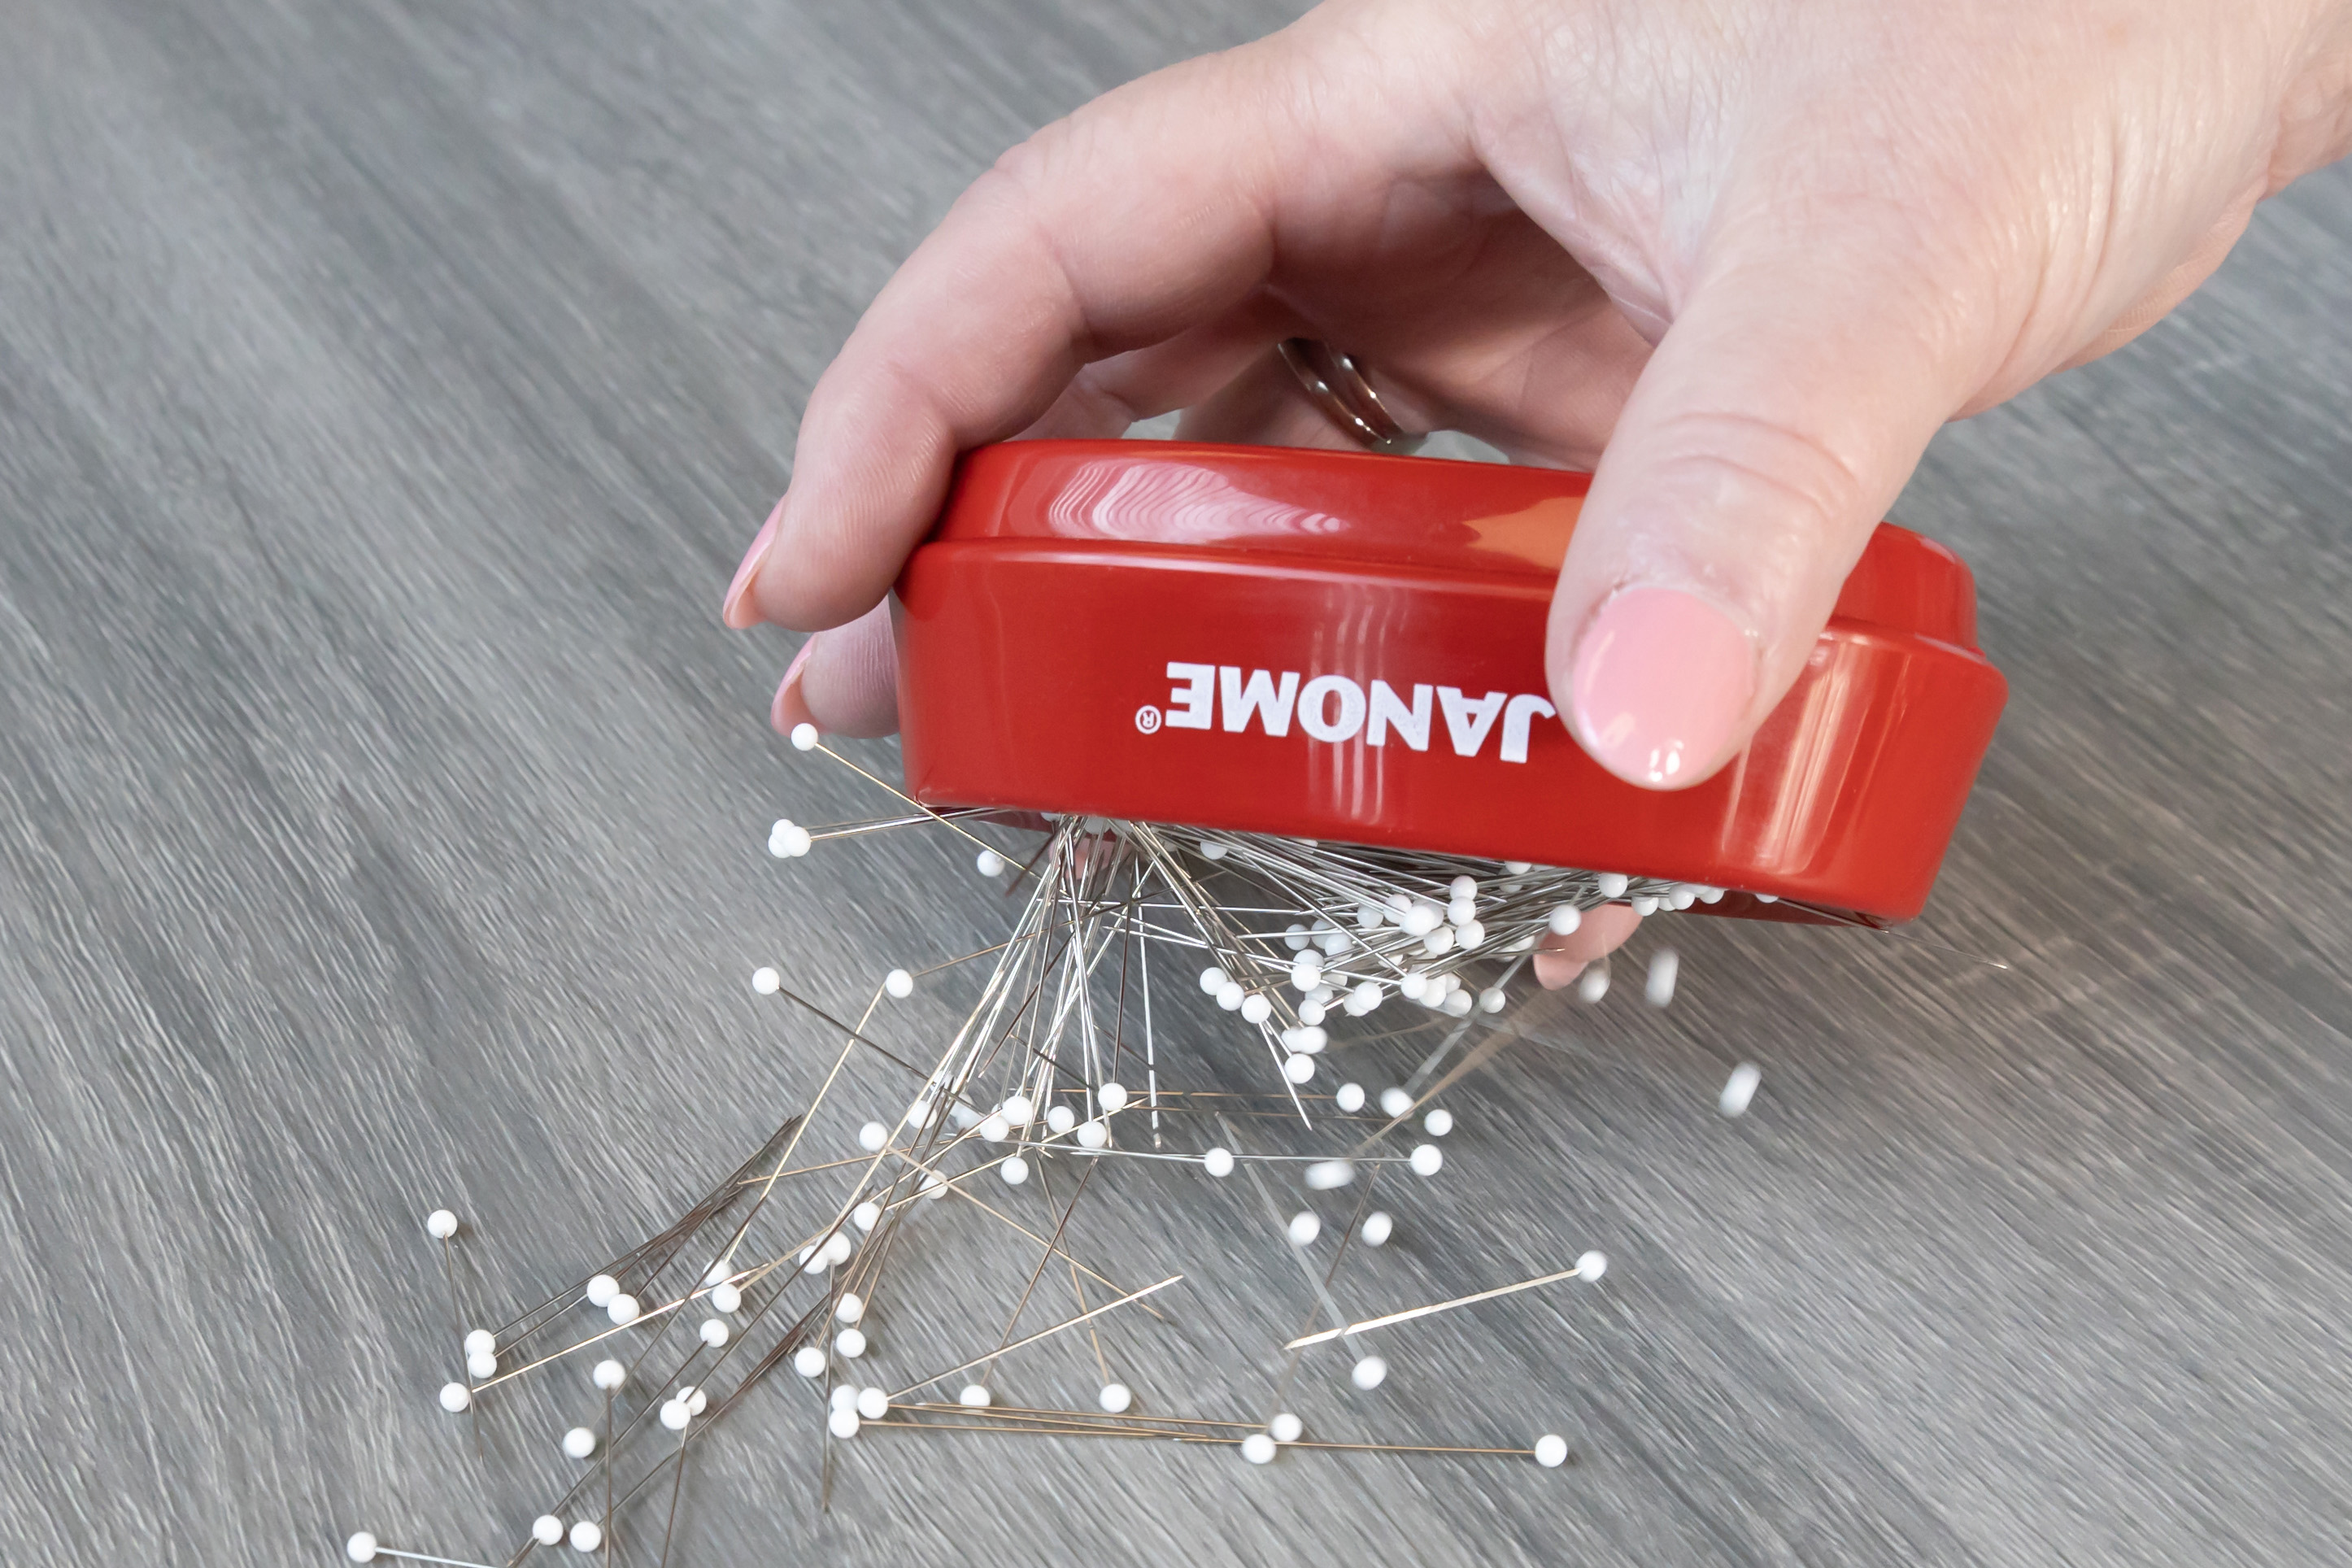
Have you heard about Janome’s Magnetic Pinpals? Obviously from the name we know they hold your pins but did you know you could use them to hold your metal sewing feet as well?
If you are working on a project requiring a couple different feet you can use your Pinpal to hold them so they are disappearing into the table beside you or getting lost in the shuffle of your project. My favourite feature of this PinPal is it helps me find the pins I drop on the floor while sewing.
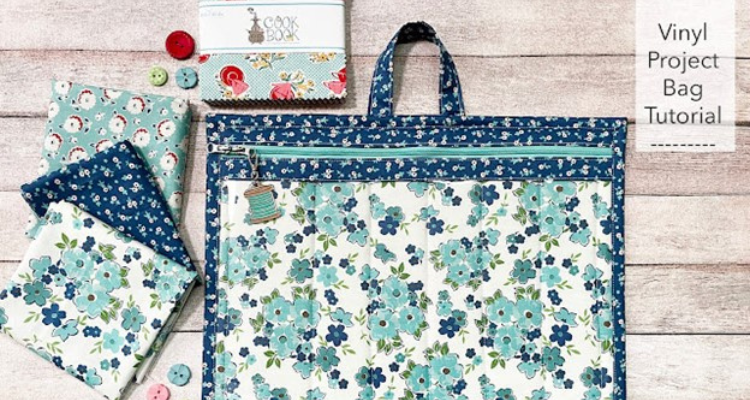
We have our machine covered and a safe spot for our pins and feet, but what about our projects? How do we quickly store them but keep all the pieces in the right order? This can be tricky. You could create some project bags.
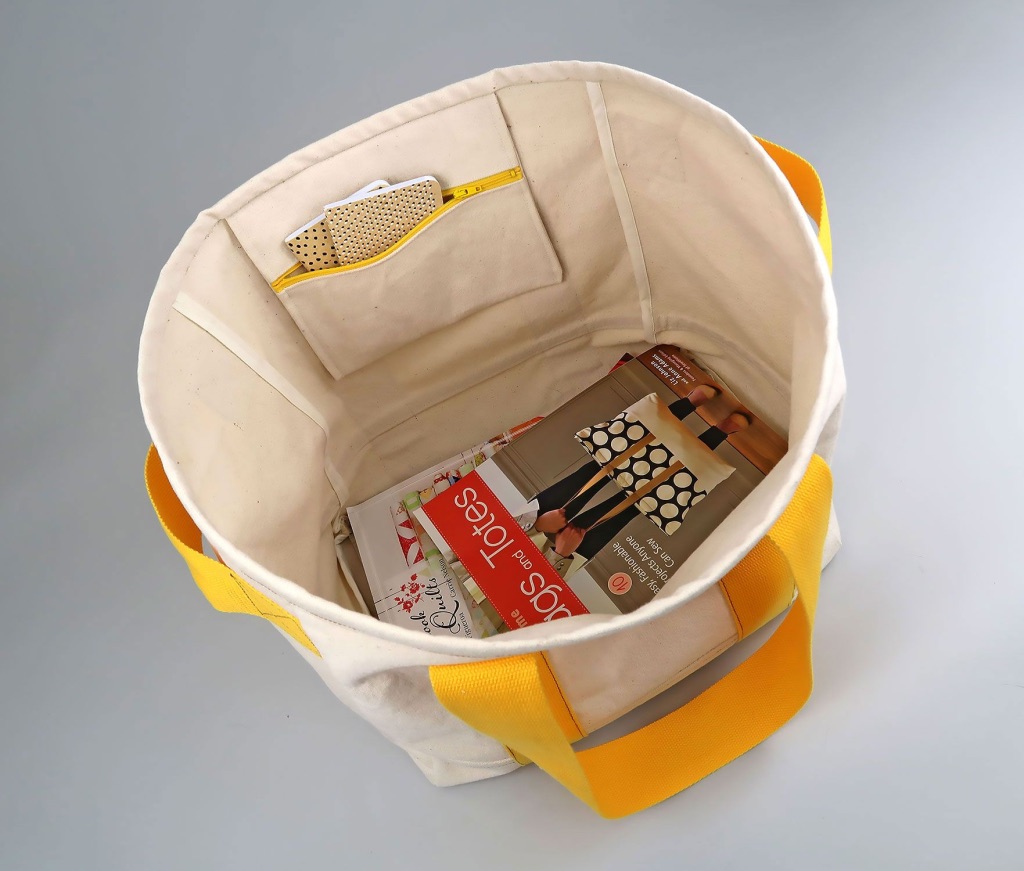
This Vinyl Project Bag can be found on the Inspire Tab on Janome.ca along with so many other great project ideas. Maybe you want a really big project bag. Some projects require some thing nice and big. How about this Janome Canada Exclusive Boxed Tote Bag for Sew4Home. So much space to keep your entire project together.
If you don’t want to make something many Sewsits turn to storage bins. I’m a bin lover and I’m always on the look out for another good bin. Sometimes I think I sew just so I can buy more storage bins.
Then if you need even more organization in these containers I often use Ziplock bags of various sizes. Reusable, inexpensive and you can even add labels to them.
So many options to put your project away quickly and stay organized.
What are your common area sewing space tricks and tips? I’m sure there are many more great ideas out there!
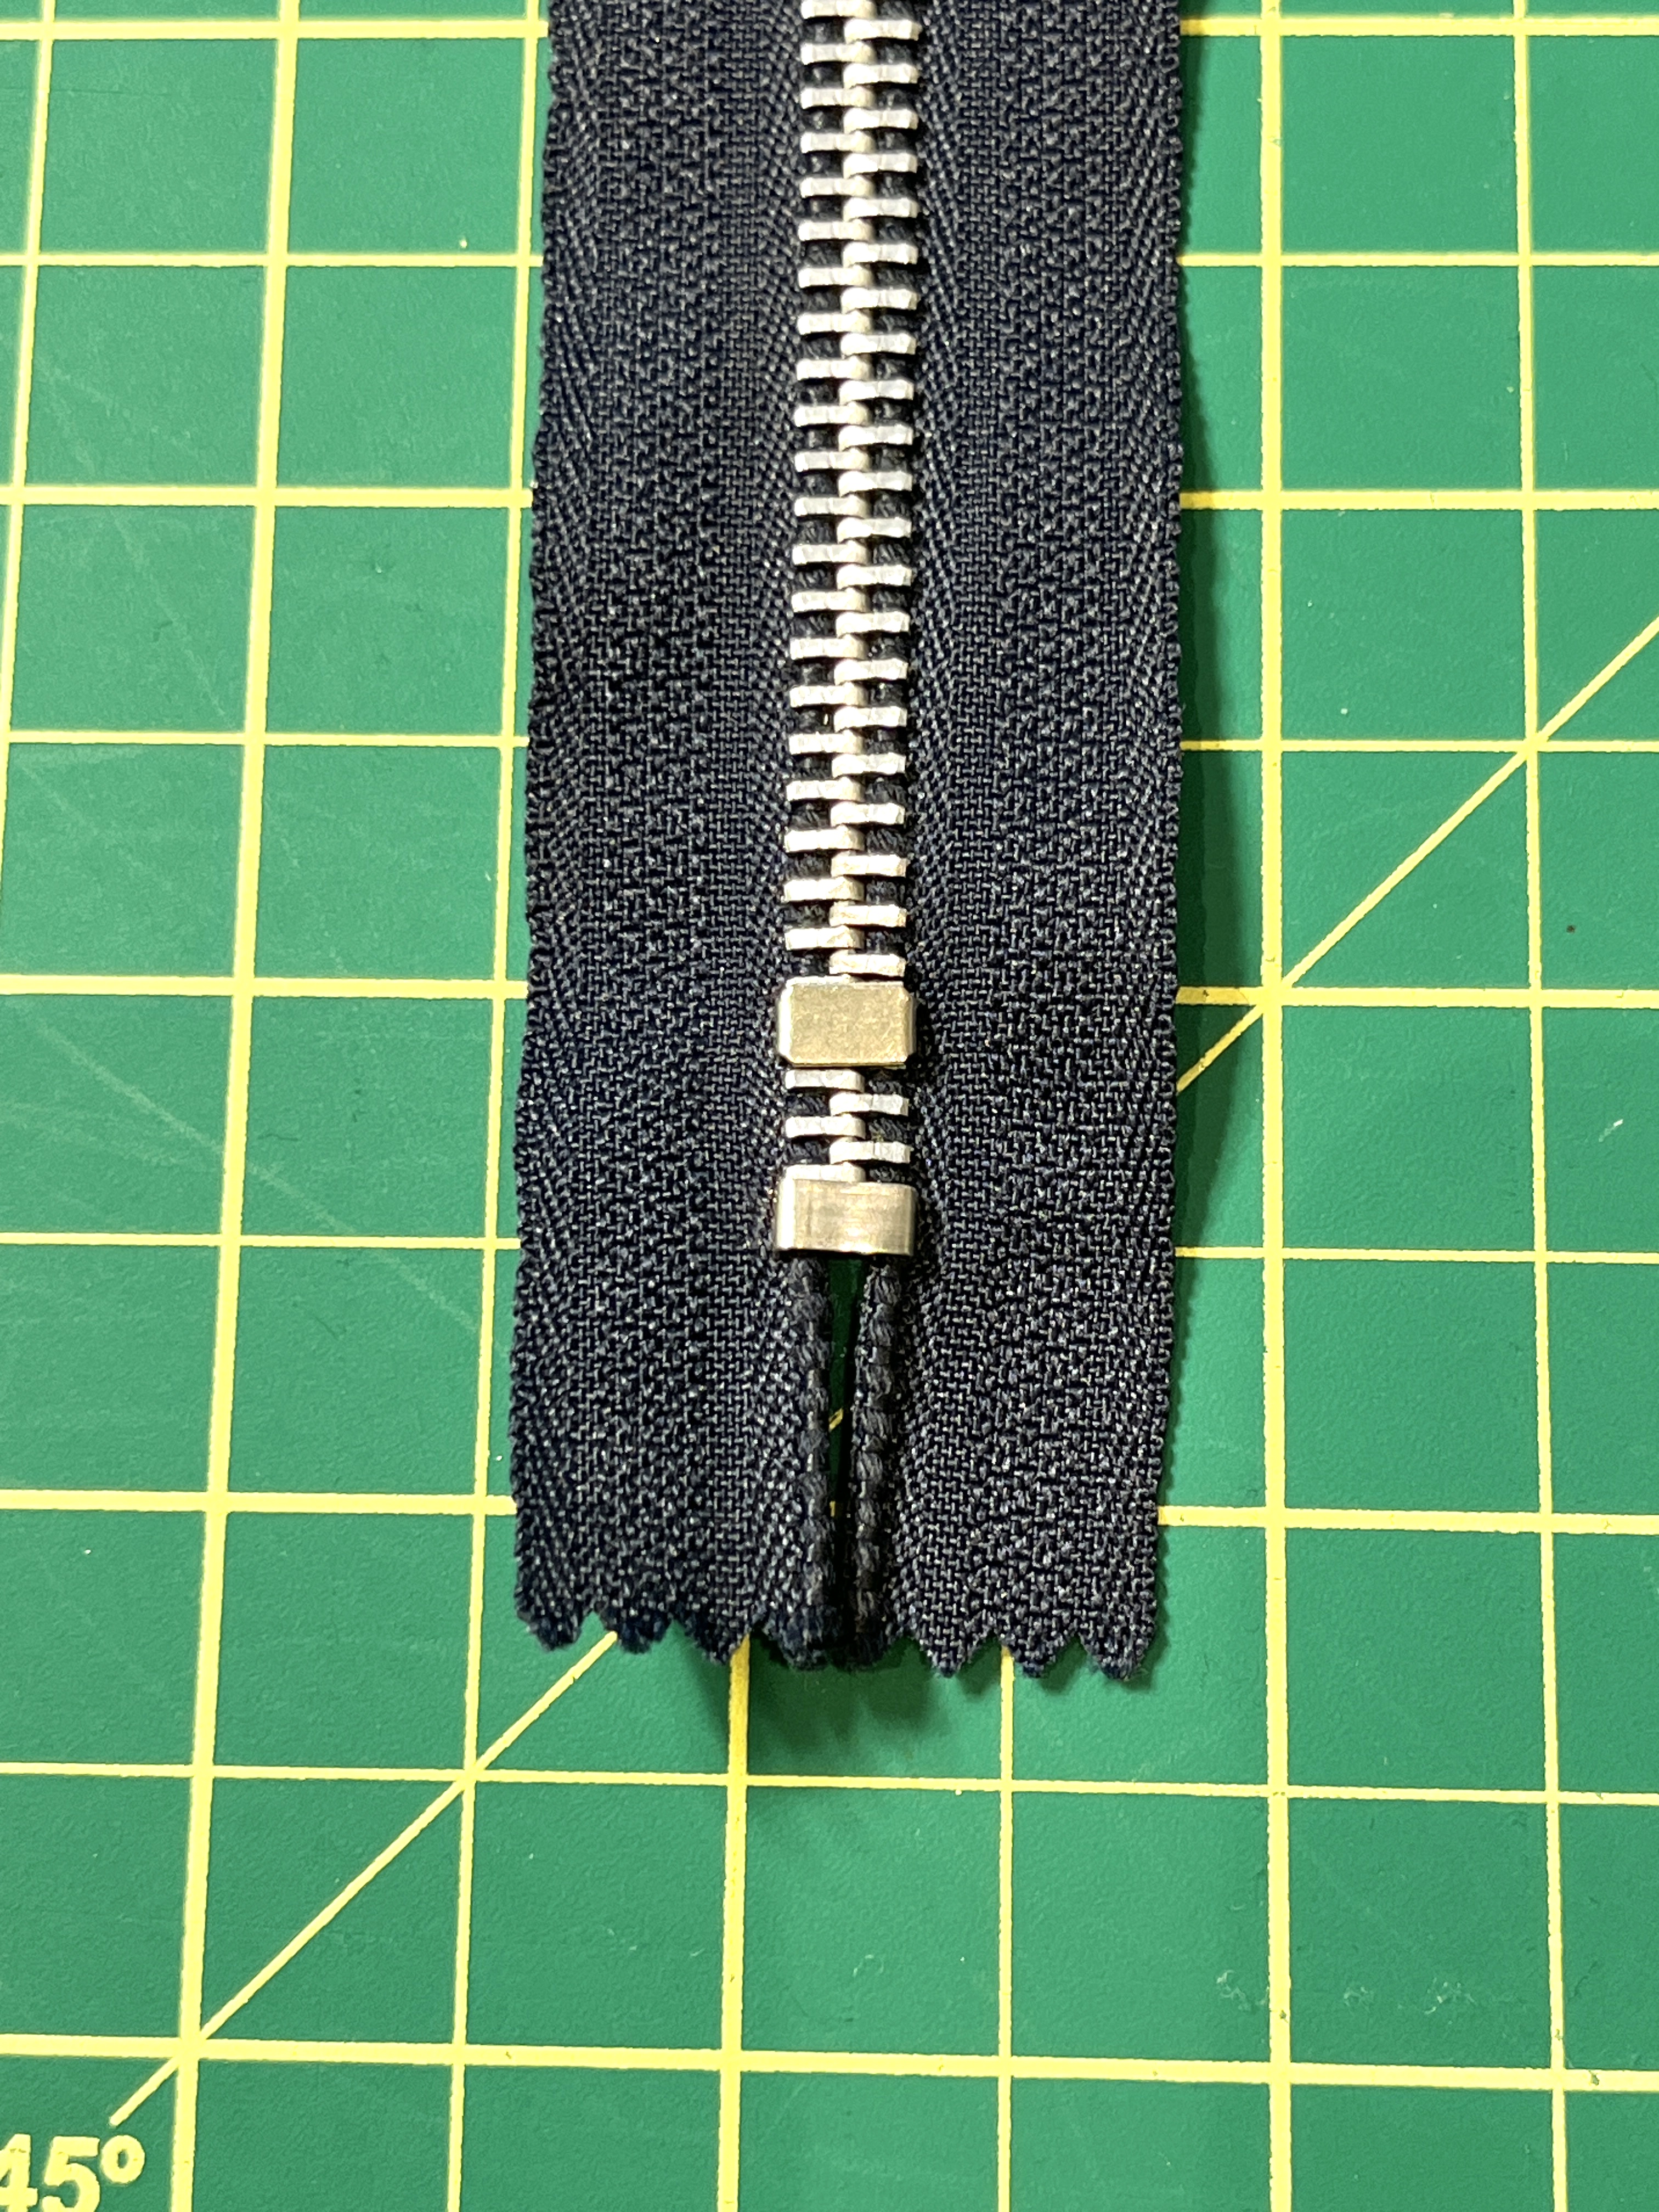
It has happened to all of us. We go to start a project and realize we don’t have the right zipper, and worse yet, the sewing centre is already closed! In some cases, you can shorten a zipper using special replacement pieces. In the end, you can’t tell that its been altered!
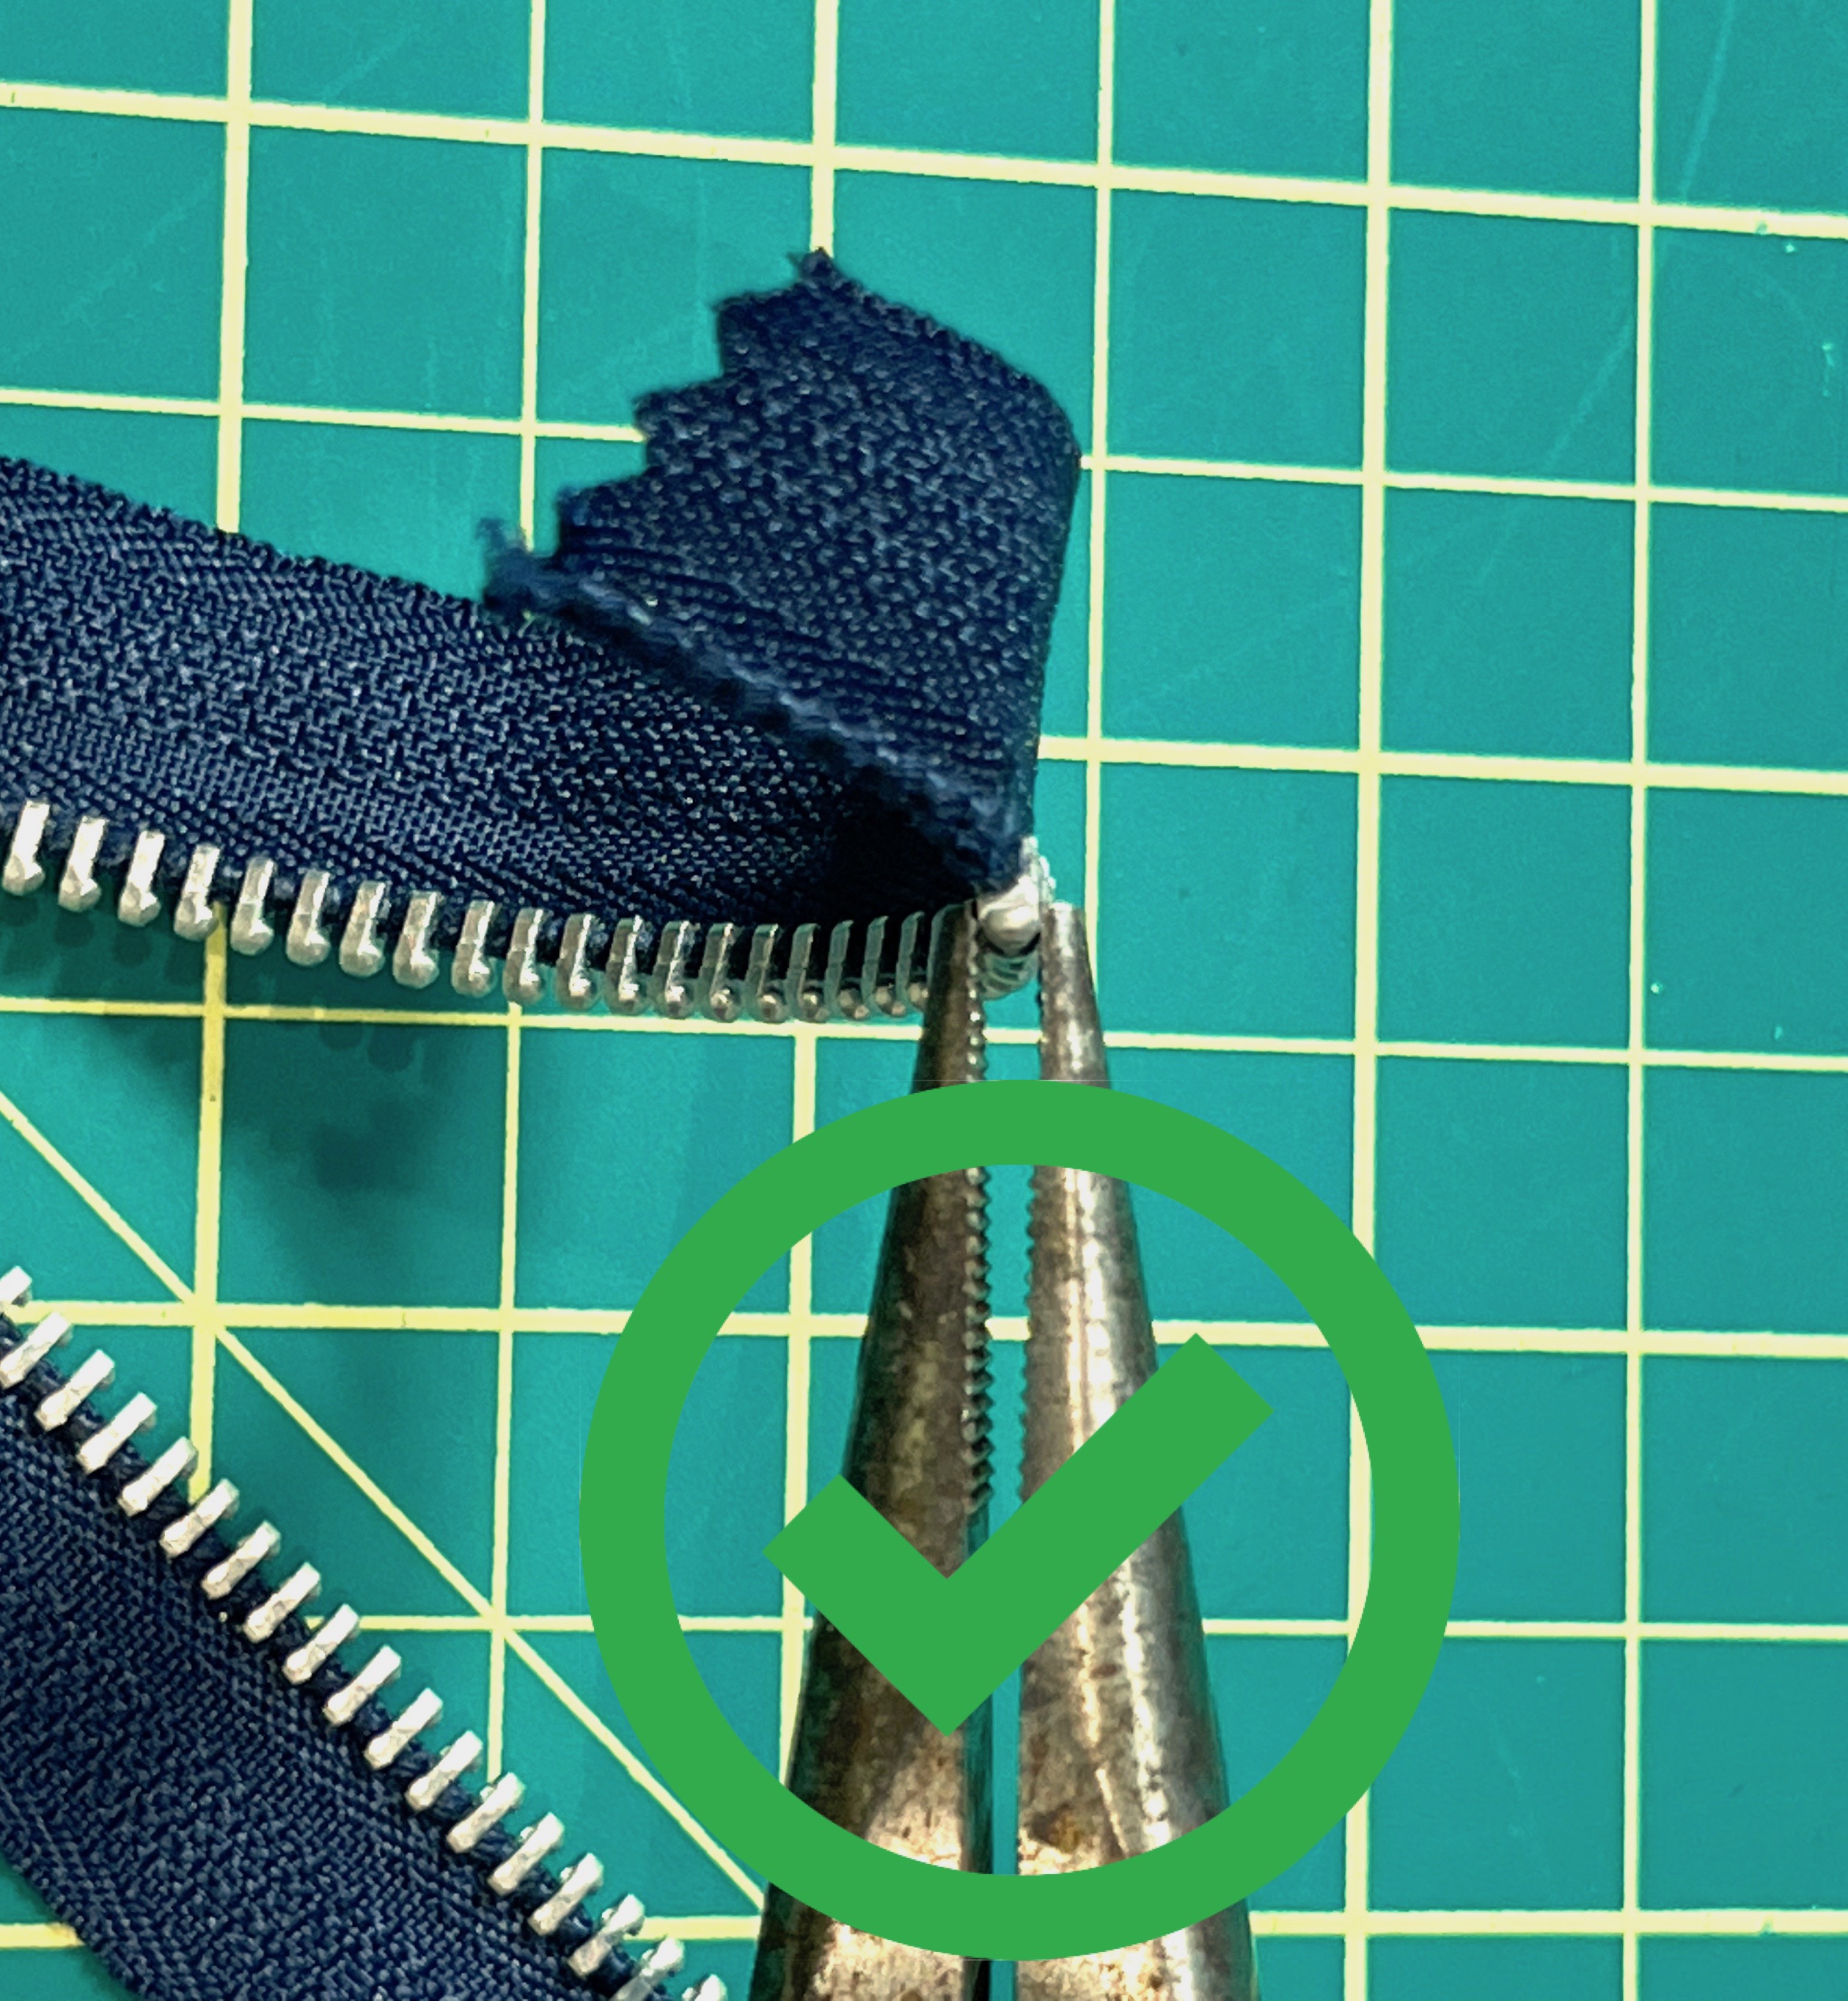
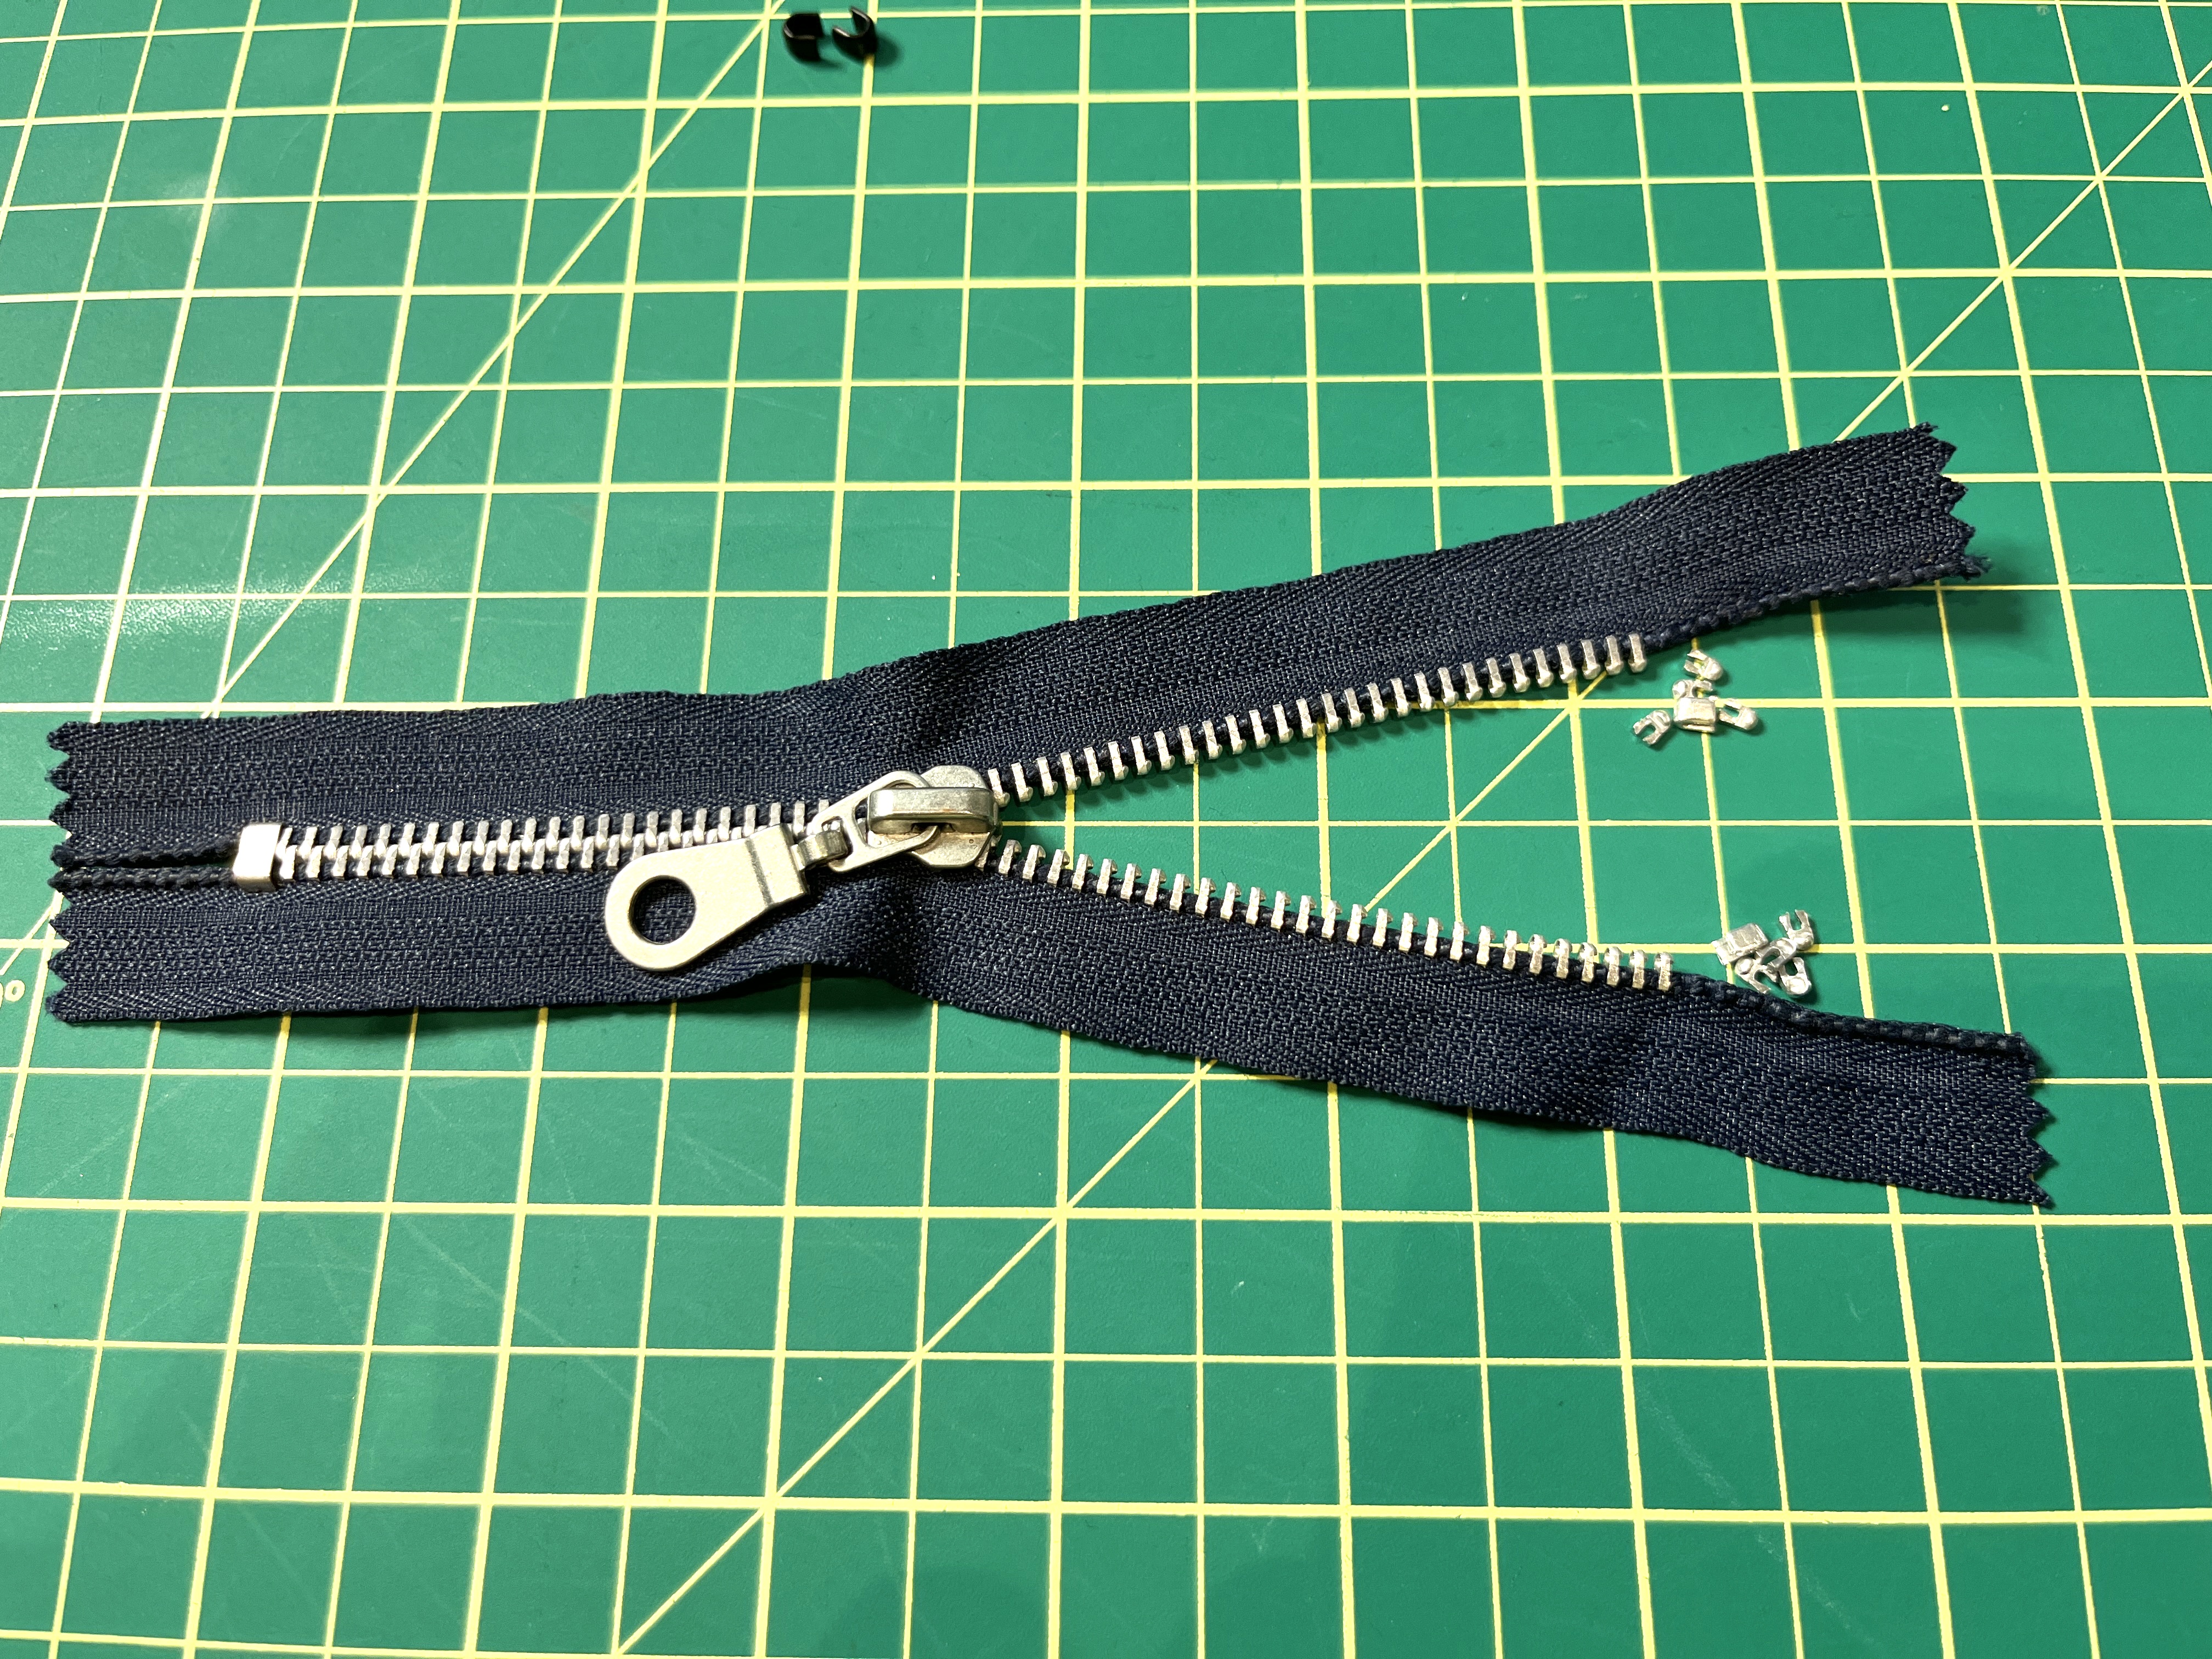
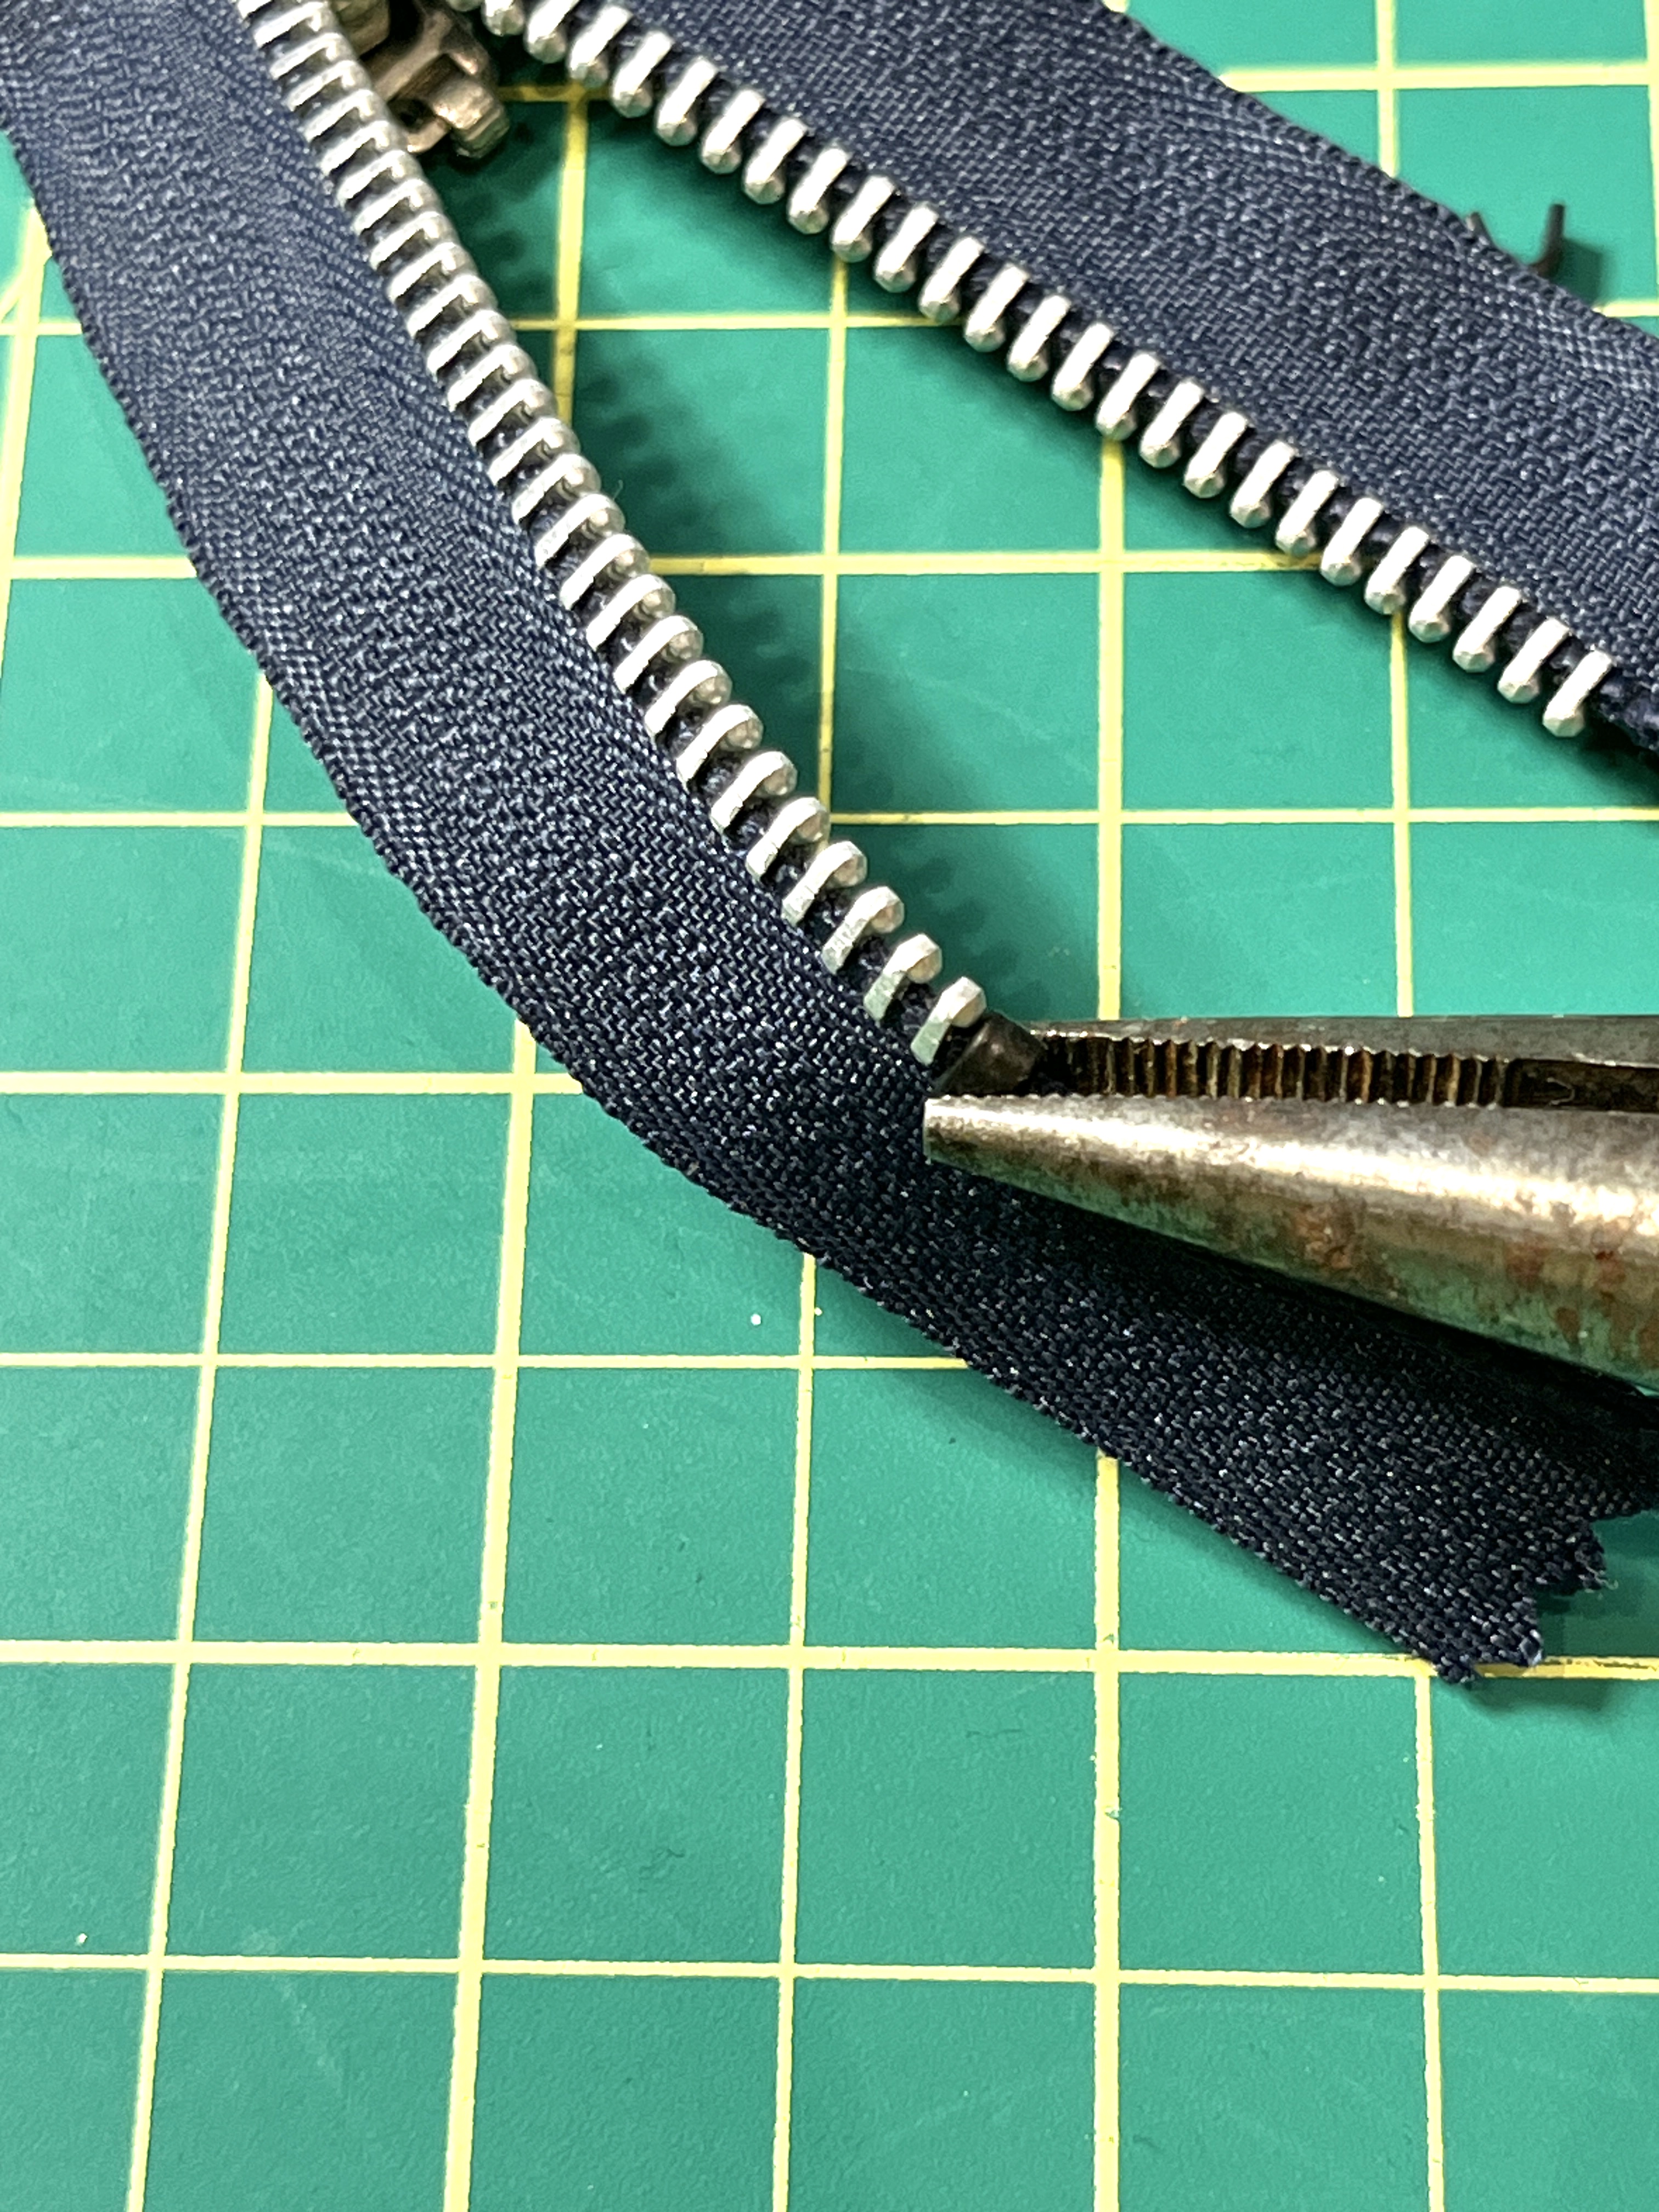
First, we’re going to shorten the zipper from the open end. We will be using needle nose pliers, and zipper stops (little black pieces). Most sewing centres have zipper stops in stock, they might be behind the counter in a little bag, you just have to ask for them!
Step 1: Removing the teeth
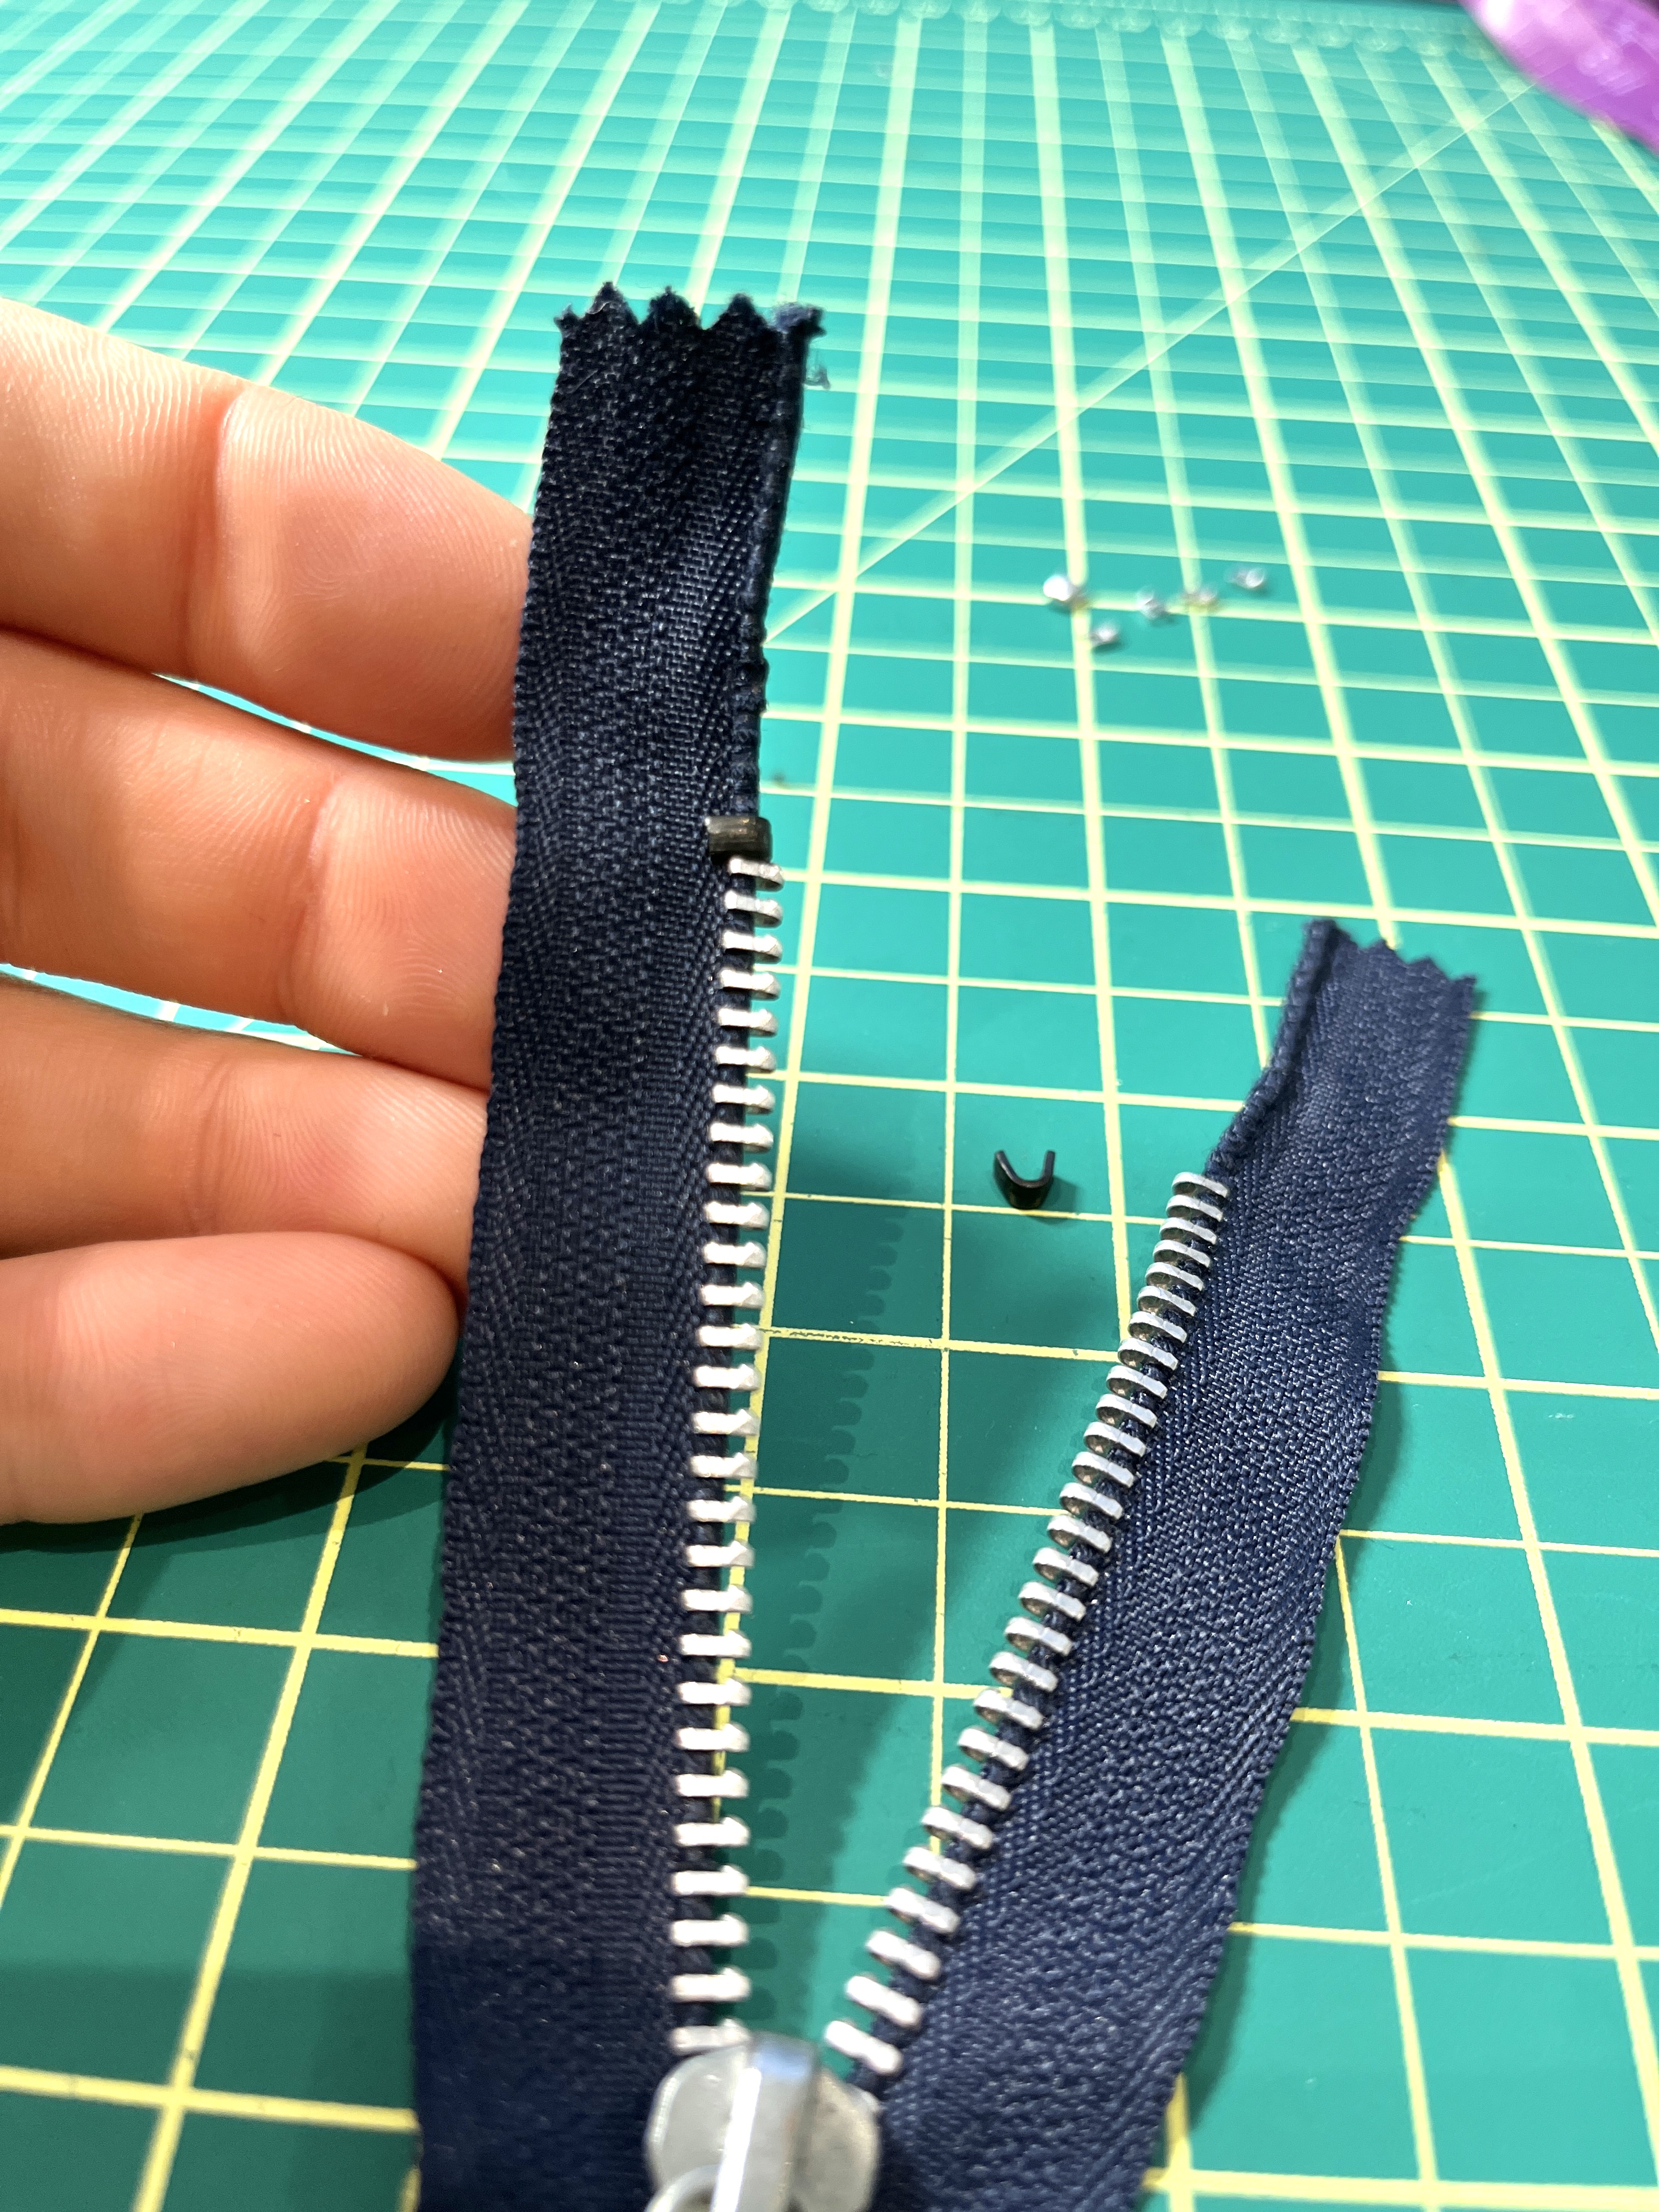
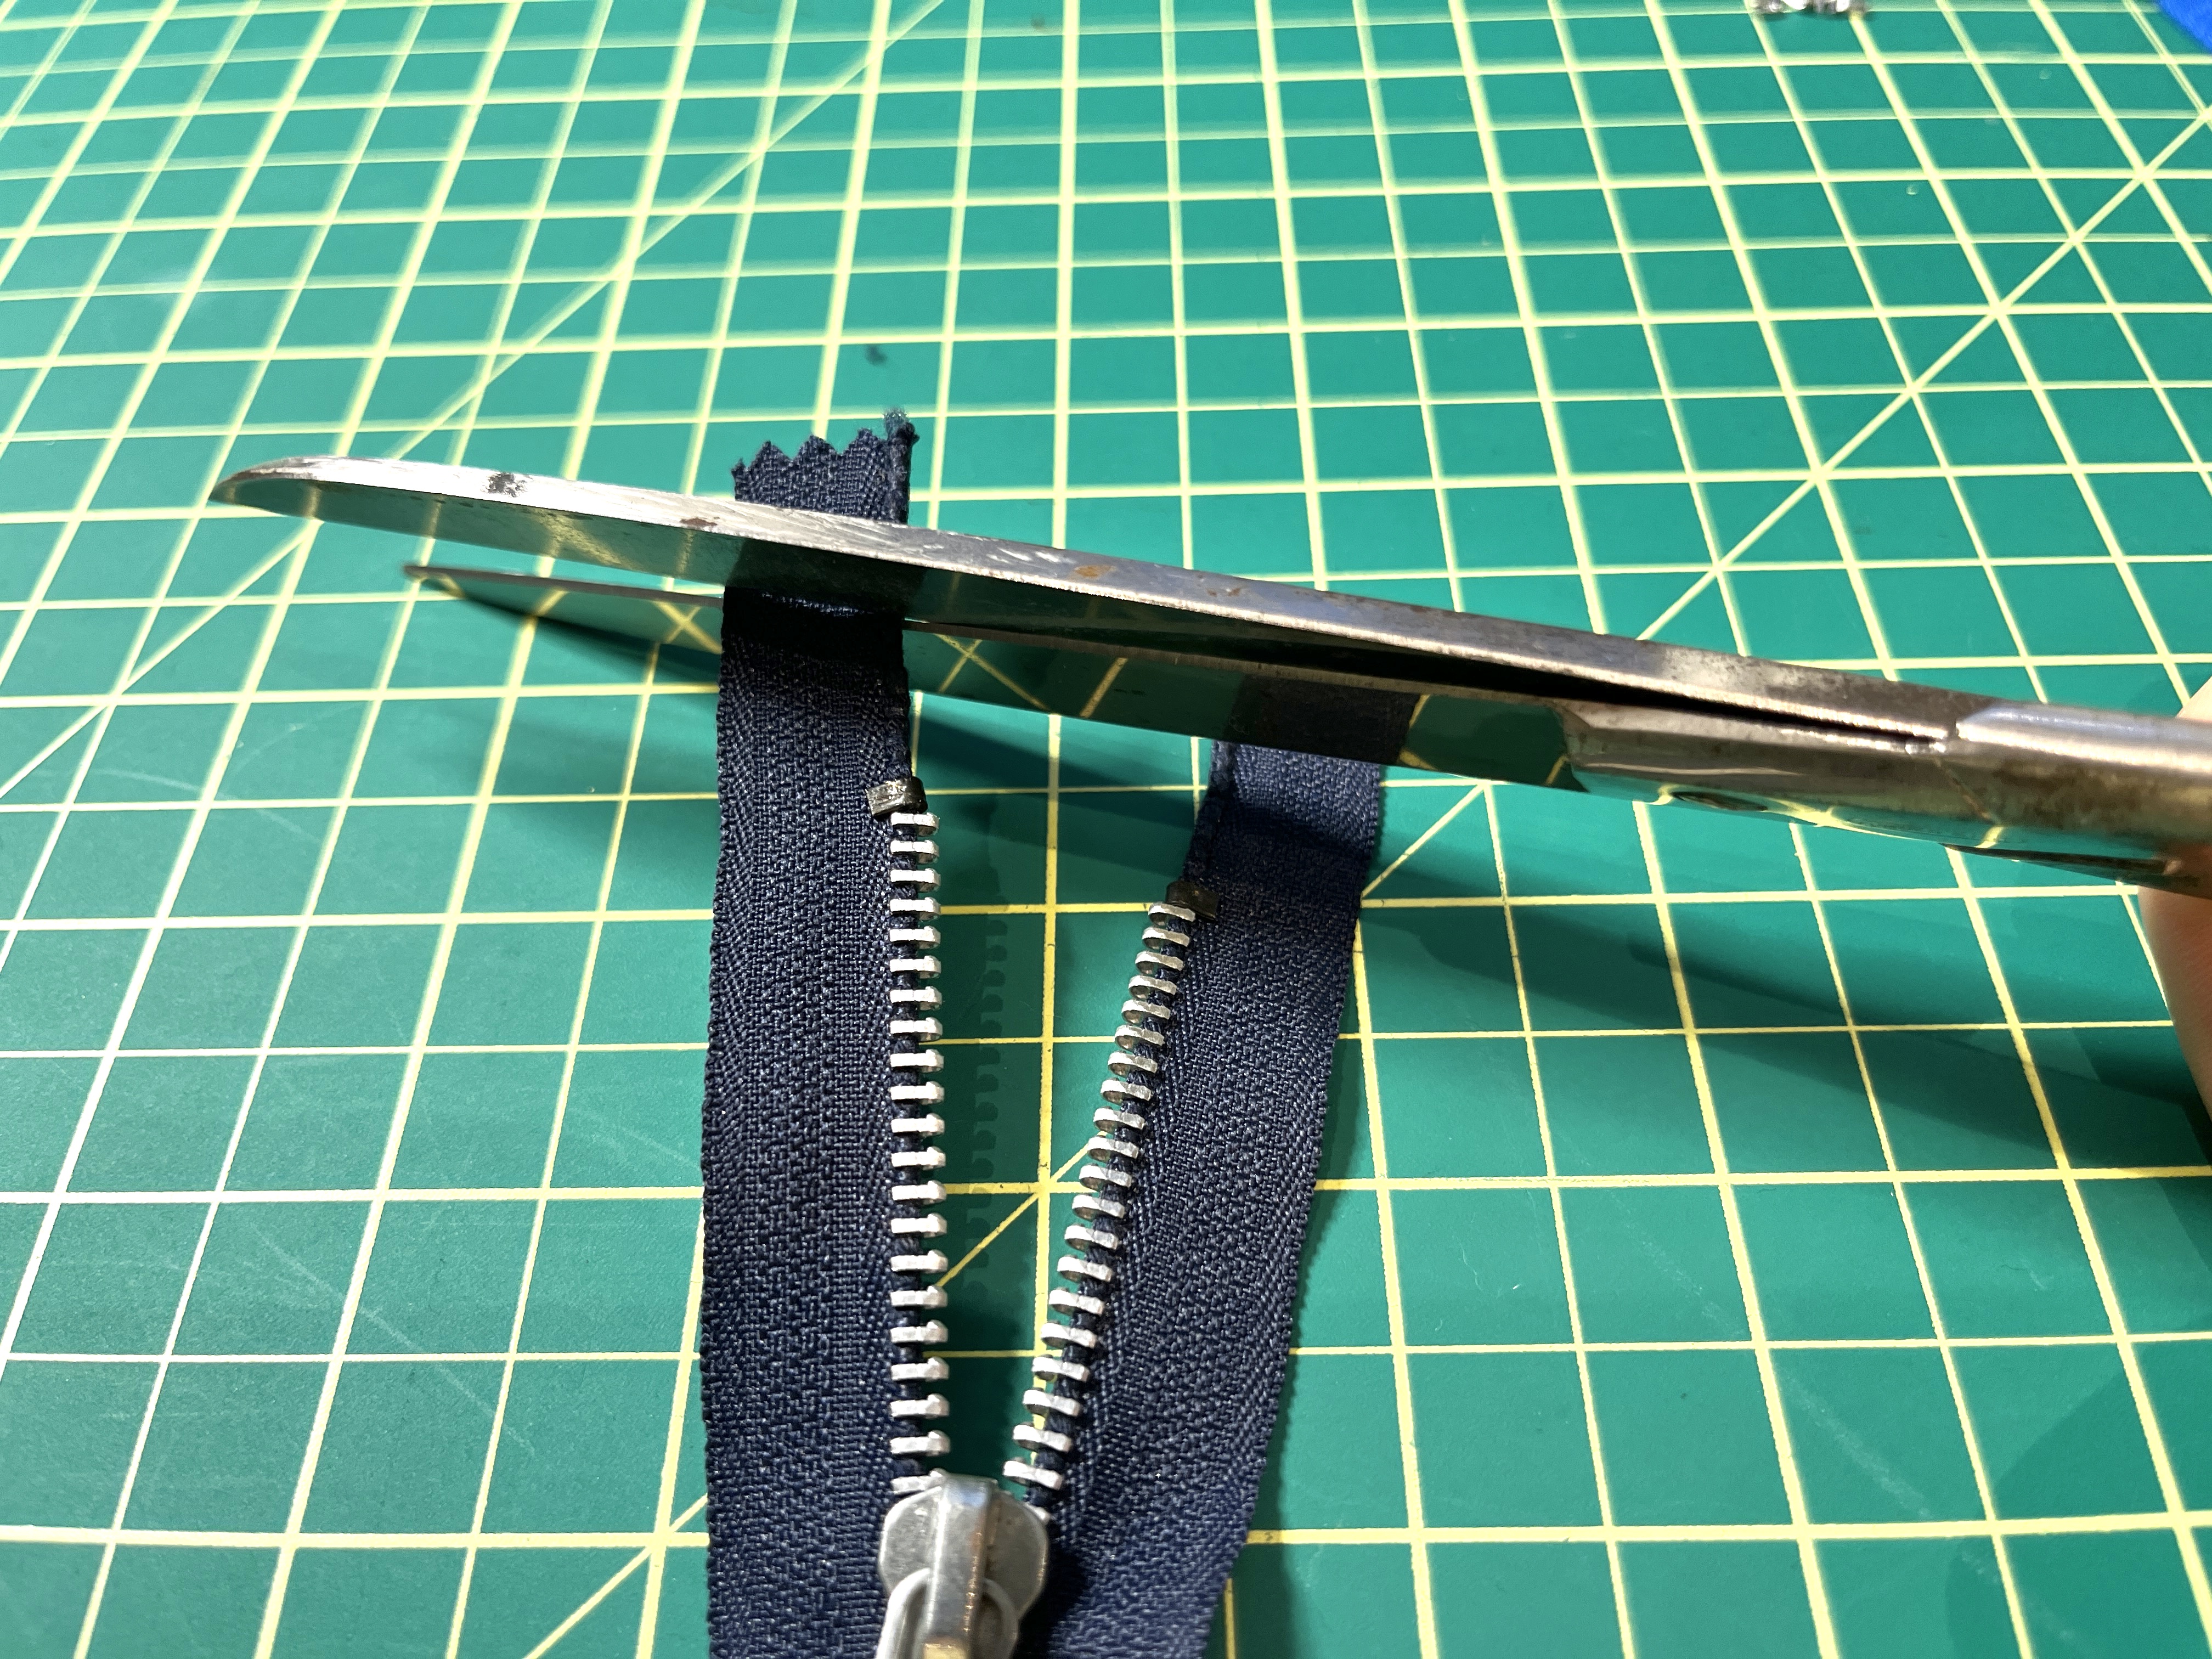
Using needle nose pliers, pry off the top stopper and as many teeth needed until the desired zipper length is achieved. Note: the tip of the pliers should only squeeze on the edge of the teeth. if you grip the entire tooth, it will be much more difficult to remove.
In this case I removed the top stopper and 4 zipper teeth, then repeated on the other side.
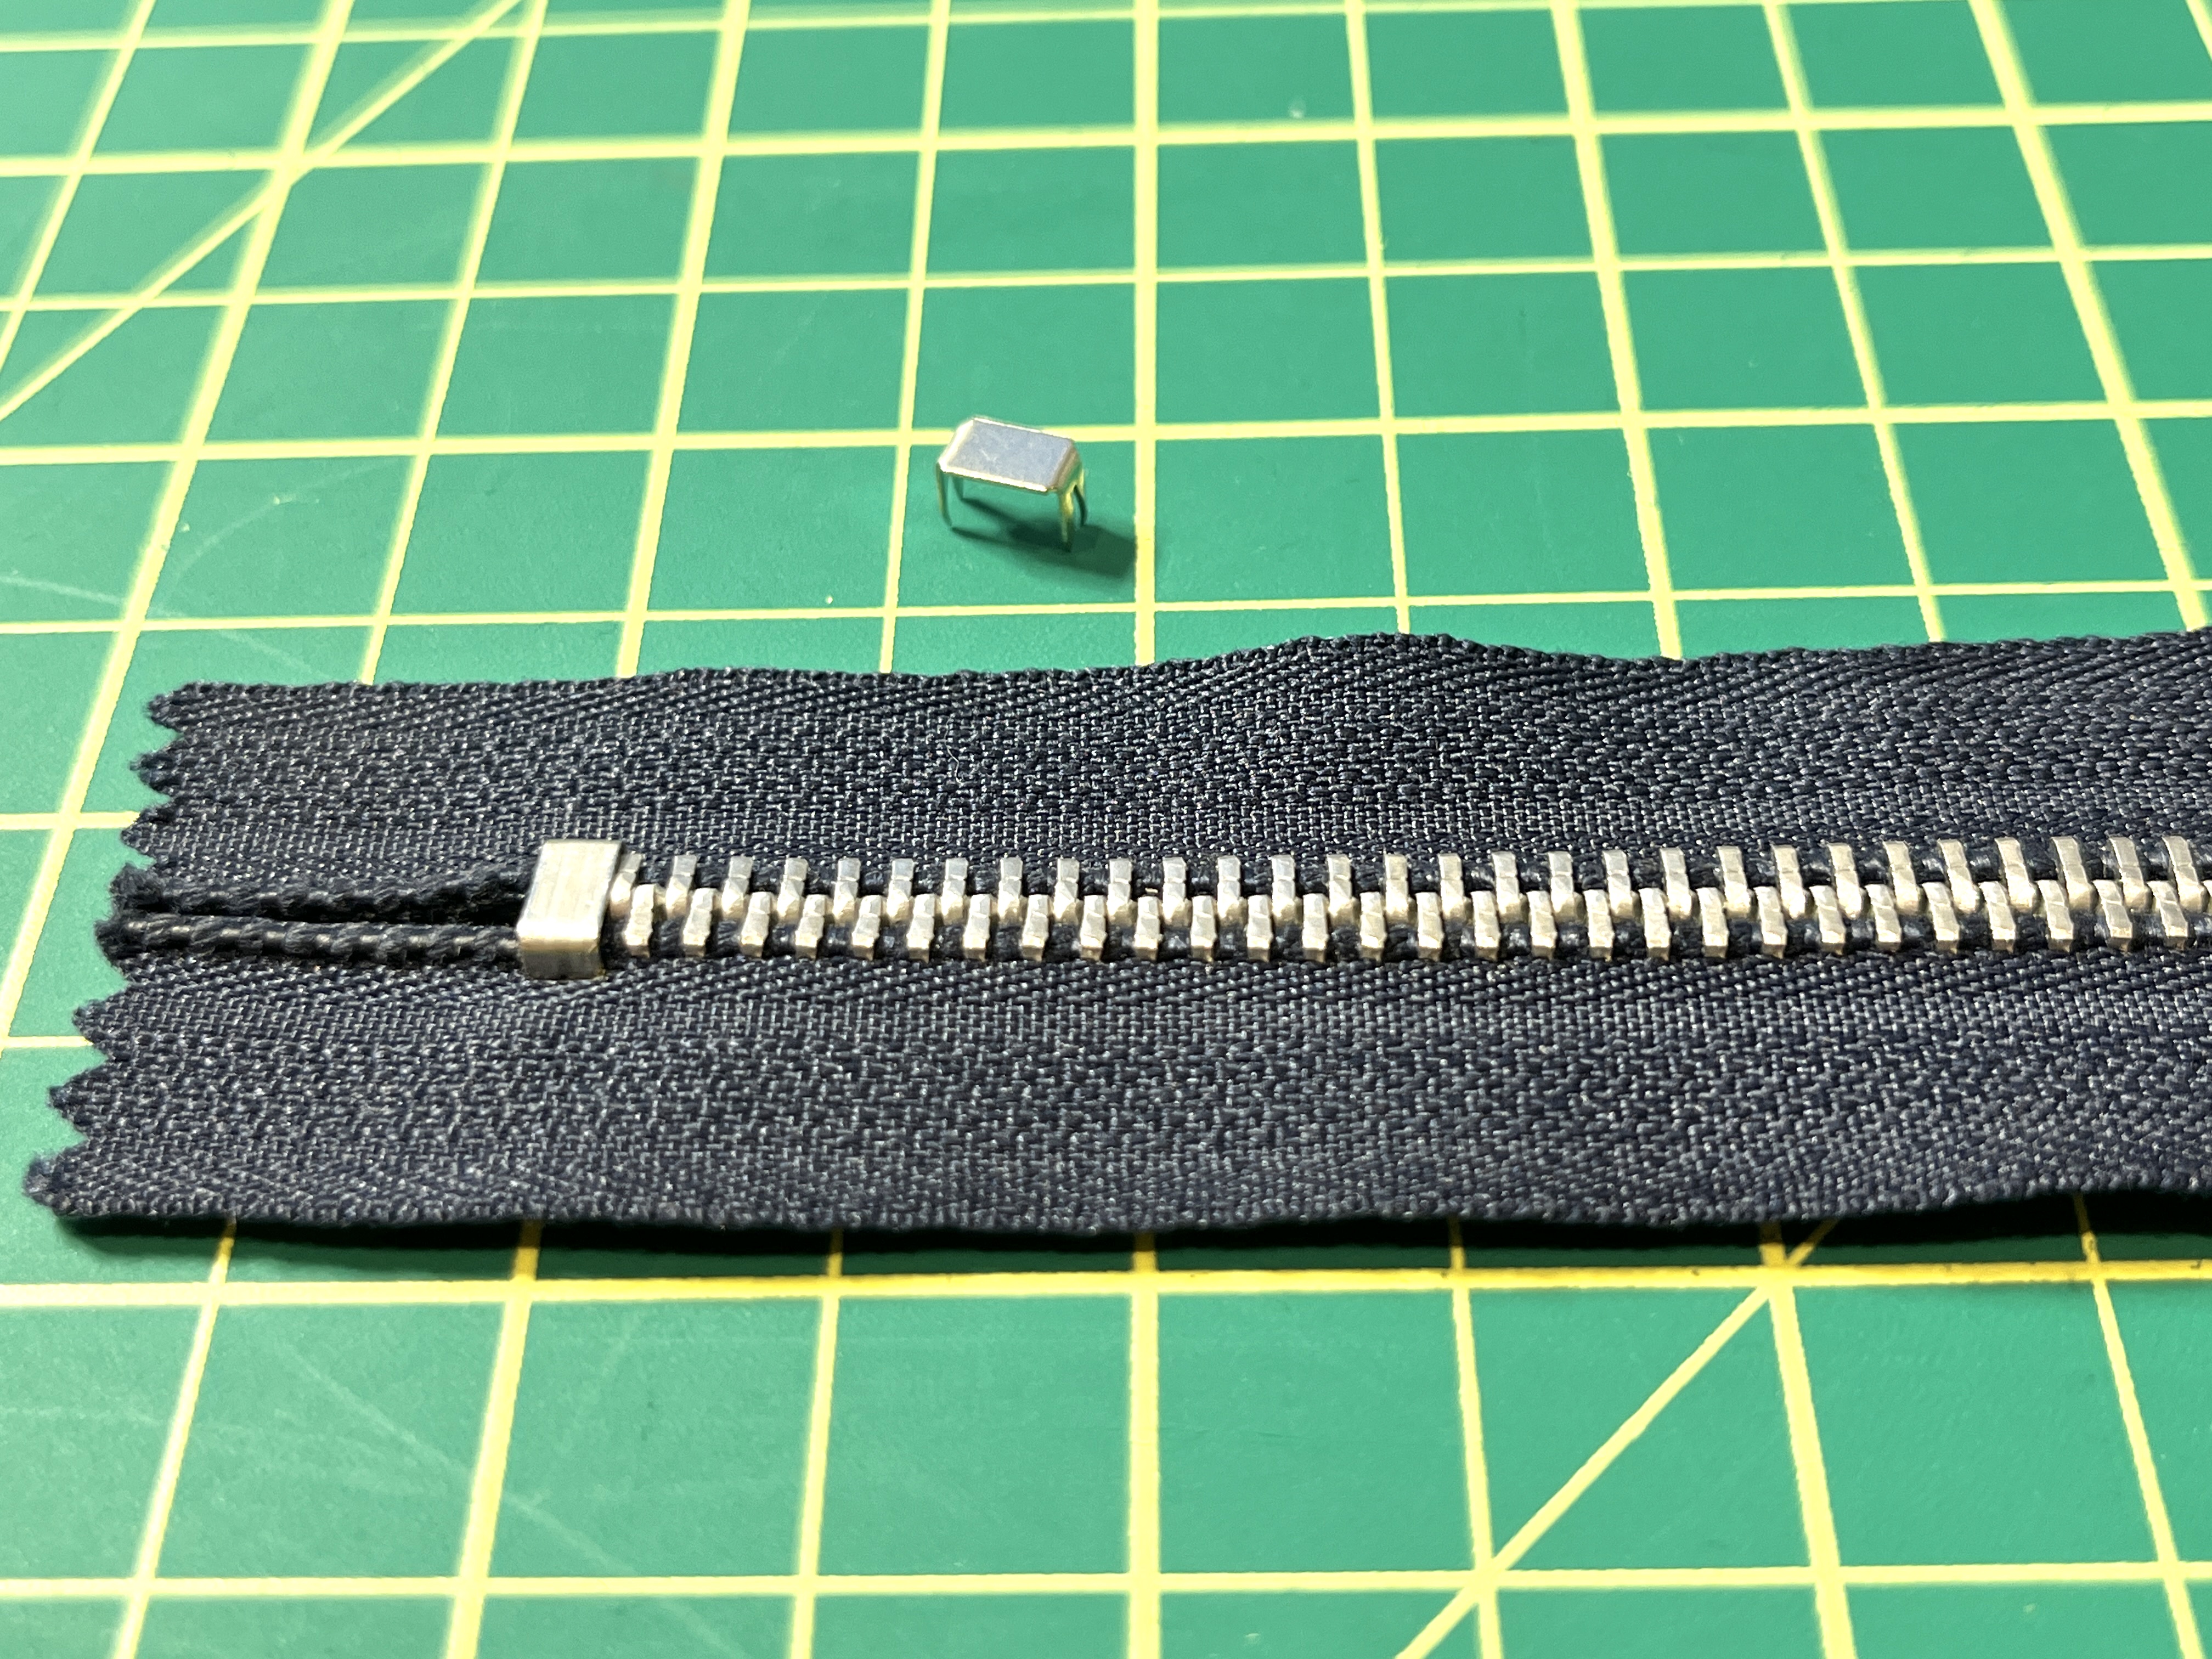
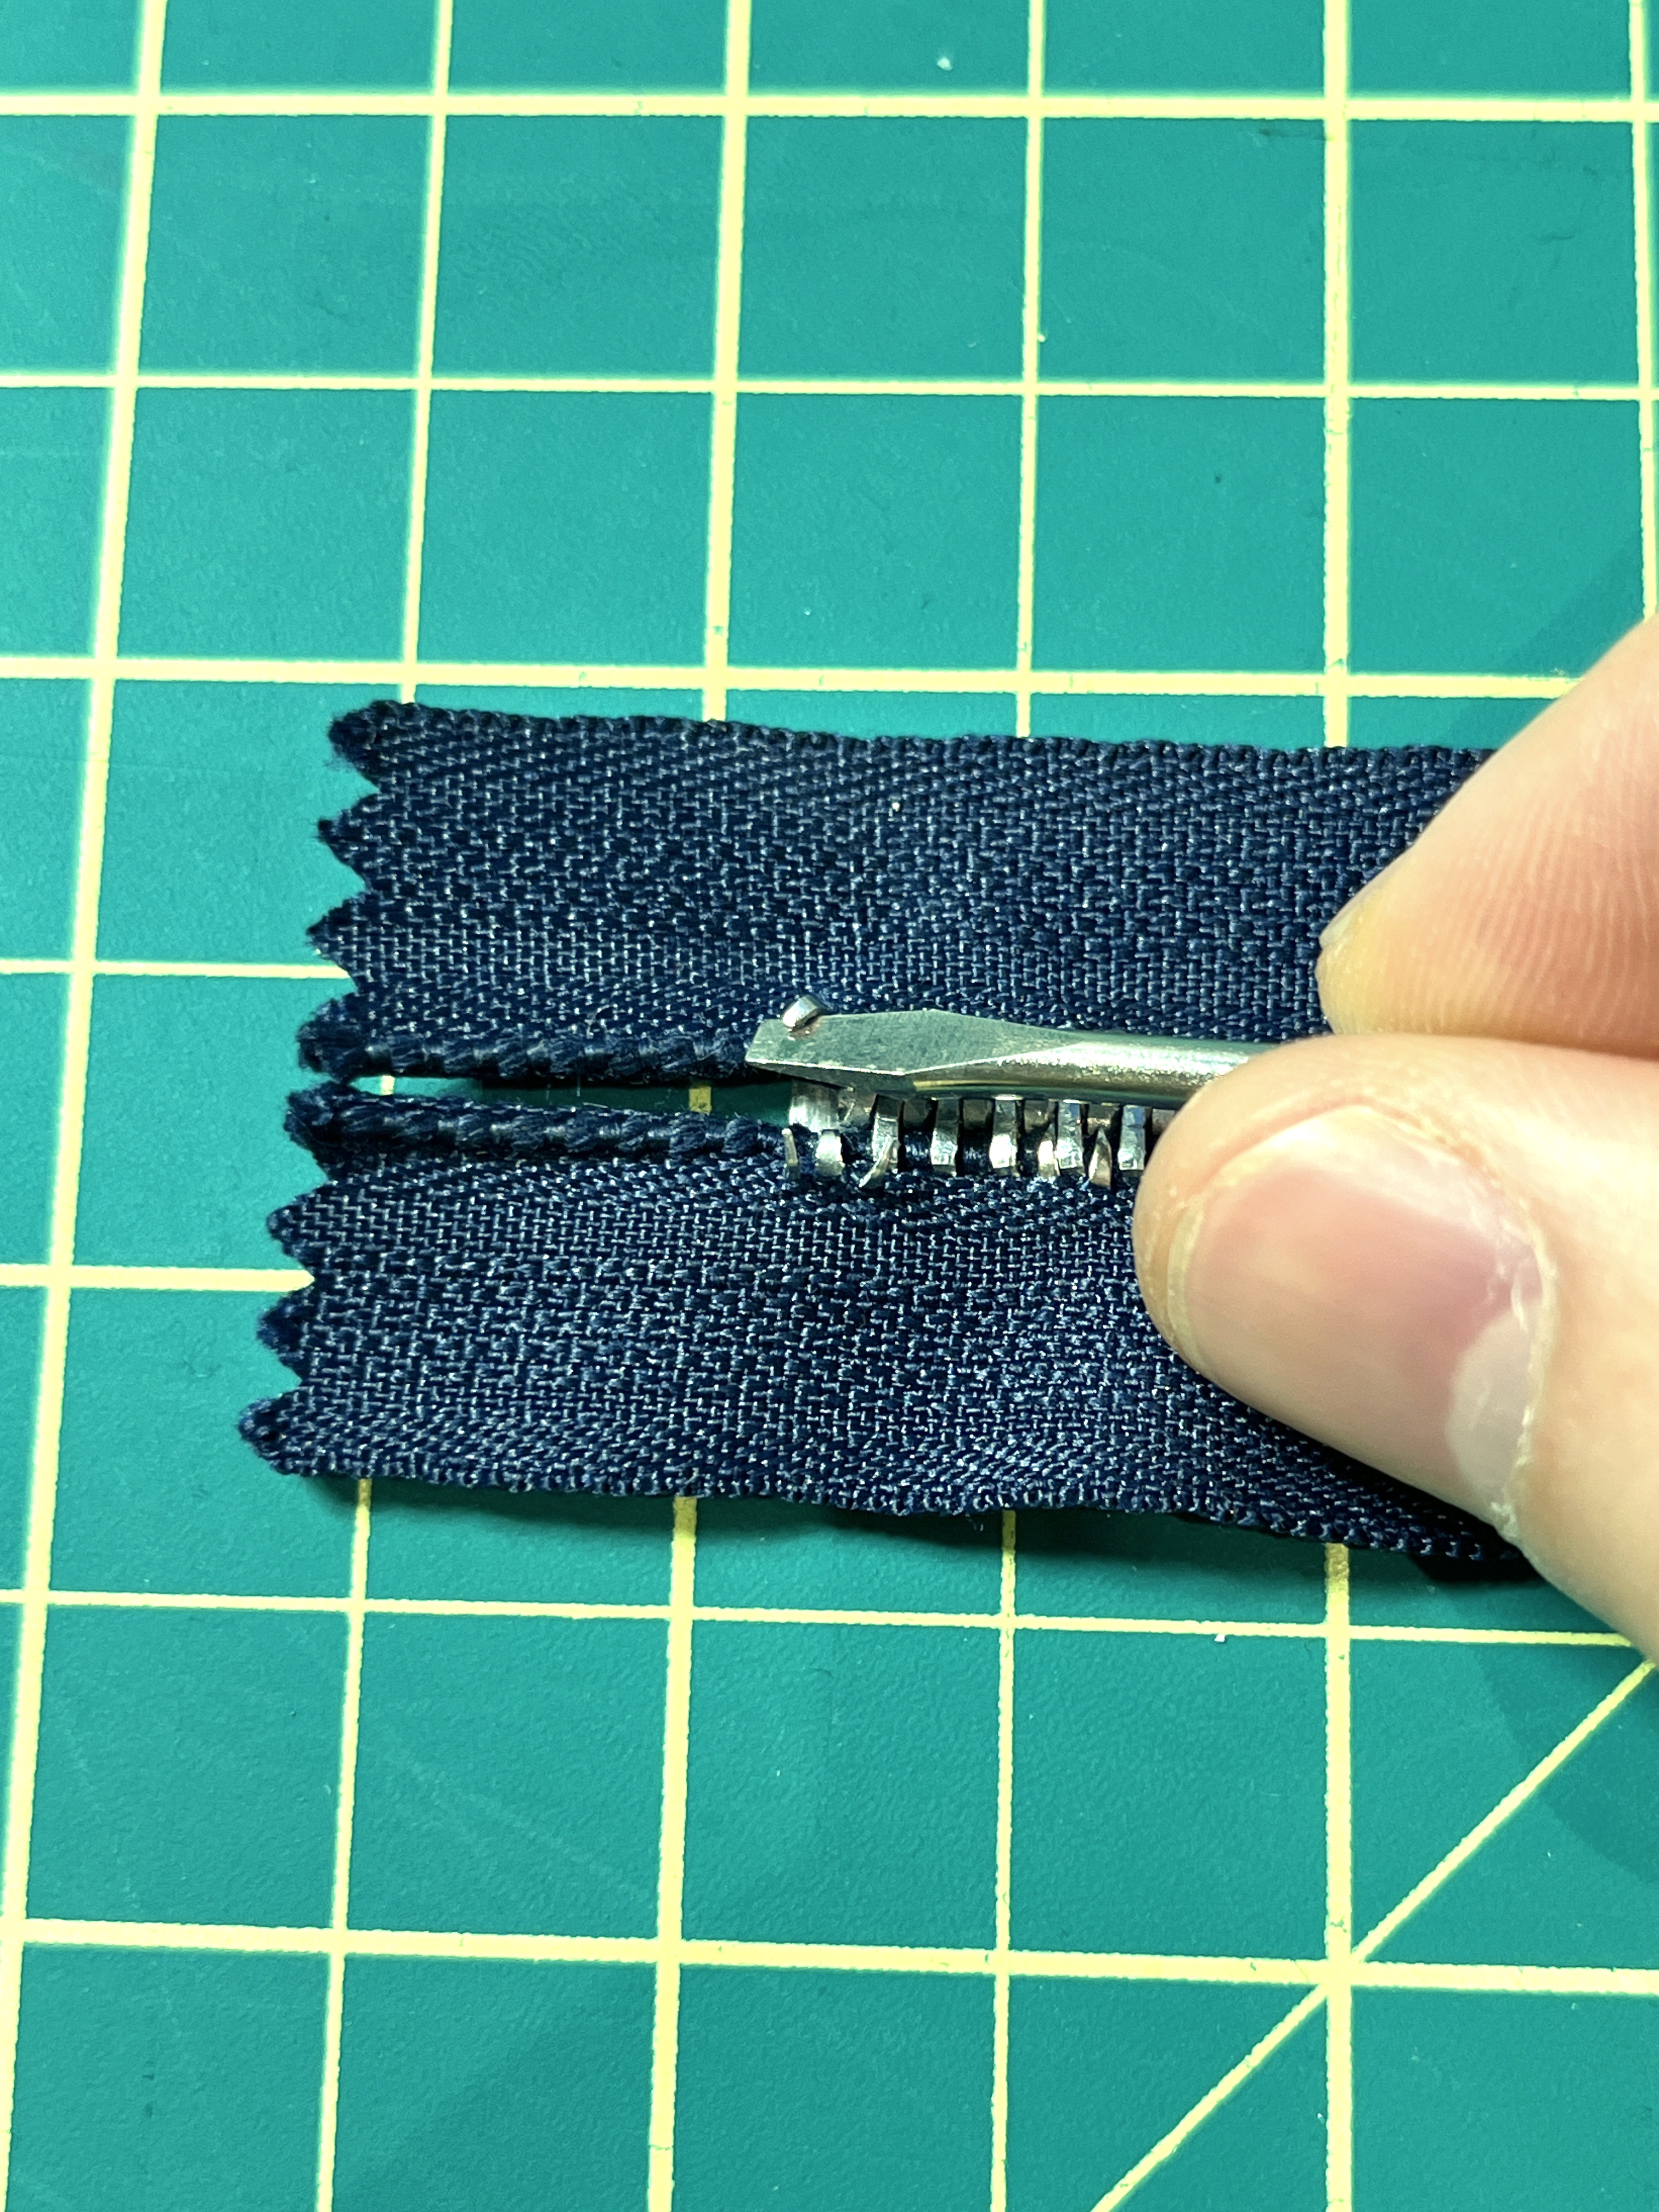
Step 2: Installing the new stoppers
Now comes the fun part! Simply slip the new stopper over the zipper tape and clamp them into place with the pliers. The stoppers I’m using are black, but you can find them in different colours to match your zipper teeth.
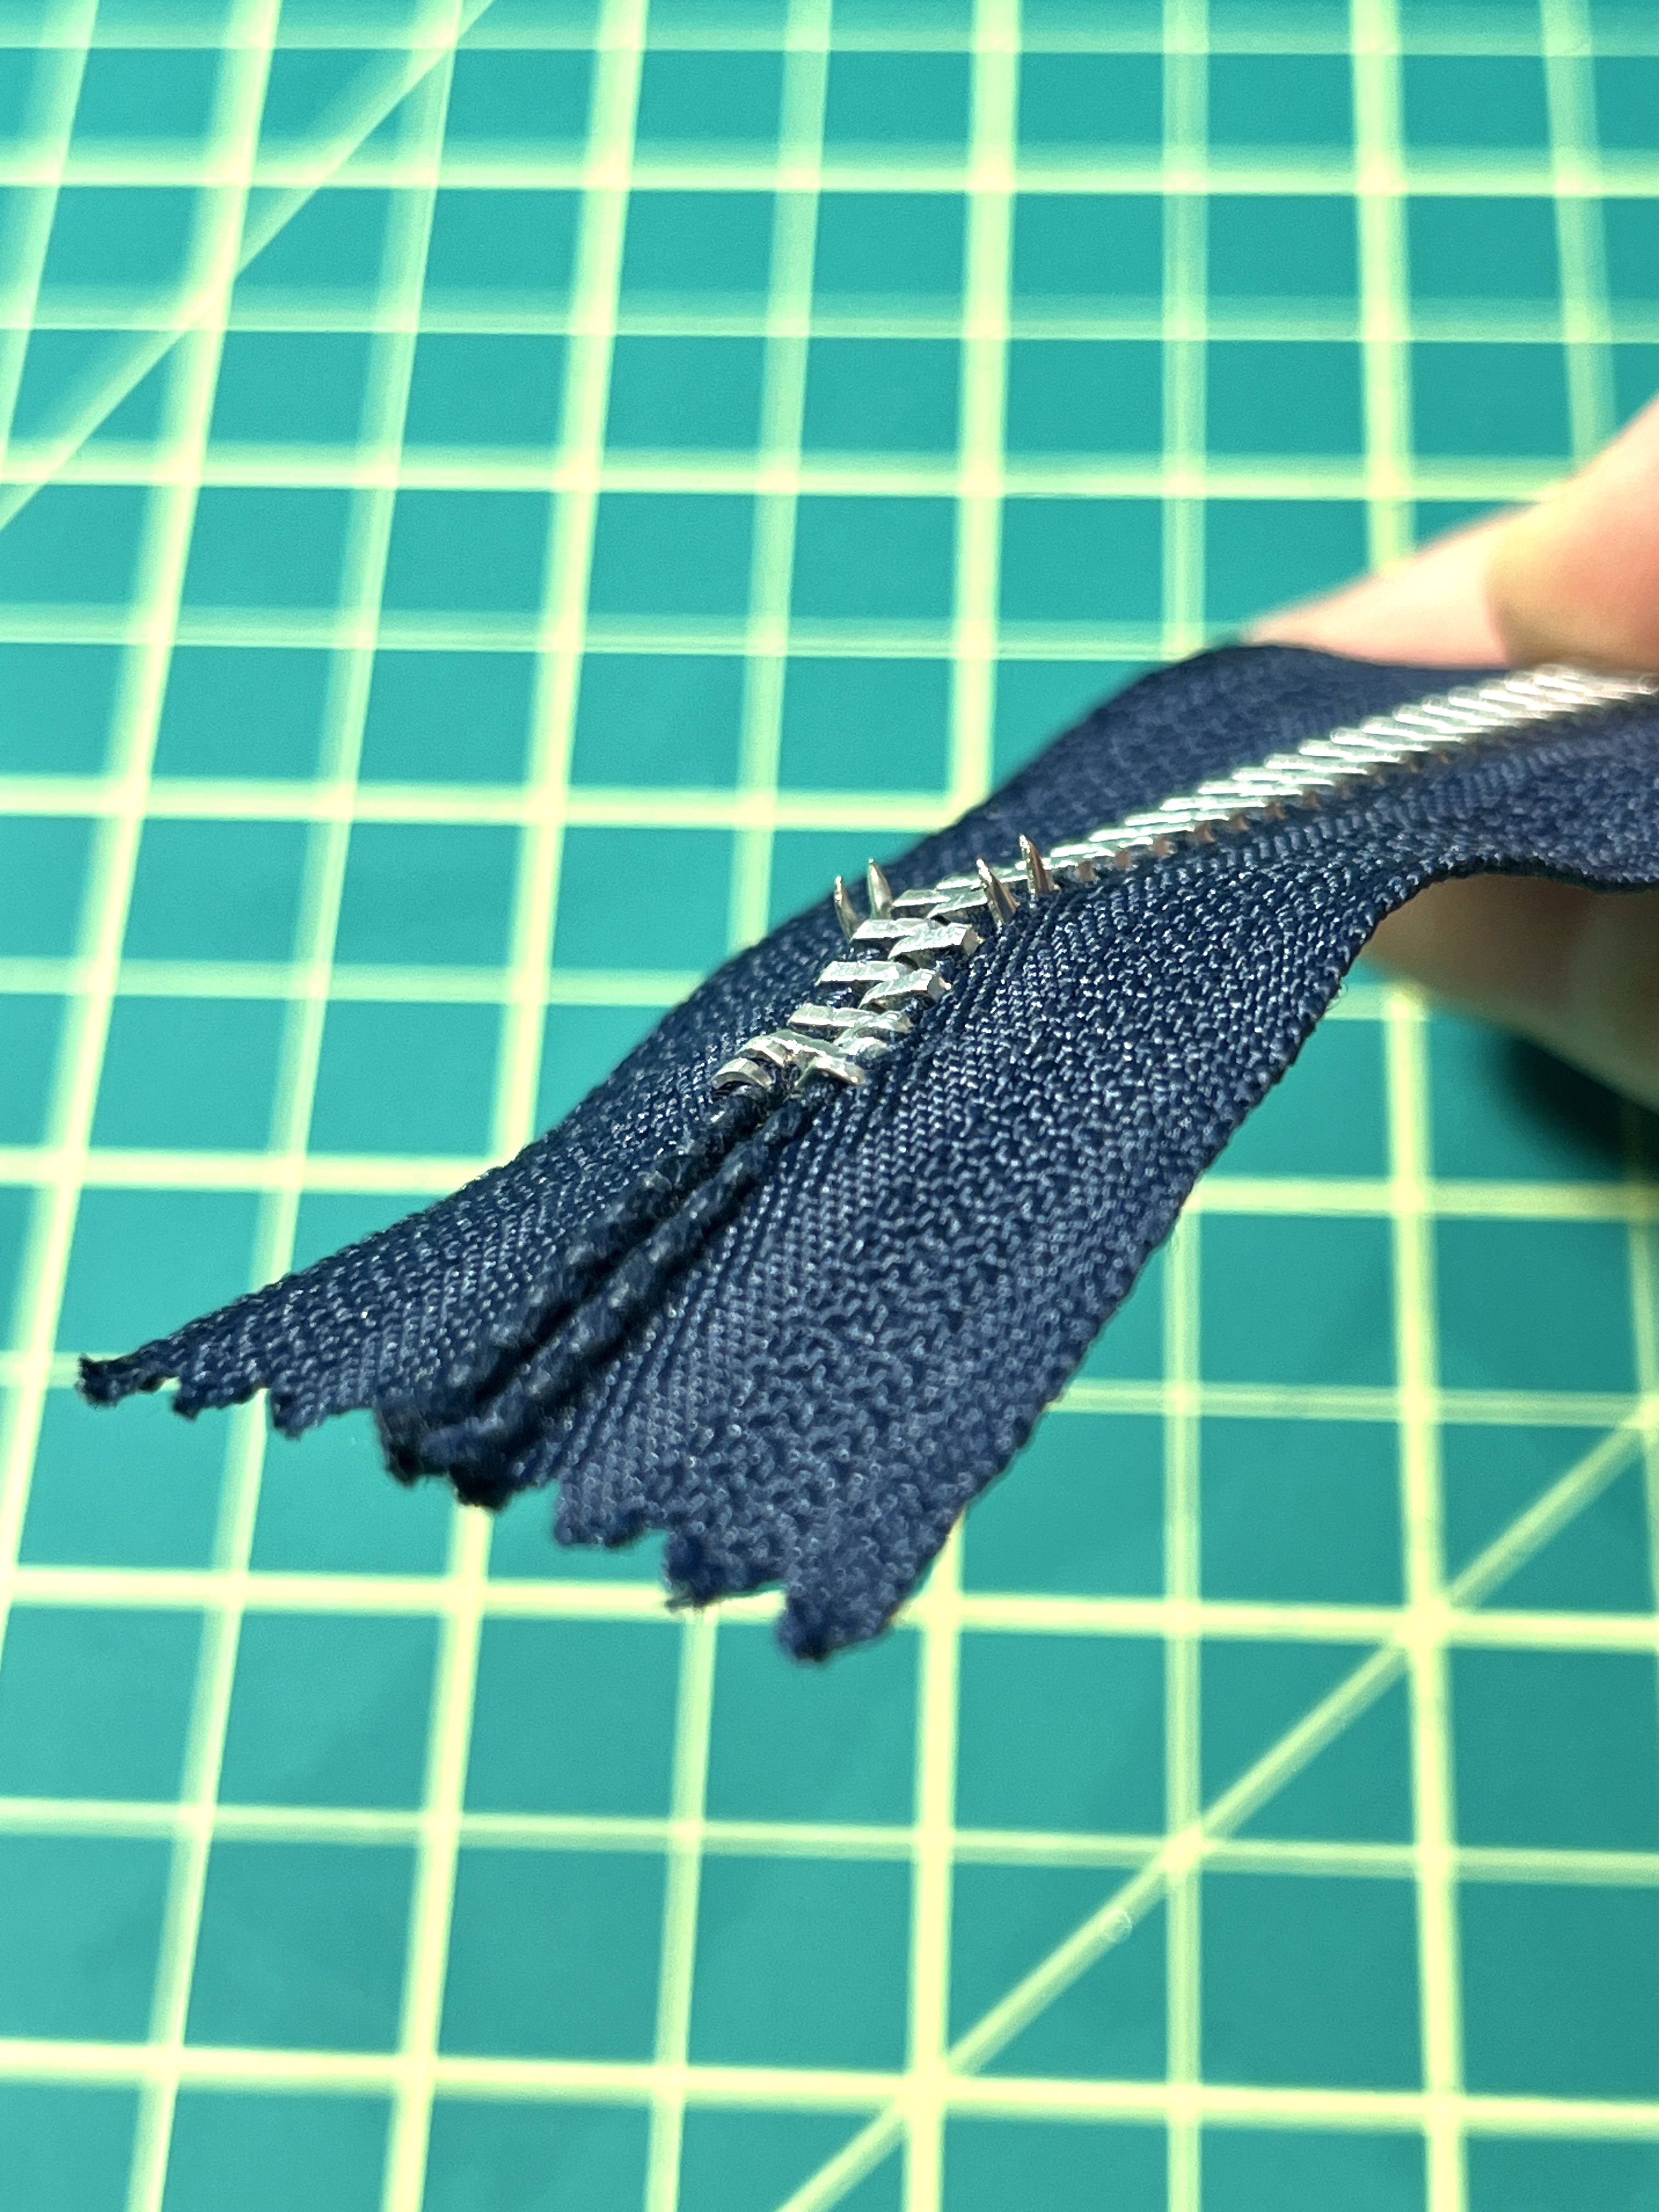
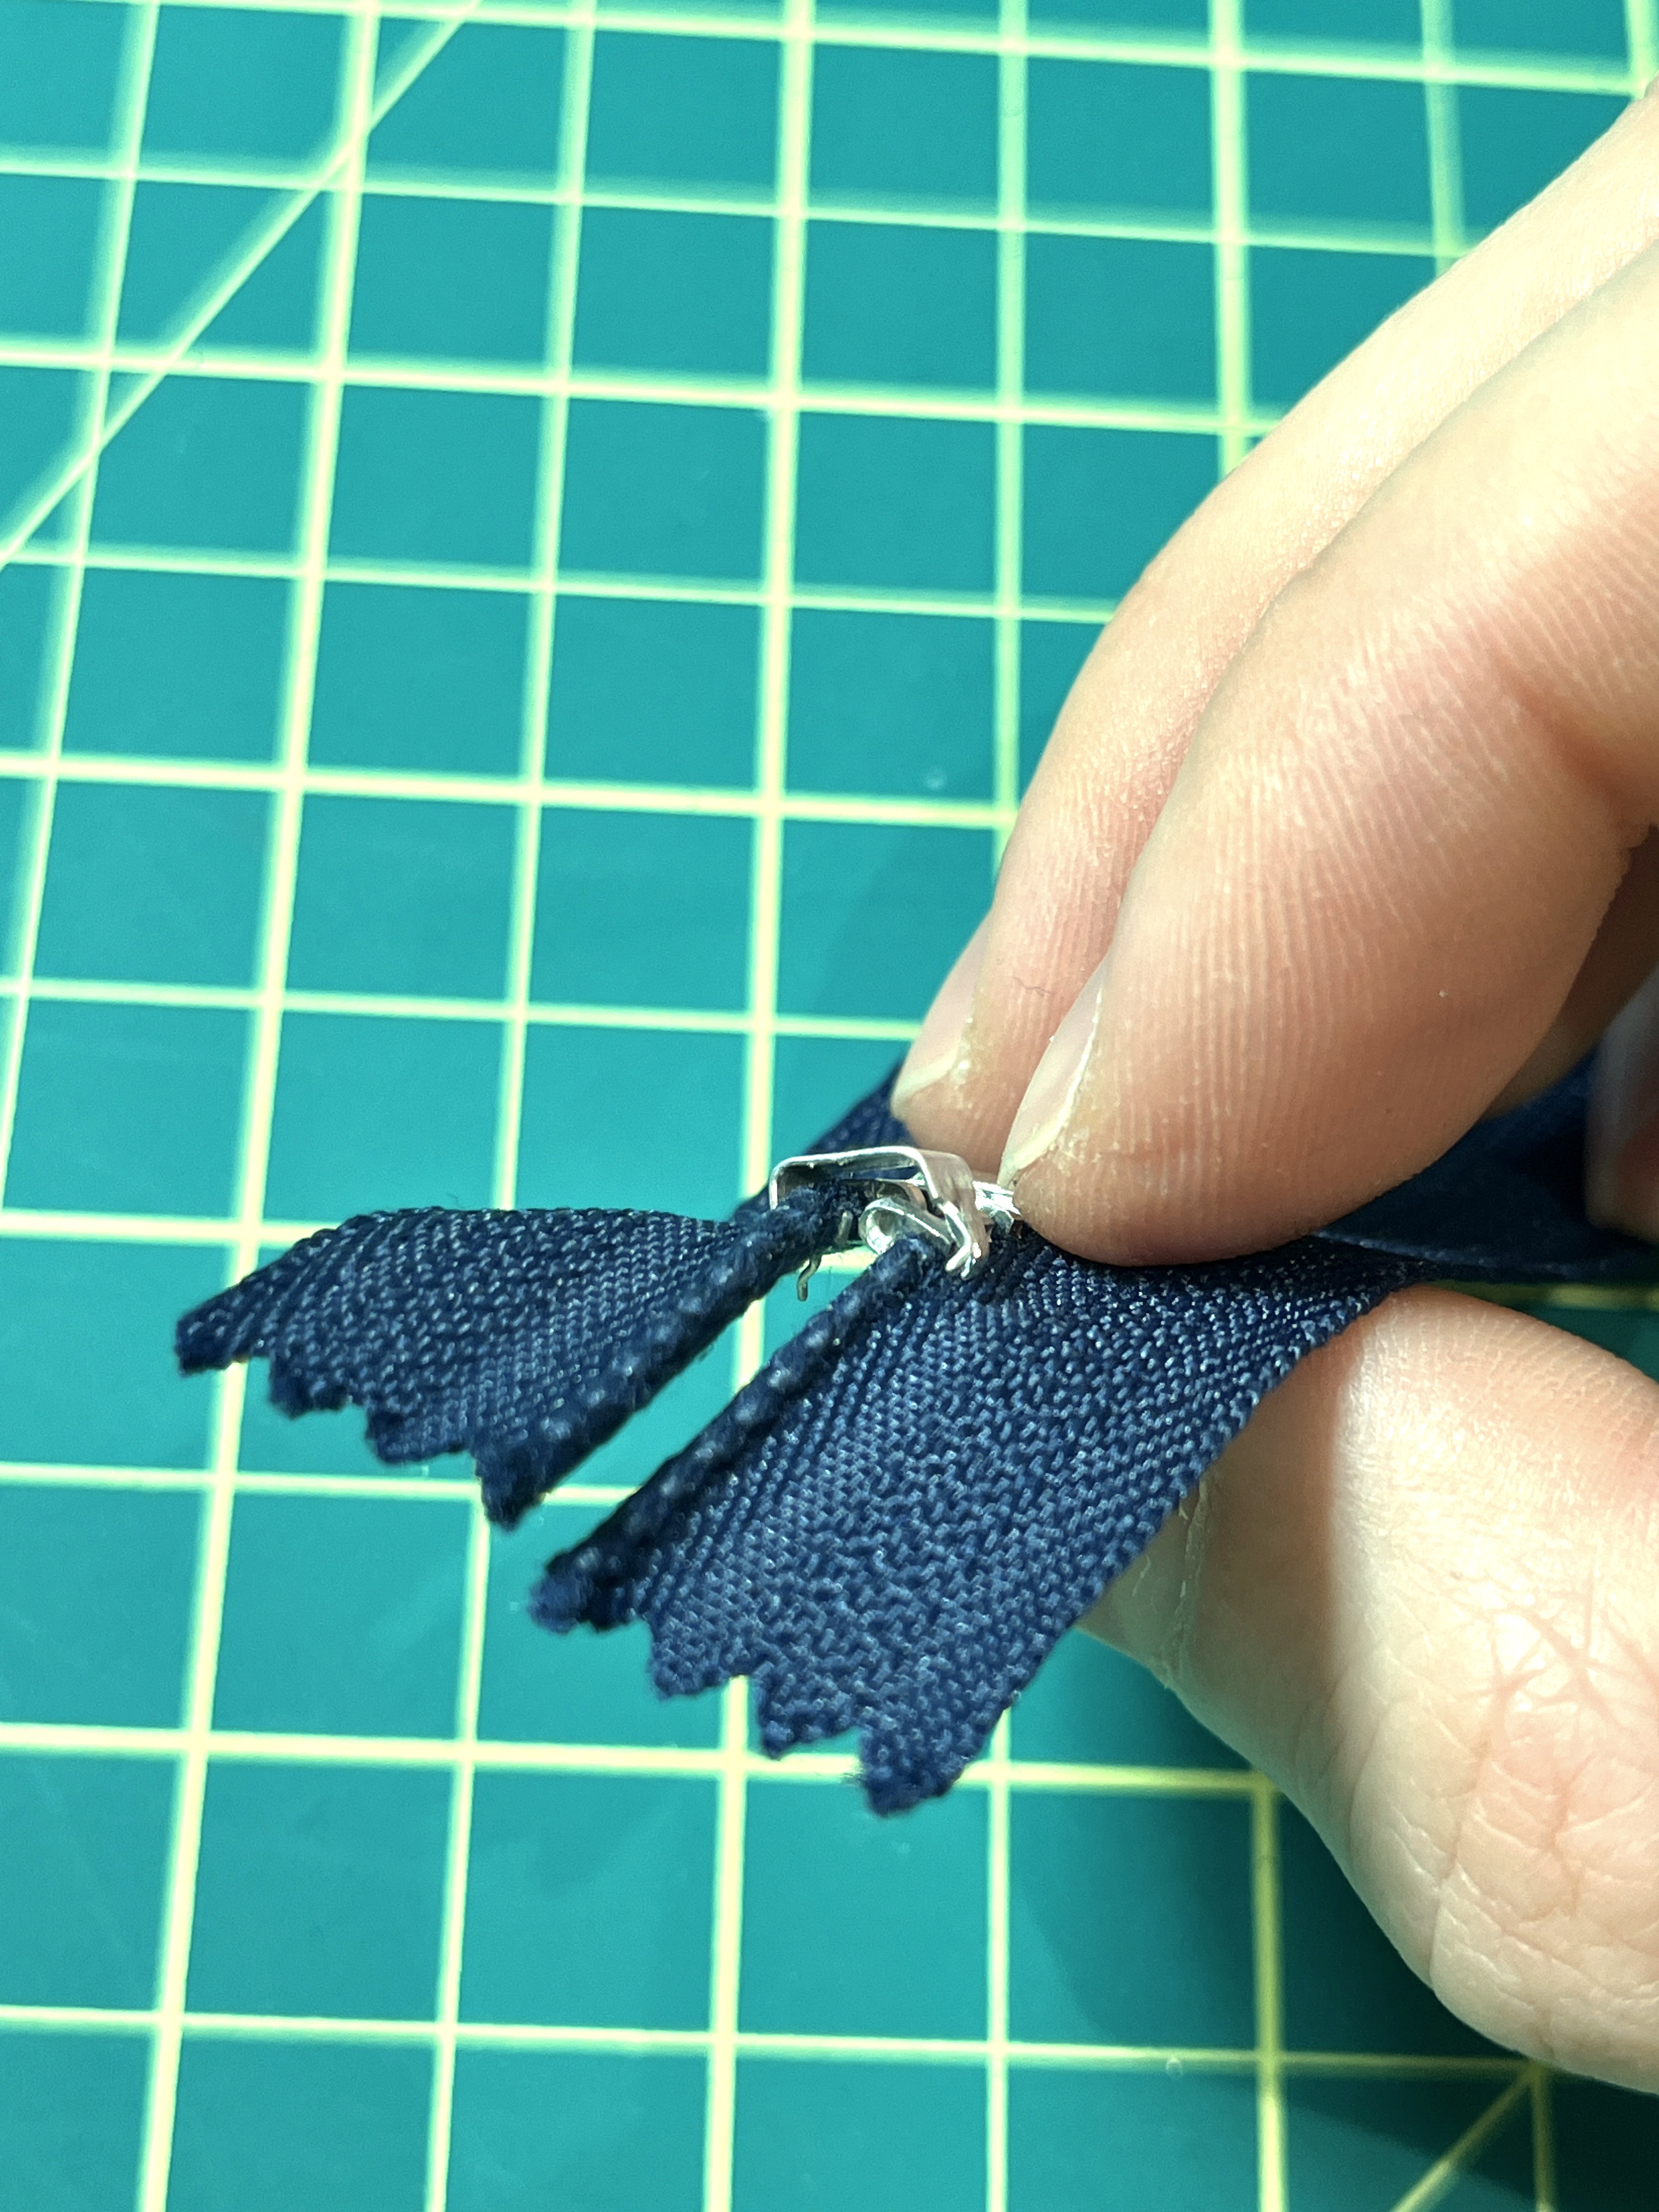
You’ve successfully shortened the zipper from the top! Now, you can trim the excess off with your scissors, or leave it as is.
Part 2: Shortening it from the botton
To shorten a zipper from the bottom, we’re going to need a ‘bottom stopper’, needle nose pliers, and a mini flathead screwdriver.
Step 1: Install the new bottom stopper
Find the spot where you want the zipper to stop, and firmly push the new bottom stopper through the zipper tape, covering the teeth. Make sure the 4 ‘pincers’ of the stopper are all protruding on the other side.
Using a small flathead screwdriver, bent each ‘pincer’ down and position them between zipper teeth to secure the stopper.
Step 2: Remove old stopper and teeth
Now we’re going to remove the old stopper, by basically doing the reverse! Bend each ‘pincer’ up with the screwdriver, and then pry out the stopper. It might not come off easily, so you may have to use the pliers to get it out.
Finally, we’re going to remove the teeth below the new stopper. Repeat the same method we learned for the teeth at the top of the zipper!
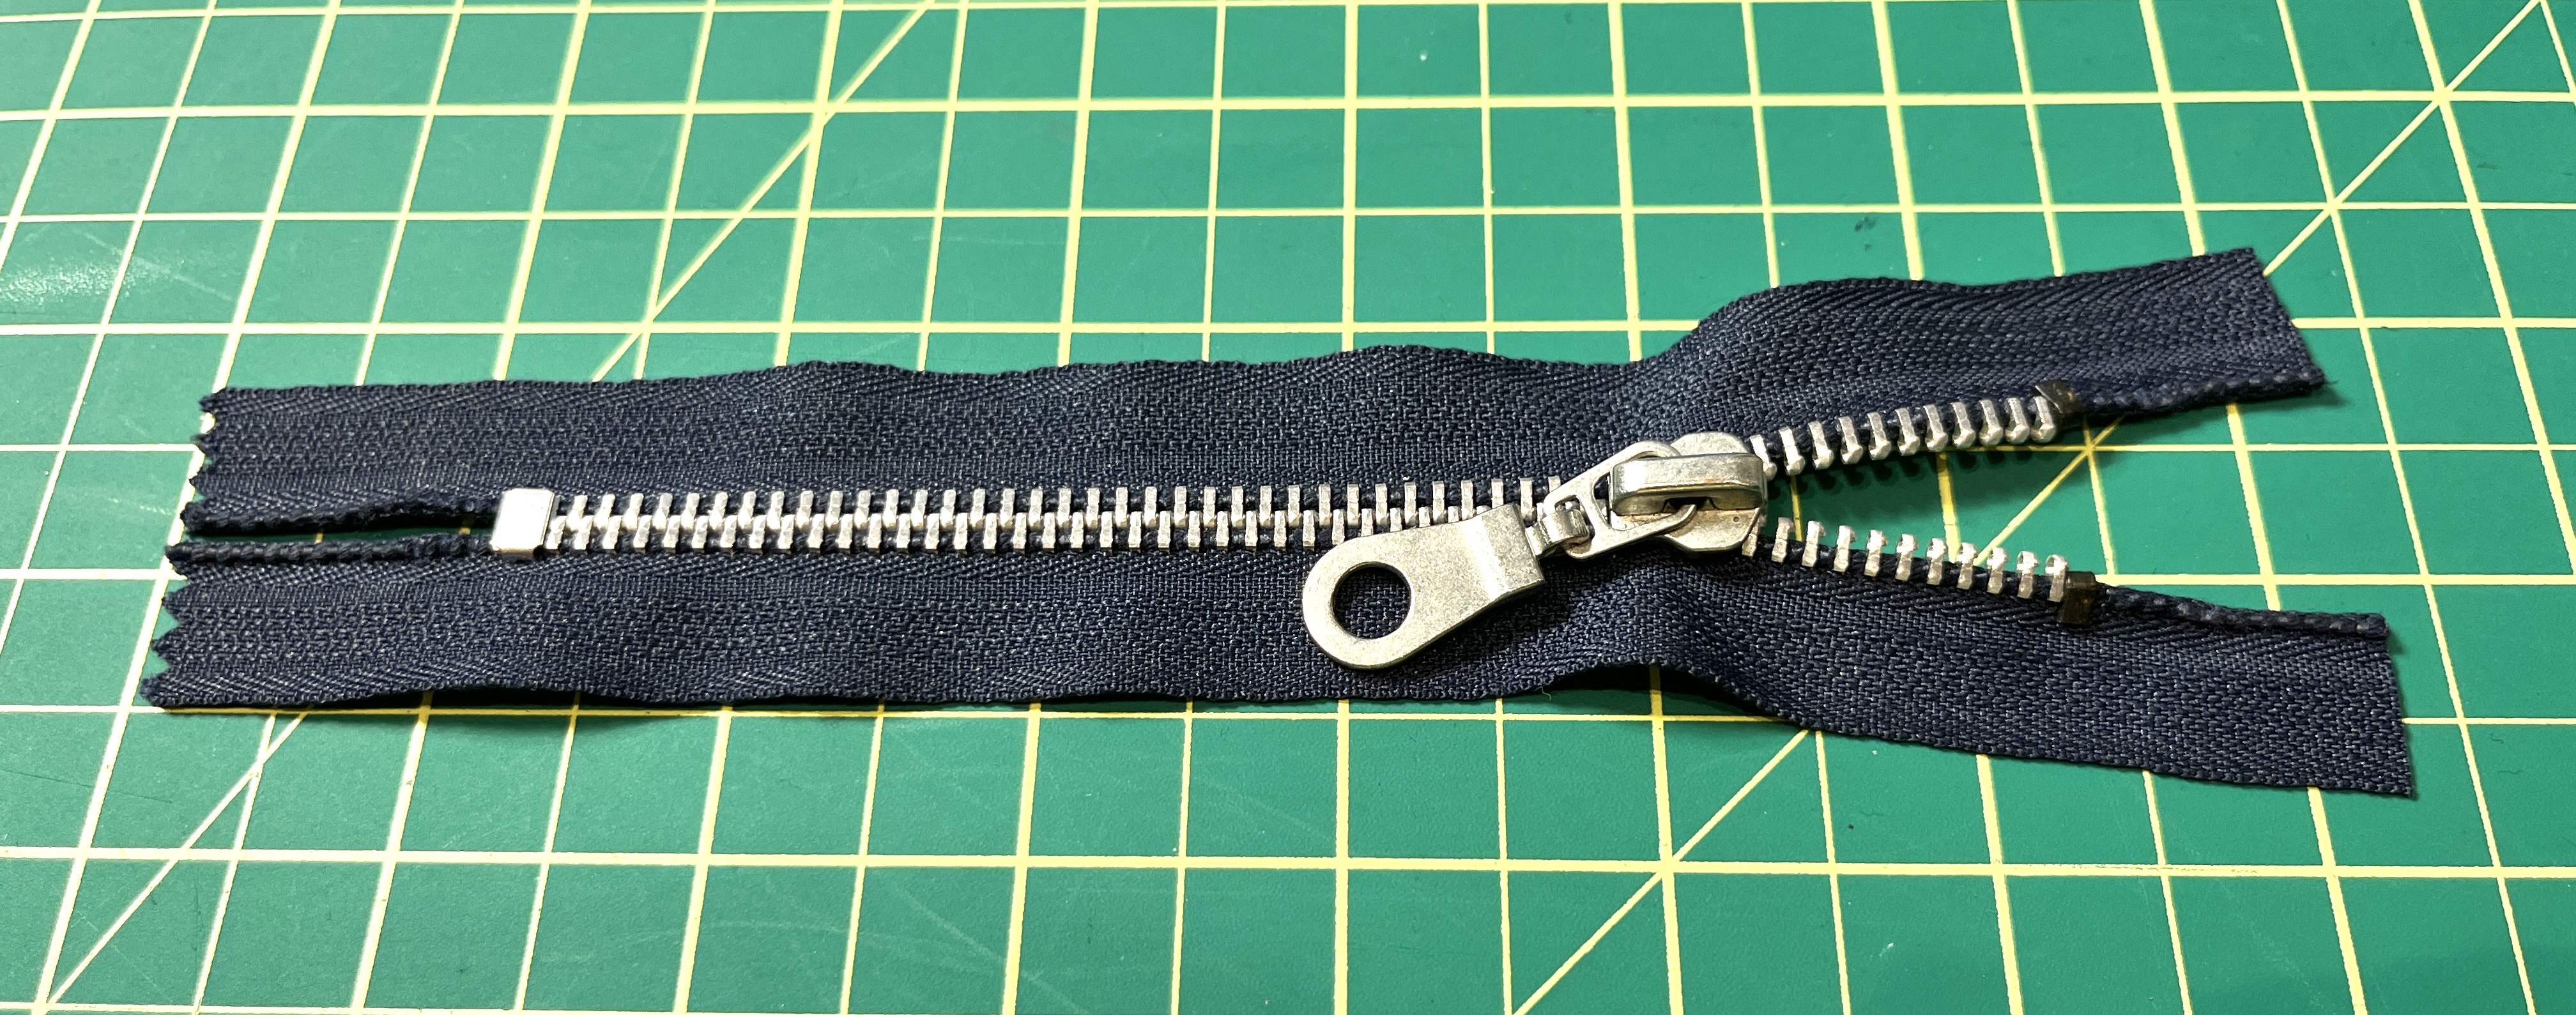
Here is the final result! Looks pretty good, and the best part? You can do the exact same thing with plastic tooth zippers.
I hope this will come in handy if you can’t get your hands on the right zipper in time. Stay tuned for more tips and tricks like this!
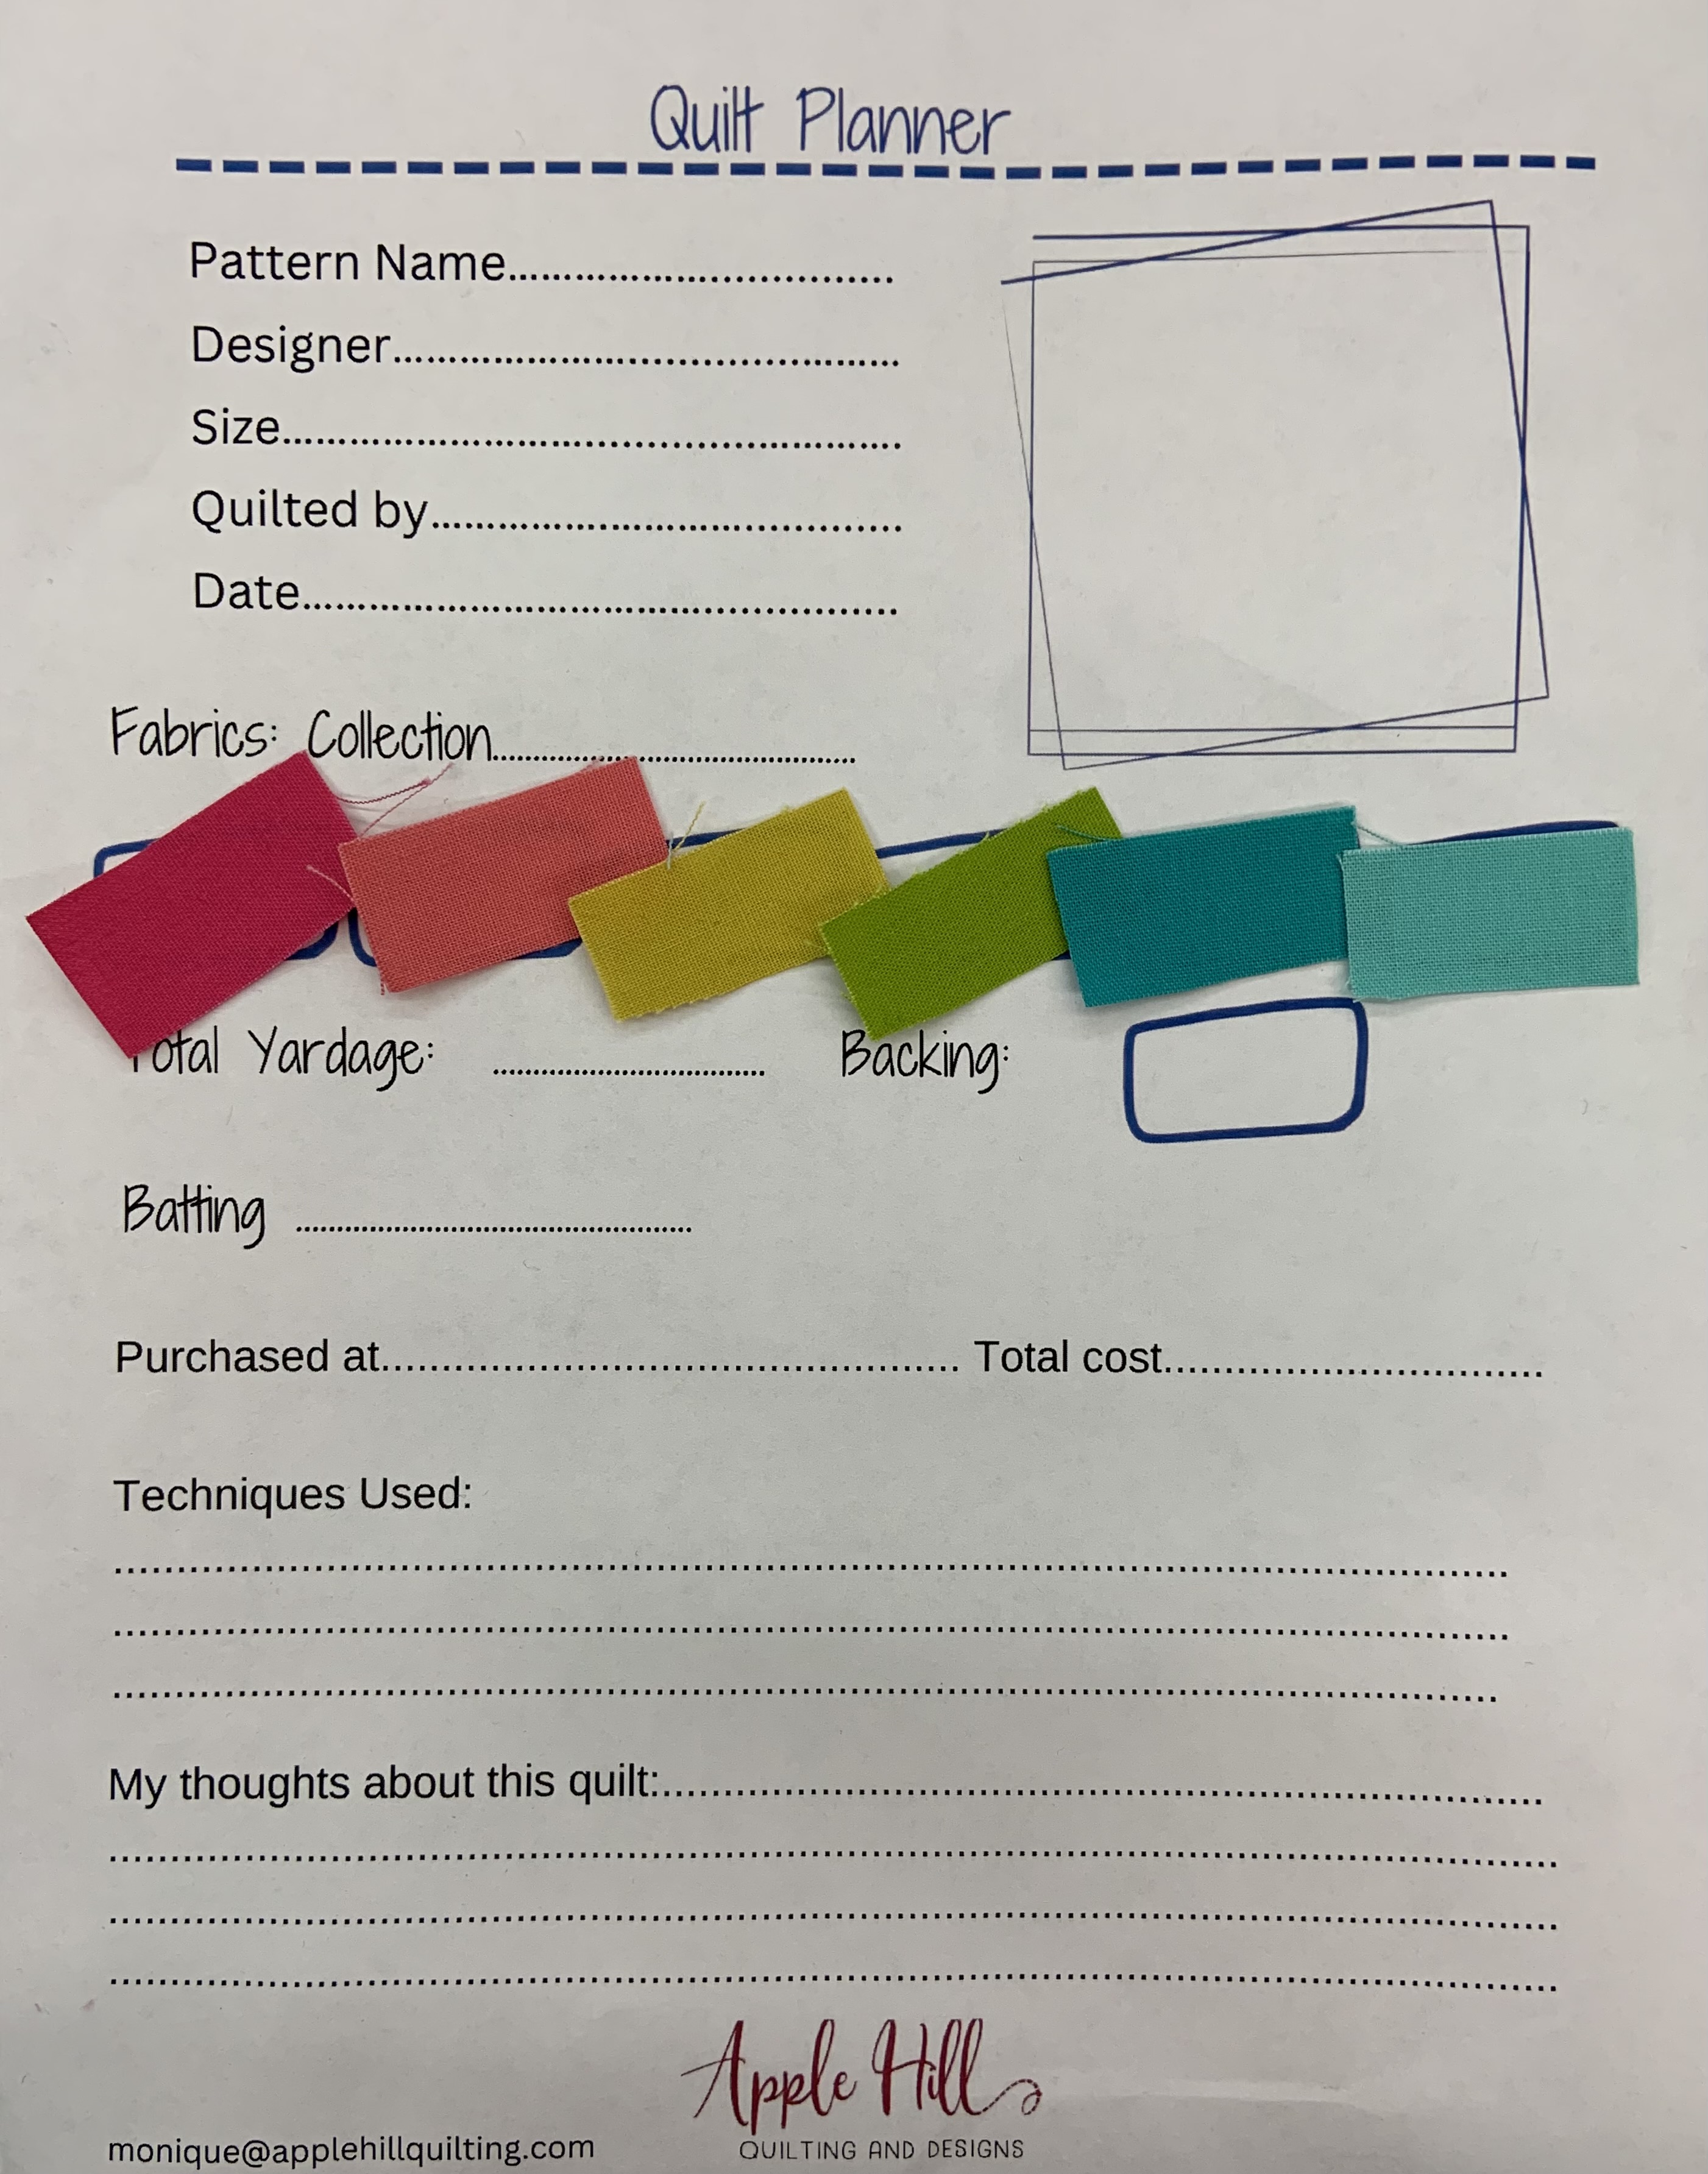
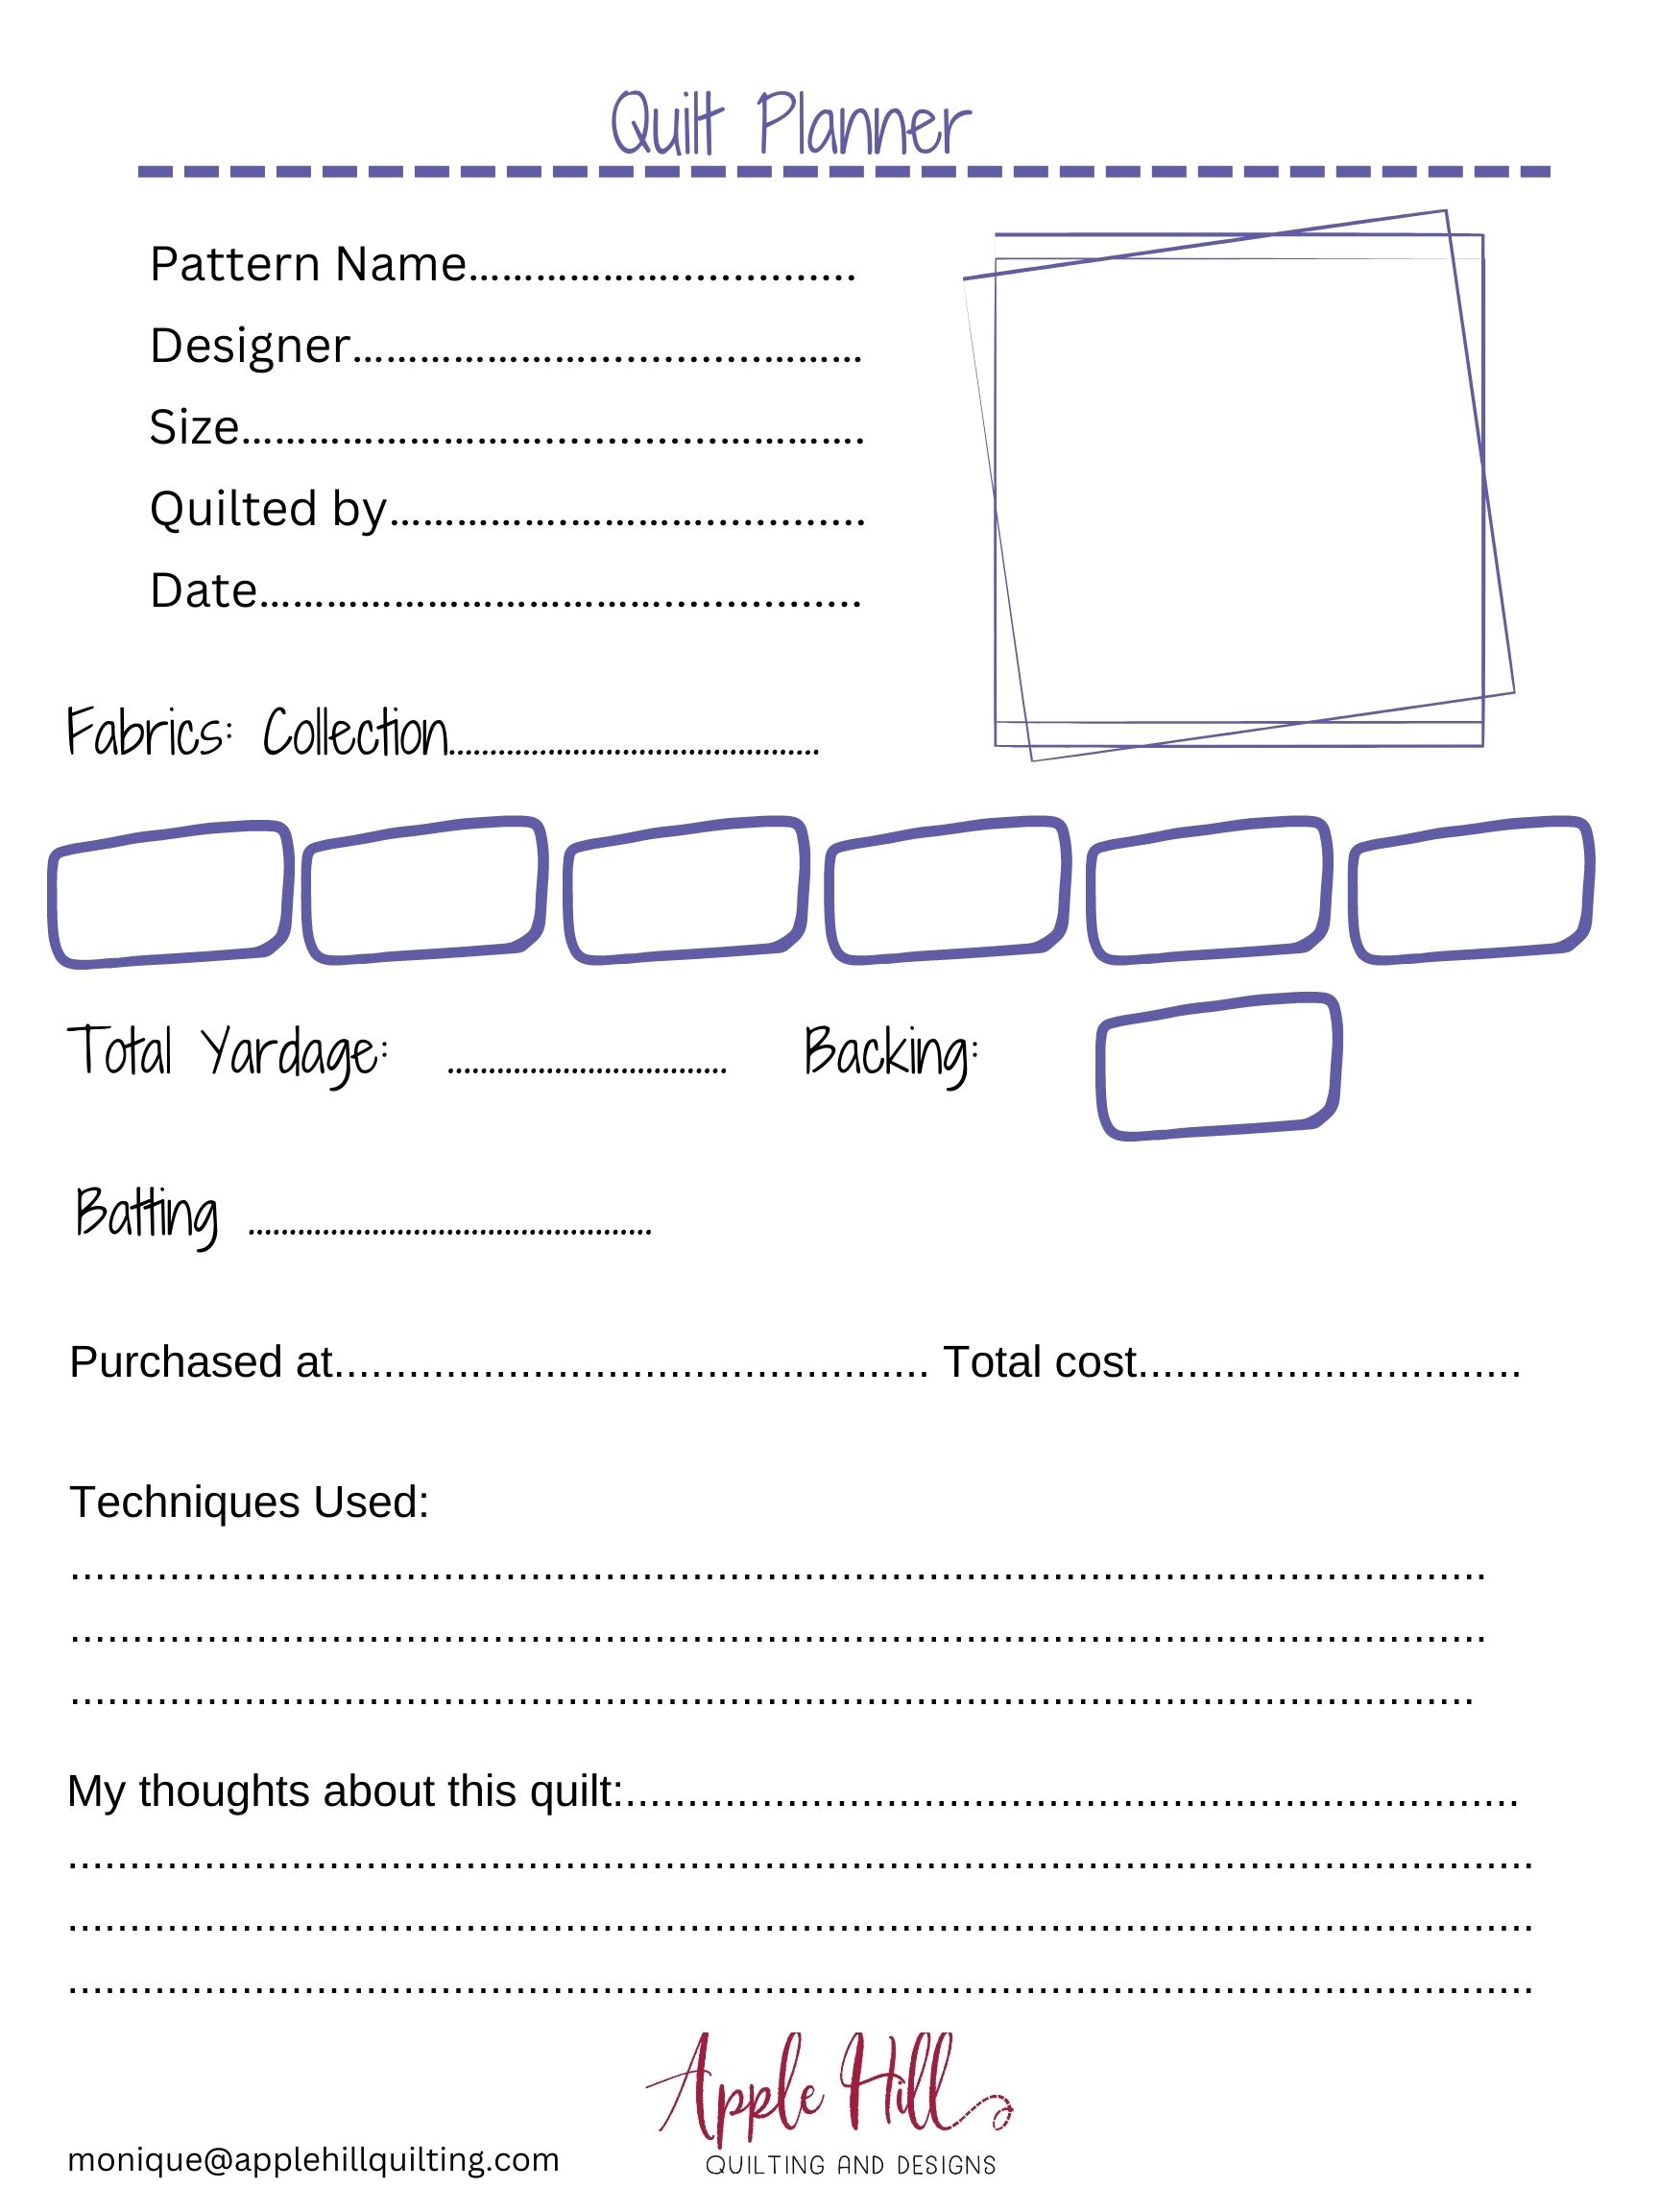
Are you making a new quilt this year? Do you have trouble staying focused on the one quilt? A Quilt Planner may be just what you need to stay organized.
This little quilt planner is just what you need to keep your fabrics in order as well as your ideas. We all know how much we try to remember from one quilt to the next. You can also fill out this planner once the quilt is complete to keep track of all the work you did and where you purchased your fabrics.
Start a fresh new binder with a few copies of this planner and keep your ideas in one place for quick reference later on. Add fabric swatches of possible fabrics you think you will use. When you are out shopping for fabric bring your binder along to reference your notes.
Add as many notes as needed and don’t forget to add all the tools you used to make those perfect HSTs. Keeping a record of construction methods gives you the chance to determine efficiencies and helps improve your skills.
You made it to 2024!!!! A whole new year of sewing possibilities lay before you. Do you have plans and goals already to go? Or do you let your current mood and creativity lead the way? Some of us are a combination of both. We would love to hear all about your goals/dreams/aspirations, leave us a comment below!
We here at Janome Canada are so excited to spend 2024 with you and helping you achieve all your sewing dreams and goals. Each month we will bring you a new theme and ideas. We are starting off January with Refreshing and Restoring our sewing and our sewing spaces. From projects, to stashes or where to find the resources we need! Stay tuned, here to our Janome Life blog for blog posts on how to get the most out of your Janome machines and accessories and so much creative inspiration!
Before we jump into everything else, let’s set you up with a list of our great Janome Canada resources. Make sure to bookmark this page so you can revisit it all year long and find everything you need.
Janome Canada sends you loads of warm wishes for a safe holiday filled with joy, love and a little bit of sewing! Don’t forget to stock up on those creative juices, because come 2024, we’ll be back and ready to fuel those Janome sewing machines of yours with endless inspiration!
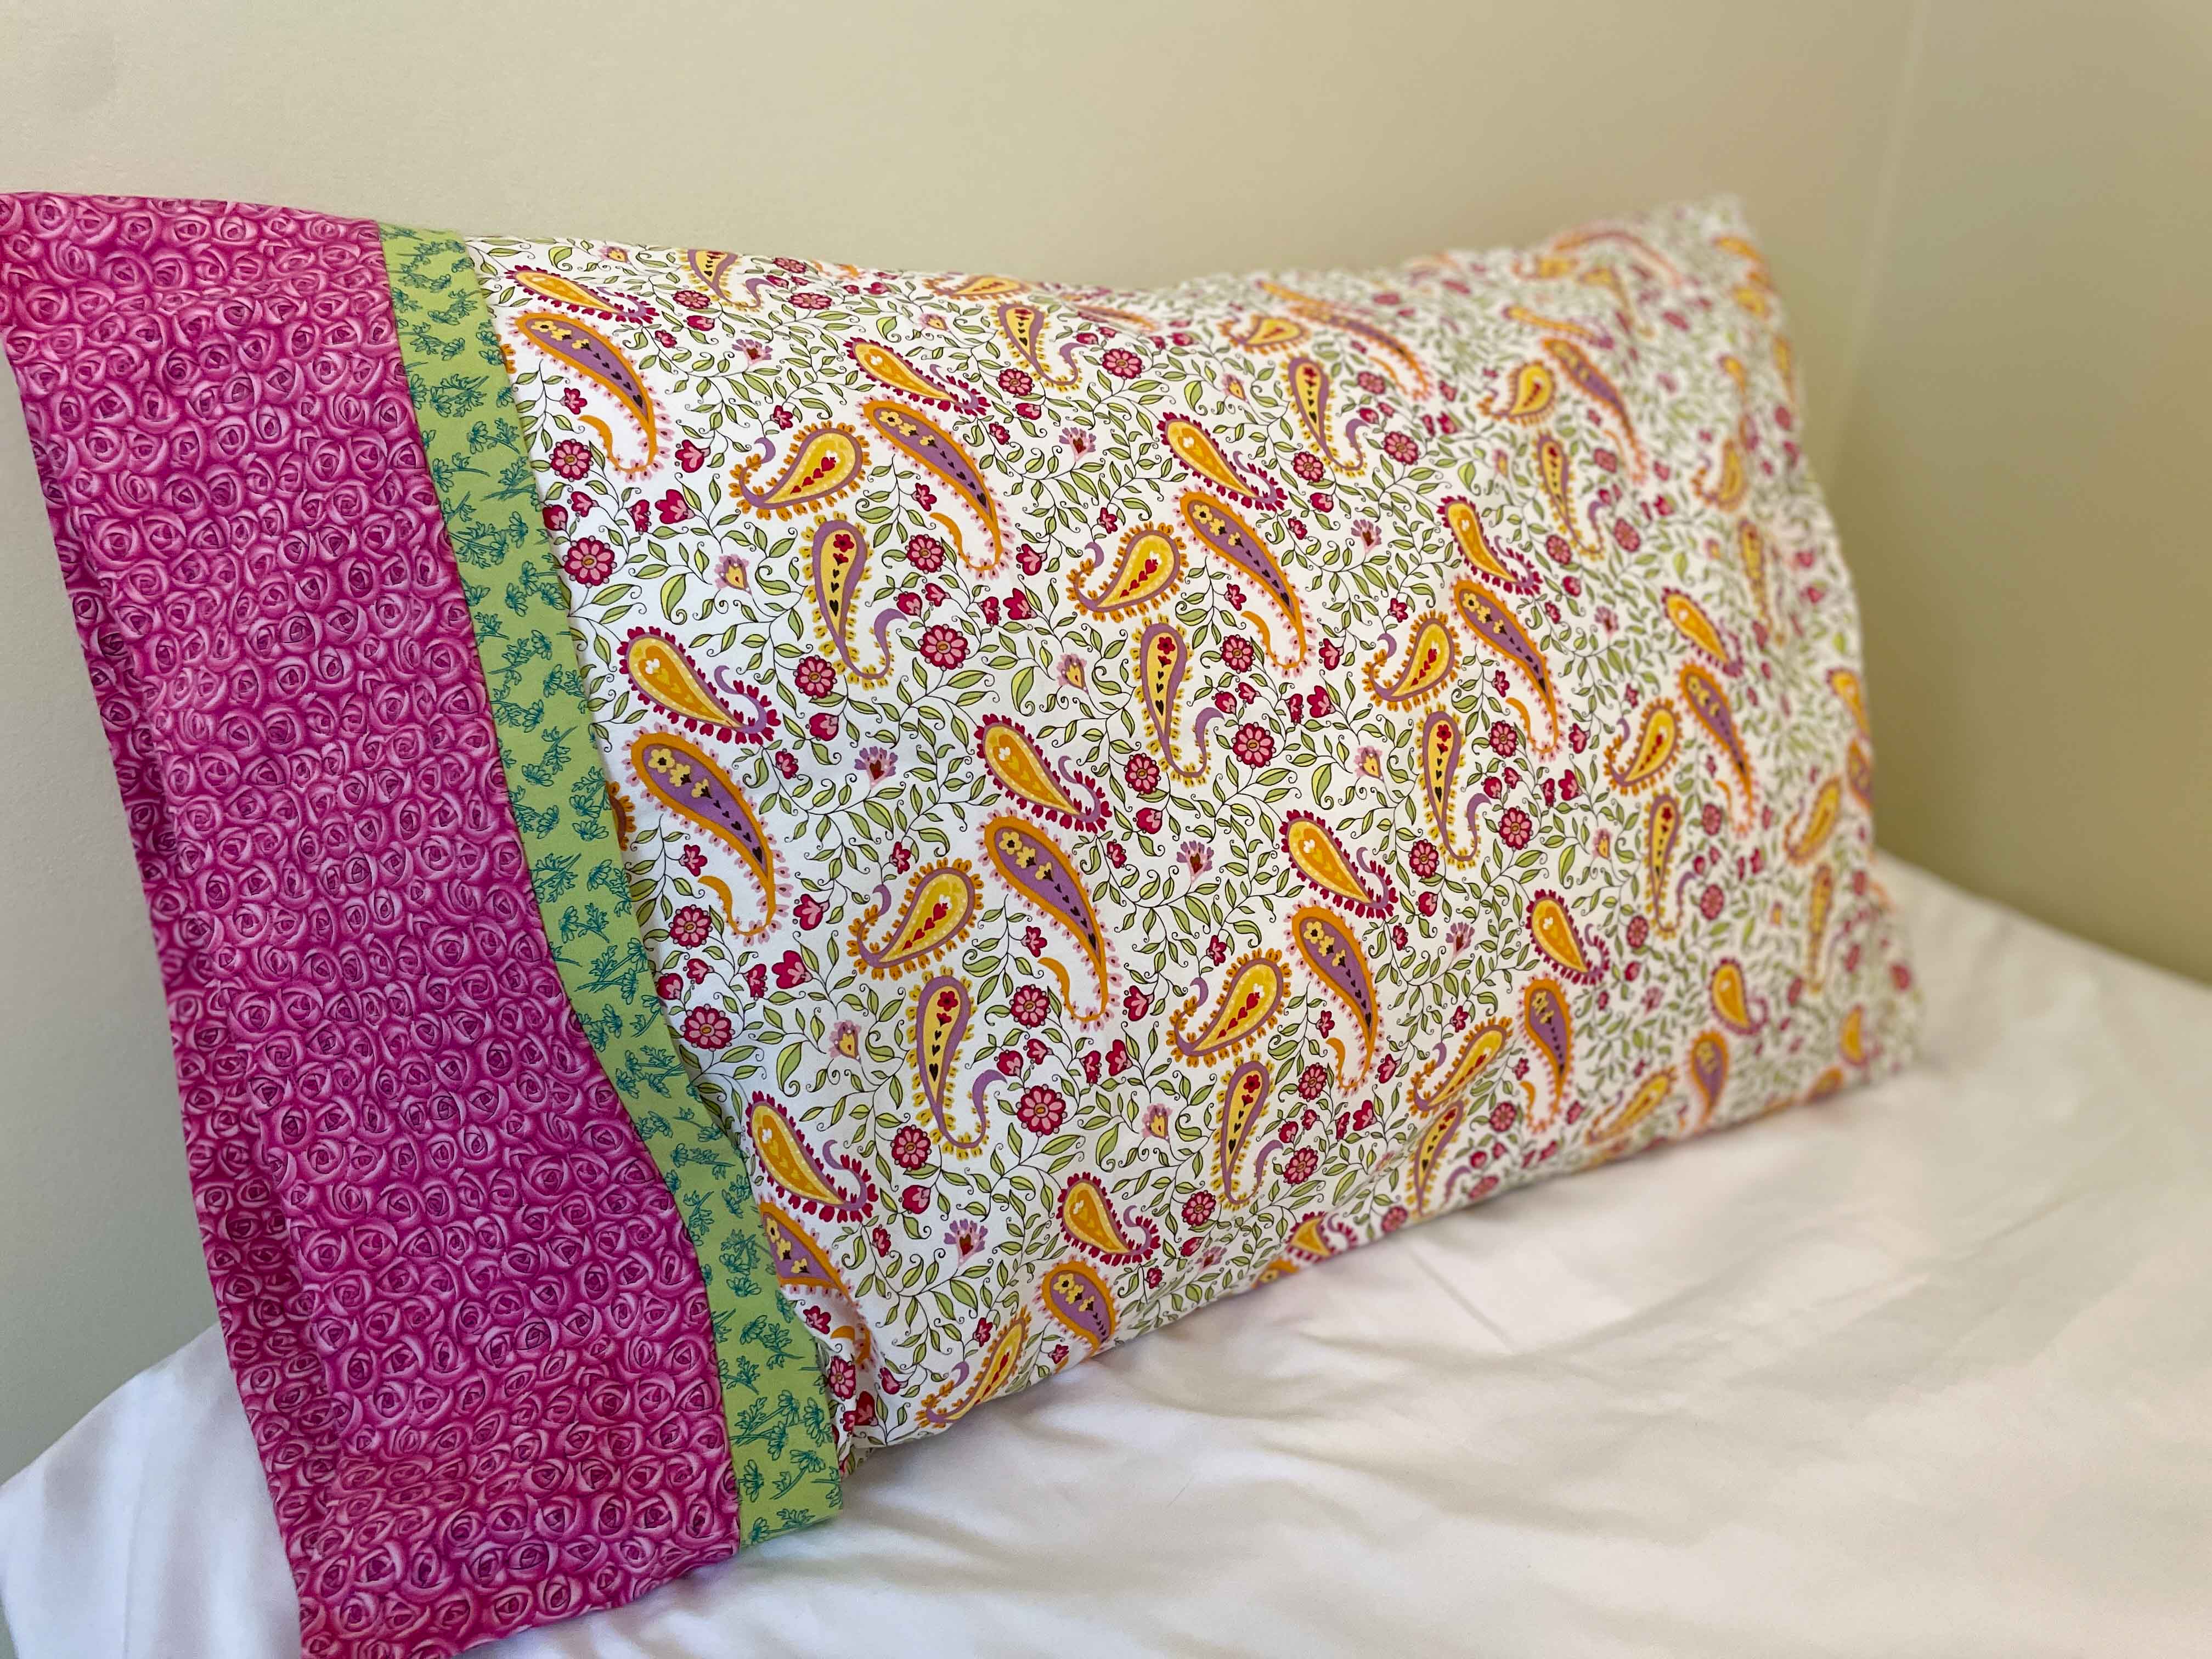
Nothing freshens up a bedroom like a new pillowcase! In fact, I love my pillow so much that I take it with me when I travel. Of course, I always have to remember to make sure it doesn’t get left behind when I leave – which I why I always travel with a bright and colourful pillowcase on my favourite pillow!
I recently needed to make a few new pillowcases – they are so easy to make and by using your own fabric you can really customize it however you want. While I’ve sewn many a pillowcase on my sewing machine, for this project I had my Janome Airthread 2000D handy and it made a quick little sewing job even faster – probably something to do with its maximum speed 1,300 spm (and the serger finished all my edges at the same time!).
I was digging through my stash and found some fun fabrics to play with. You do need to have some decent size pieces of fabric (at least for your main fabric) for pillowcases. I made mine the following size:
Main fabric piece: 26.5 inches by 42 inches
Top accent fabric: 10 inches by 42 inches
Secondary accent fabric: 3 inches by 42 inches
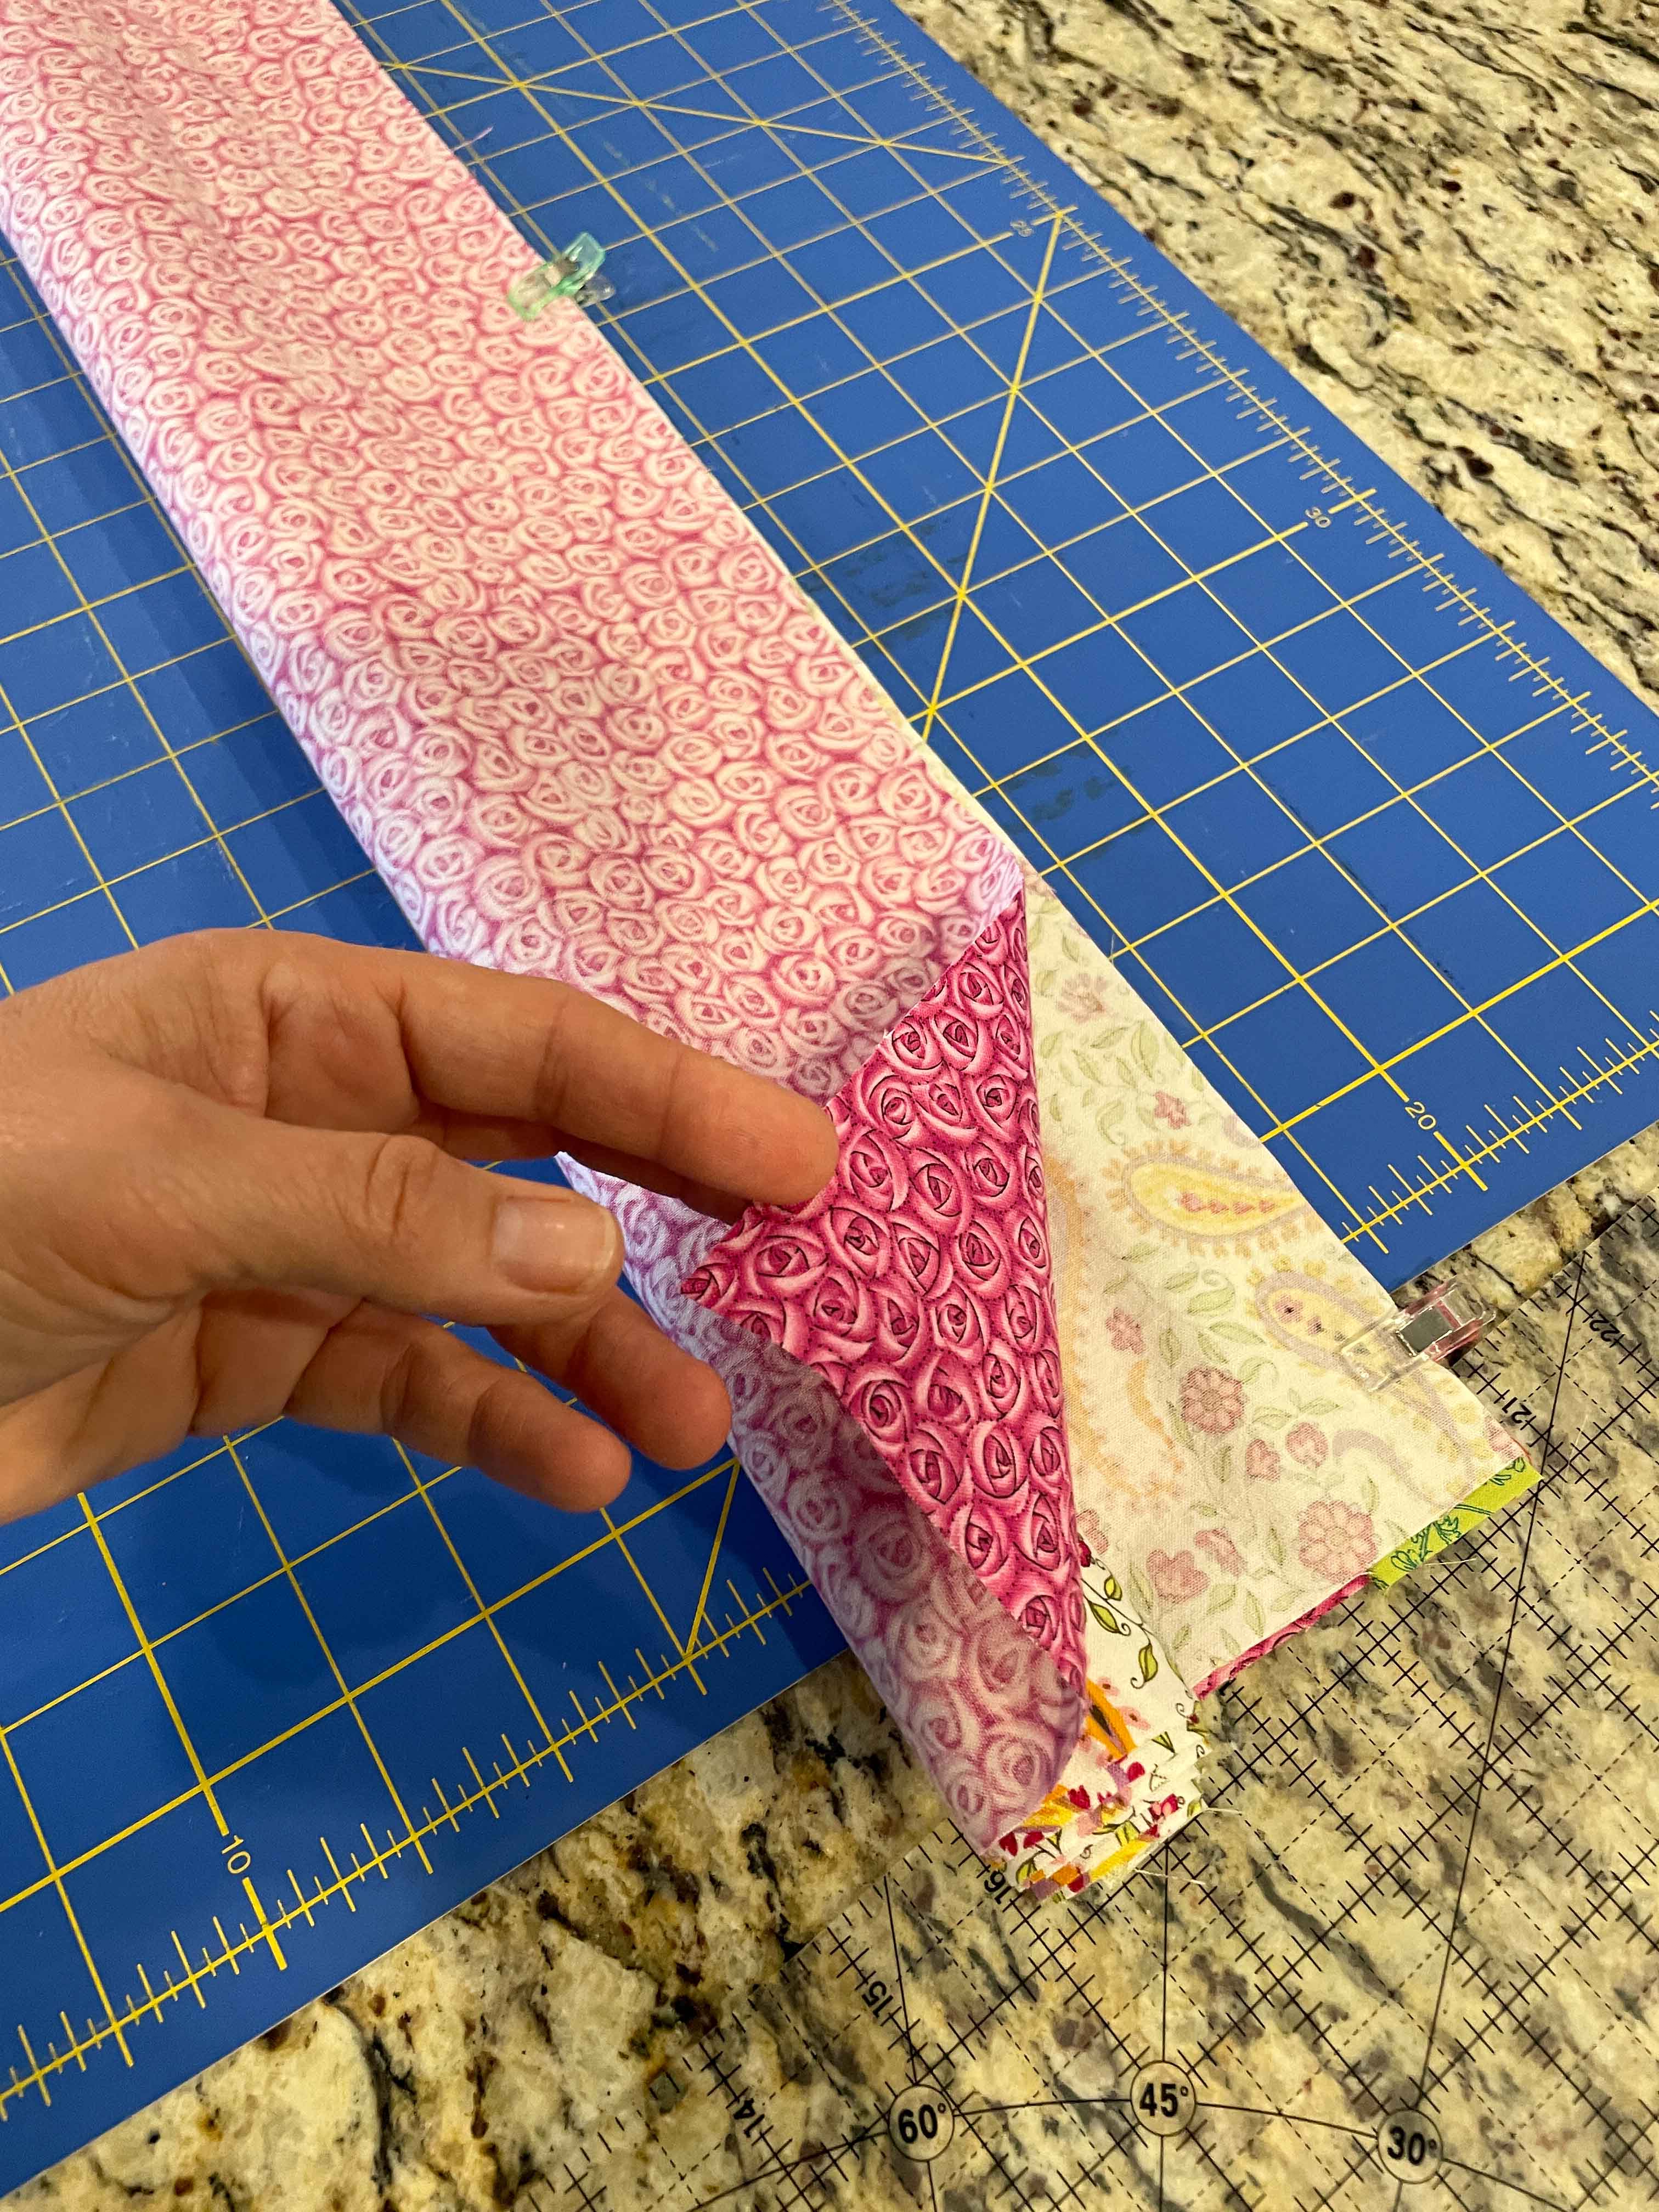
This method of making a pillowcase is called the burrito method. You can easily adjust the sizing to suit your favourite pillow size. What’s really nice about the burrito method is that it gives a nice finish on the opening.
To assemble, place the top accent fabric right side up and with the long side (42 inches) across your work surface.
The secondary accent piece is ironed, wrong sided together along the length of the fabric (42 inches) so that it is now 1.5 inches by 42 inches. Place the open edges to the top of the top accent fabric along the length of the fabric. Finally, place the main piece of fabric, right side now and line up along the length of the fabric (42 inches). Pin or clip along the top where your three pieces of fabric line up.
Roll up the main piece of fabric from the bottom, towards the top, until you are in the centre of the top accent fabric.
Wrap the top accent fabric piece over the section you just rolled up and line across the top. Pin or clip all along the top. This is your pillow burrito.
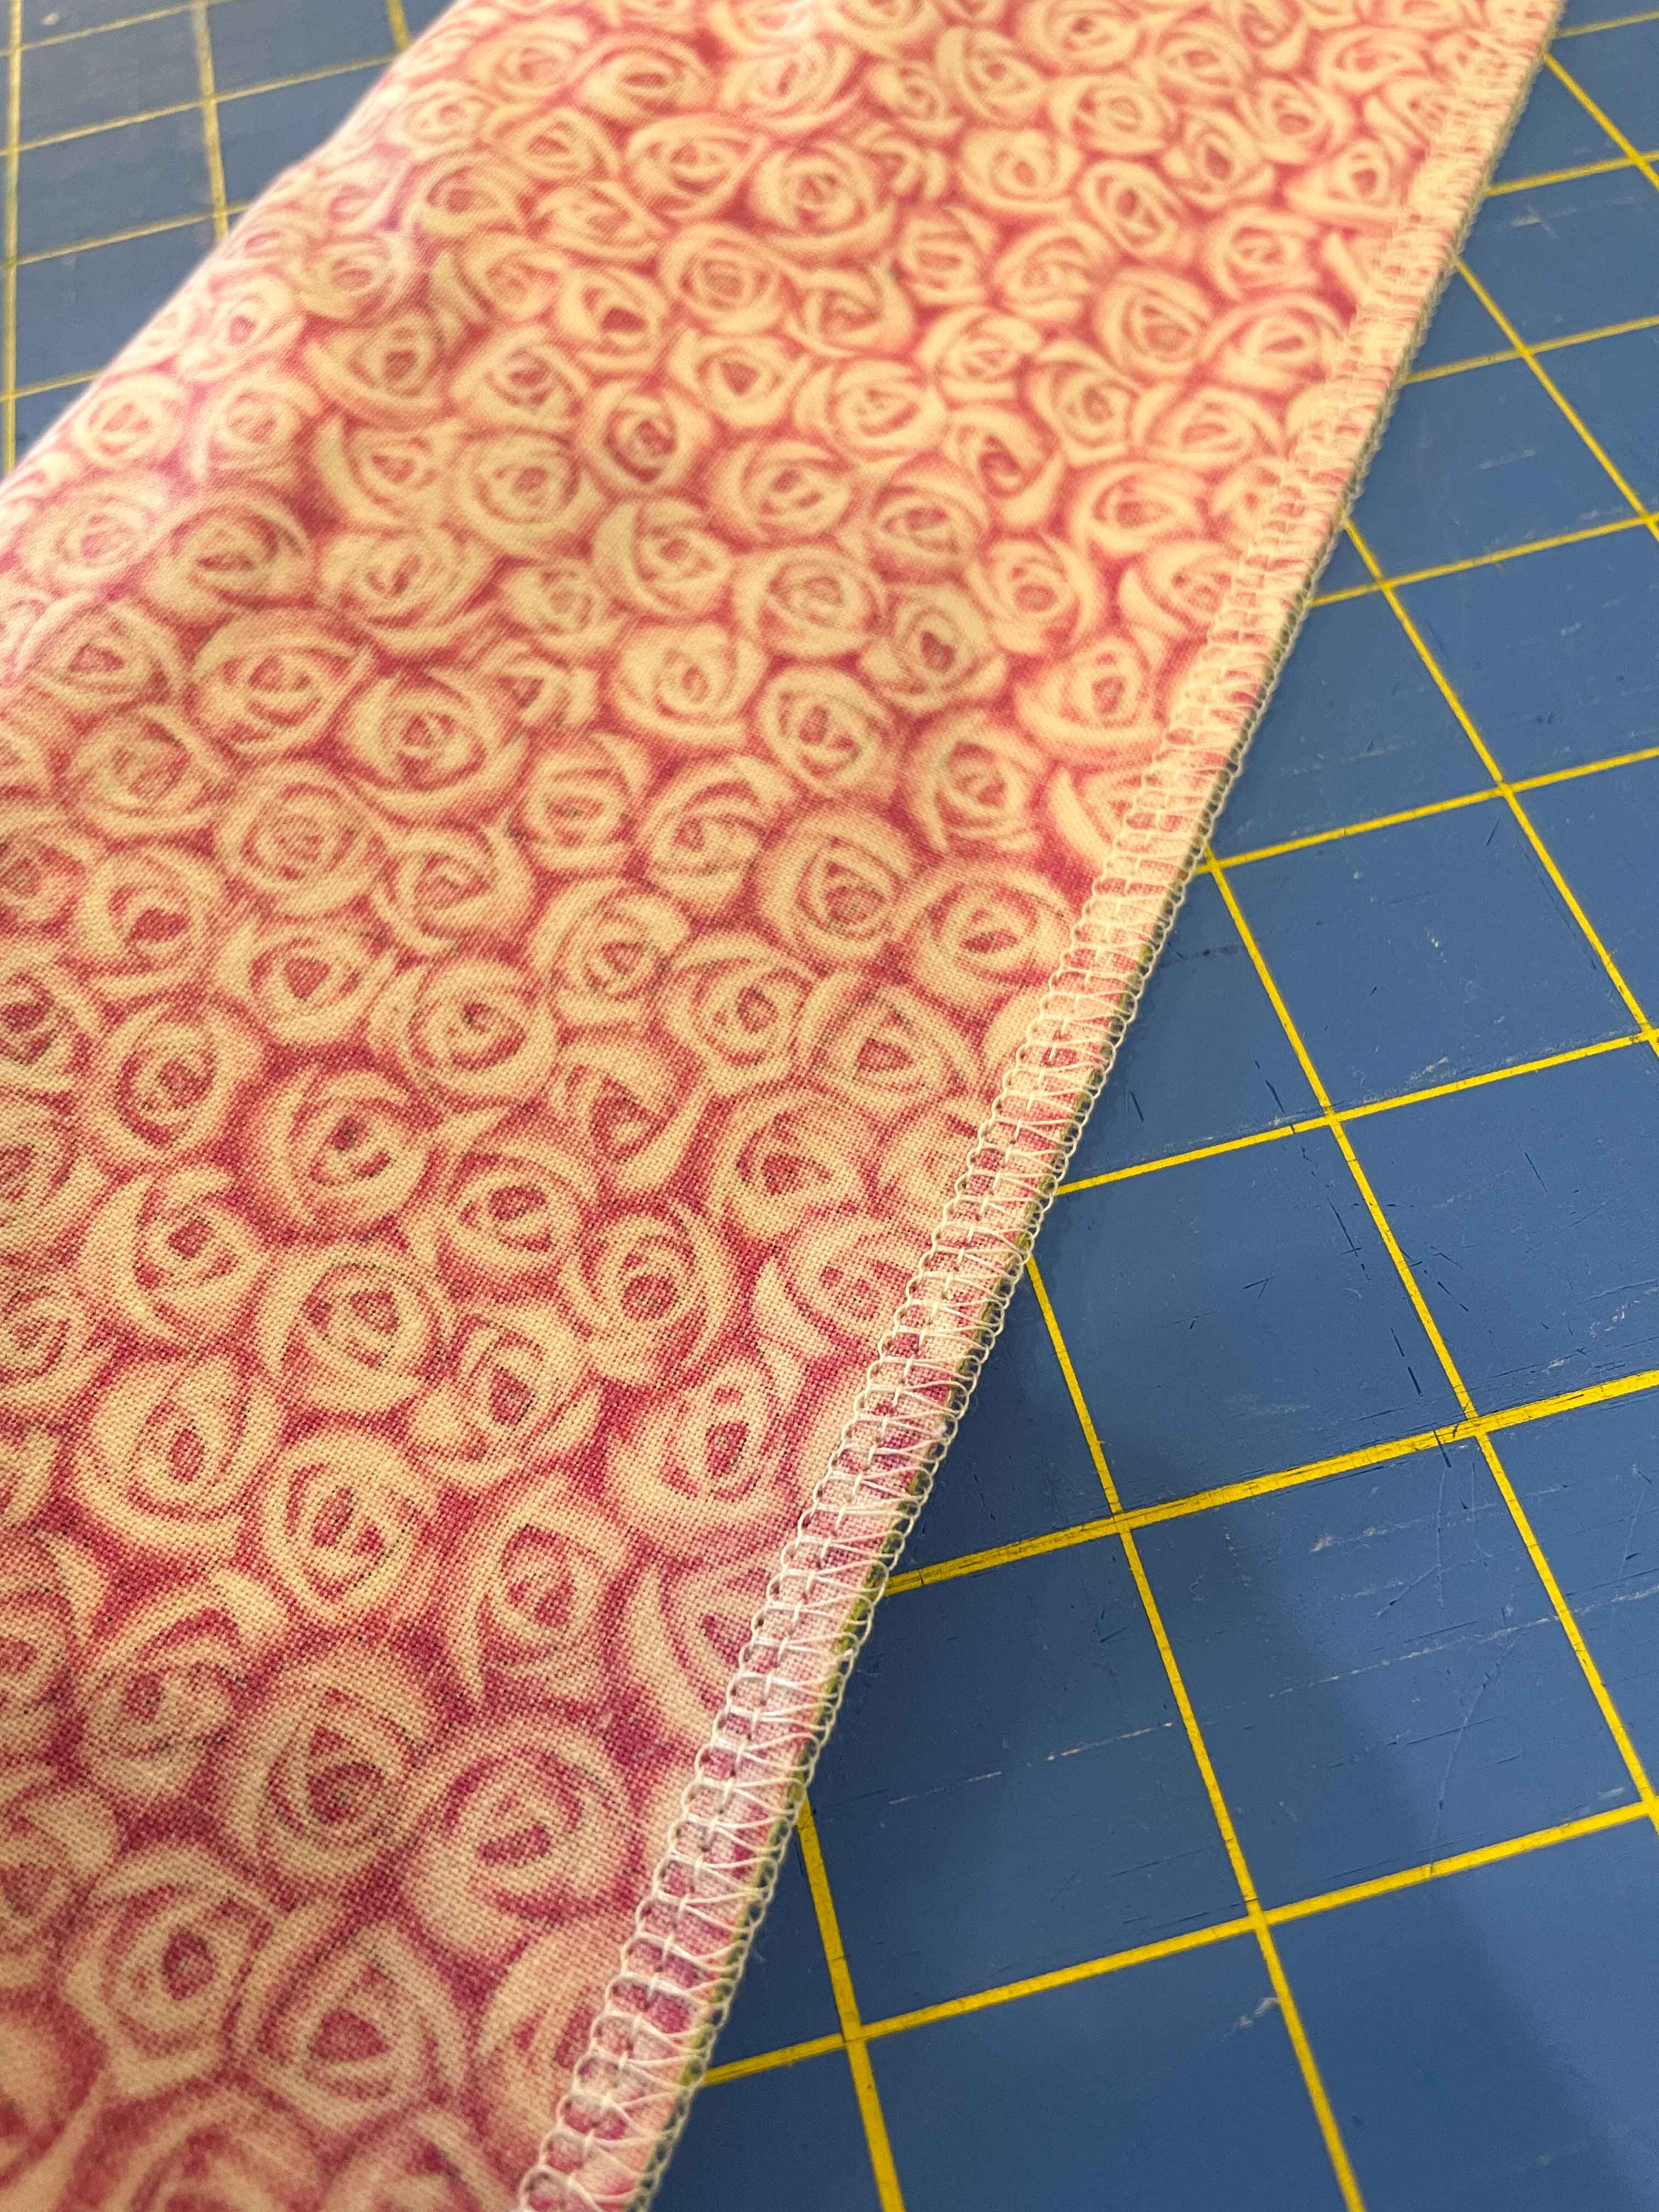
Serge all along the top length of the fabric.
I love the low profile waste chip box on the Janome Airthread 2000D. It is also detachable so it’s easy to empty.
Look at that beautiful serger stitching!
From here you turn your burrito inside out (actually right side out) and then finish off your pillow case by sergering (with right sides together) the side and bottom of your pillowcase.
Of course with a serger, you are left with these little tails. There are several ways to finish them. If you can serge over tails, that’s the easiest. That’s what I did in one corner of the pillowcase. But that still left two tails – the start and where I ended my serging. I like to just grab a large headed needle and weave in the tails. It’s quick and easy and really finishes off the ends nicely. You can also unravel the tails and tie them in a knot.
I figure pillowcases get washed a lot, so I chose this method to keep those ends as secure as possible.
My new pillowcase feels quite cheery – and of course, my daughter snapped it up right away and claimed it for herself (so I had to make another one).
What quick sewing projects do you find even quicker on your serger? What is your favourite method for finishing off serger tails? When you travel, do you bring your own pillow?
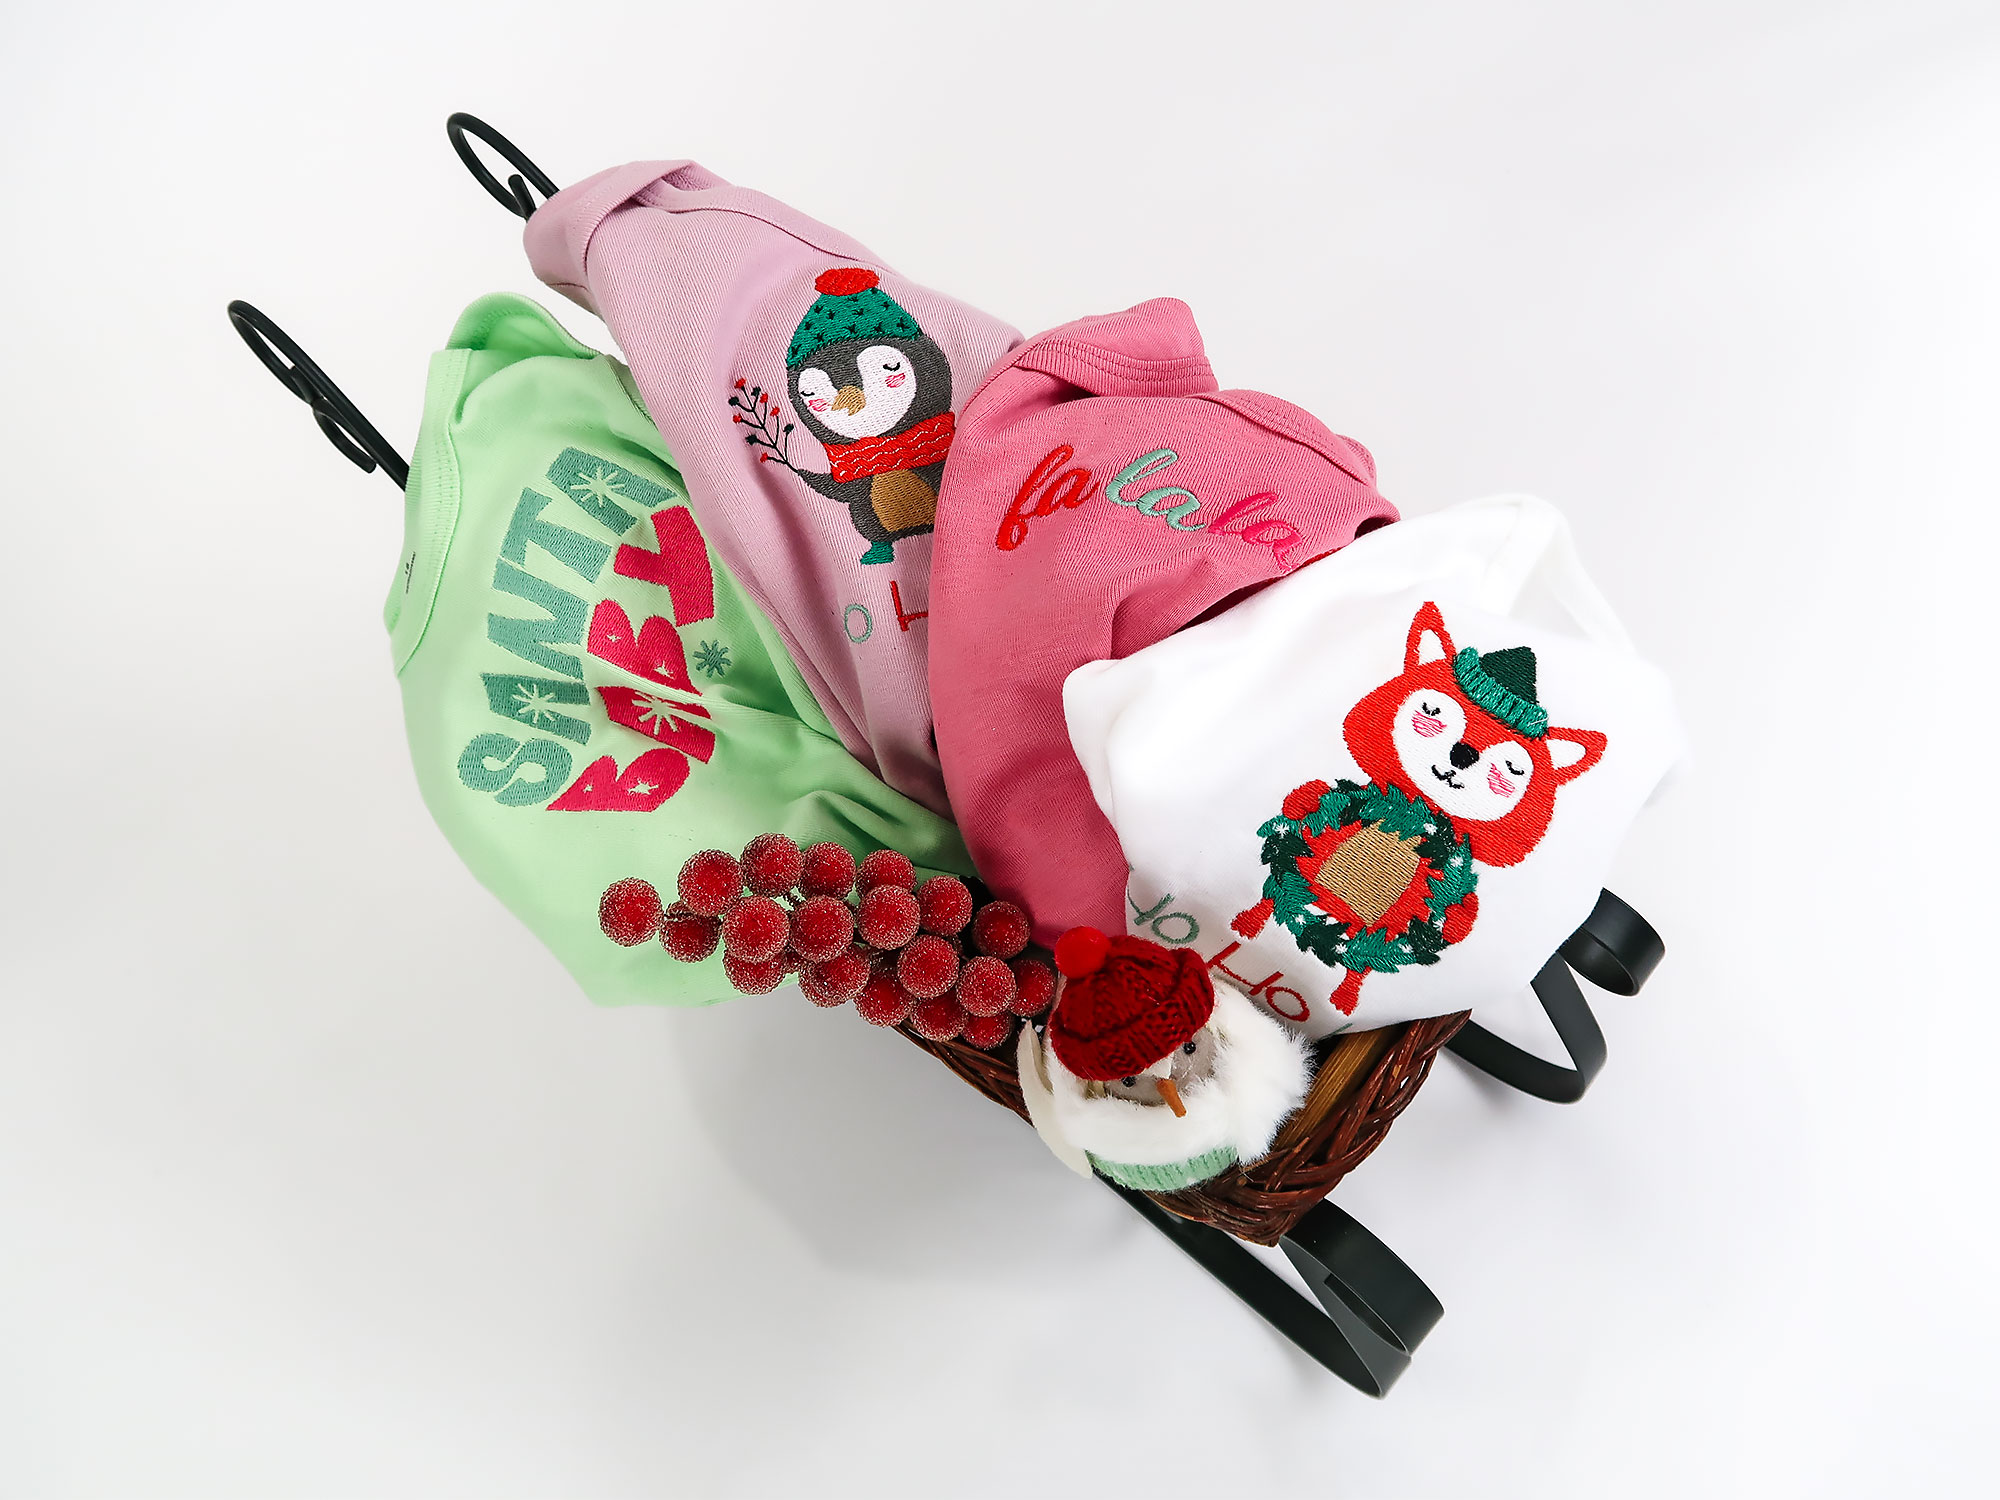
Sew4Home understands there is only one thing Janome Embroidery Machine users LOVE more than a cute new design, it is 4 new cute designs! For FREE! Just in time for the holidays they have created 4 new designs, FREE for our Janome Canada customers.
With these 4 designs, the creative possibilities are endless. They make the perfect host gift when you add them to a tea towel.
Or you could make a custom onesie for the little in your life. There are so many other items you could use these embroideries on!
If you are a new Janome Embroidery machine user you will be happy to hear we have a wonderful How to document to help you to embroider this project with ease. It is available in English and in French.
We can’t wait to see you put these designs to good use! Make sure to tag Janome Canada on Social Media so we can see them!


