

We all have scraps of fabric left over from other projects. Here is one idea for where you could possibly bust your scrap stash. This essentially is using the ROLLED hem Stitch program on your serger to whip up strips of ribbon neatly finished along both edges.

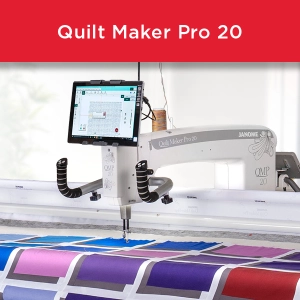
THE FABULOUS JANOME AIR THREAD 2000D SERGER
Another recent Project we showed was how to make Serger Ribbon. This was a Janomelife post + Facebook Live on Janome Sewing machines which we have also saved to our Janome Life You Tube Channel. This technique is so quick and easy and the post and videos give lots of suggestions of where you can use the Serger Ribbon You make. Check out the links above.

But back to our project idea for today: use those strips of serger ribbon to weave into a pretty pillow cover. Of course the ribbon weaving could be used for different projects: a table topper? A quilt block? A purse or bag? a pocket on a garment? I’m sure you could come up with other ideas.
So where do we start?
- Set up your serger for a 3 thread rolled hem. I used the Janome FA4 serger but most sergers will do a three thread rolled hem. Adjust your lower looper tension to be higher than usual so that the upper looper thread is pulled to the back and forms that neat rolled hem.

Available at local Janome Canada dealers
- I would recommend you Press your fabric well and also use a stiffening spray like Best Press or Terial Magic. You only want a light stiffening so go easy with the Terial Magic as it gives a pretty stiff result. Spray very lightly/quickly. Do not saturate the fabric with Terial Magic. Not the end of the world, of course, as you can wash the ribbon later to remove the stiffening but it just adds extra steps you don’t need.
- Do a test serge on the fabric you intend to use and check that your stitch length is tight/small enough. If you see fabric between your stitches, then you need to decrease your stitch length a little OR use a thicker thread. Using a “Floss” type serger thread such as Madeira Aeroflock works so well as it stretches as it goes through the serger and then relaxes once stitched. When it relaxes it “fluffs” or “ plumps” out so that the coverage on the fabric edge is fuller and looks neater – Perfect and just what you need for rolled hems. Janome distributes Madeira thread in Canada. If you cannot find a Janome or Elna Dealer who stocks Aeroflock, let us know in the comment box below and we will try to assist you to get this quality thread into your serger!

- Once you are satisfied with your test serge of a rolled hem, go for it with your strips of fabric


.
My suggestion would be to cut strips about 1 – 1 1/2 inches wide. Of course you can make them wider but you will need another method to keep your parallel ribbon edges straight. 
5. My method is: serge all the way down one side of your ribbon. Turn it around and serge a rolled hem down the other side with the left side of the presser foot riding right up against your first rolled hem edge. This way your ribbon will be perfectly straight and the same width for the entire length. You don’t want it wobbly and uneven.

Here is the rolled hem on one edge of the ribbon strip that has been done. Now position the rolled hem edge to the LEFT of the foot and ride the foot along the previously done rolled hem to create a second rolled hem edge on the other side.

Here are both sides of the ribbon with serger rolled hems. I just pulled the ribbon from the back round to the left side so you could see both sides. The width of the ribbon will be the width of the FOOT if you do it like this. If you want it wider, you will need to use the sewing guide marks offered on your specific serger (shown here on the left upper section of the “door” to the FA4 serger).
6. Do make sure that you serge the rolled hem on both sides with the SAME side of the fabric facing up. The top and the underside of a rolled hem do not always look the same so you want to keep things neat. We used cream and pink cotton fabric for our serged ribbon.
7. Once you have all your strips hemmed, get your pin board or pressing board out. I have a couple of these in different sizes and find them extremely useful for a number of projects. If you own a wool pressing mat, that will work well too. And failing that, a piece of corrugated cardboard would work too. You could even do it straight onto your ironing board.
8. Cut and lay a piece of fusible interfacing with glue side UP on your board. Pin at the corners and ensure it is lying nice and flat.
9. You are now going to lay your ribbon strips down on top of the interfacing with right side facing up and pin at either end. Use GLASS head pins.
10. Now weave the ribbon in and out of the strips already pinned down. Do this gently and use a bodkin if that helps get the ends of your ribbon under the previously pinned strips. Ensure you are satisfied that all your strips are flat, even and straight.
11. When ready, press well. This will adhere the strips to the fusible interfacing under your weaving. Effectively you have created a piece of fabric – a ribbon woven fabric.
12. Now remove pins and ribbon weaving from the board. Trim to the size you require and use in whatever project you have in mind.
Ours was the pillow cover. I have not provided instructions for making the pillow cover here. We just did a simple cover with 2 pieces of pink overlapping fabric on the back. You will be able find instructions by doing a search on Janomelife; google; You Tube or Pinterest. You can sew front and back of the pillow together using a serger or a sewing machine…..a Janome, of course!


I would really like to try this however, I cannot figure out what you mean in Step 5 when you say to have the left side of the presser foot riding up against your first rolled edge hem. Can you post a picture of what this looks like? Otherwise your instructions seem very clear and I am looking forward to trying this. Thank you
LikeLike
Hi Deborah,
Thnaks for the feedback. I will add that to my To Do list and hopefully get a pic inserted into the post in the next few days.
Liz
JANOME CANADA
LikeLike
Hi Deborah,
I have just added 2 photos with captions to the post. I’m sure you will now understand the process I was trying to explain.
Liz
JANOME CANADA
LikeLike
Perfect! Thank you so much. I now understand Deborah
LikeLike