Take your embroidery to the next level by incorporating Cutwork, a delicate technique of creating holes in the fabric which are reinforced with stitching. Traditionally this drawn thread work was done by hand, but now can be done quite conveniently with our Janome embroidery machines.
Join our fabulous Janome Canada educator, Celine Ross,LIVE today at 3pm EST on the Janome Sewing Machines Facebook page to learn all about Cutwork as she creates an adorable table topper in times for Valentine’s Day.
Don’t worry if you can’t make the LIVE as all of the presentations will be saved under the Videos tab of the Janome Sewing Machines Facebook page. Use the Search Box to find all the videos with CelineRoss.
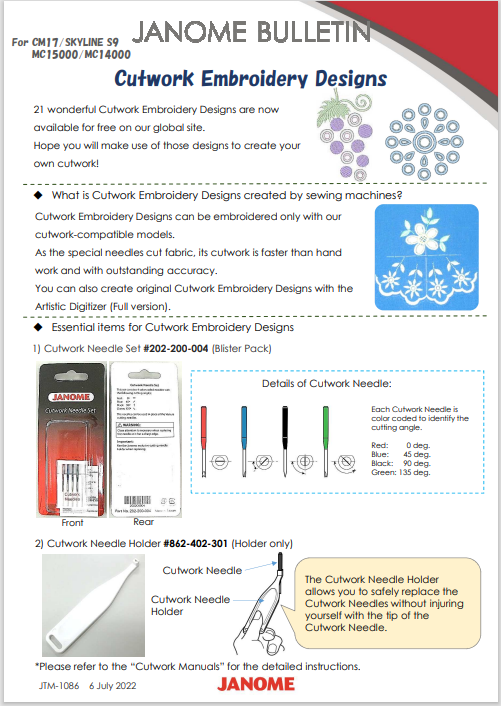
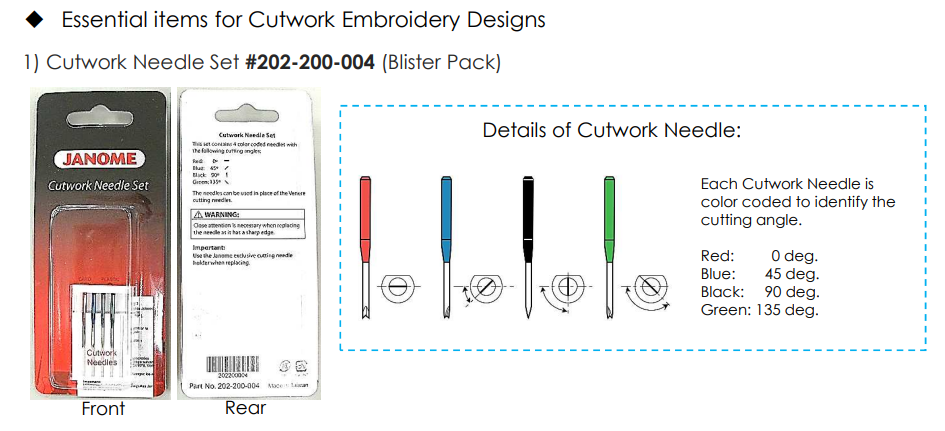
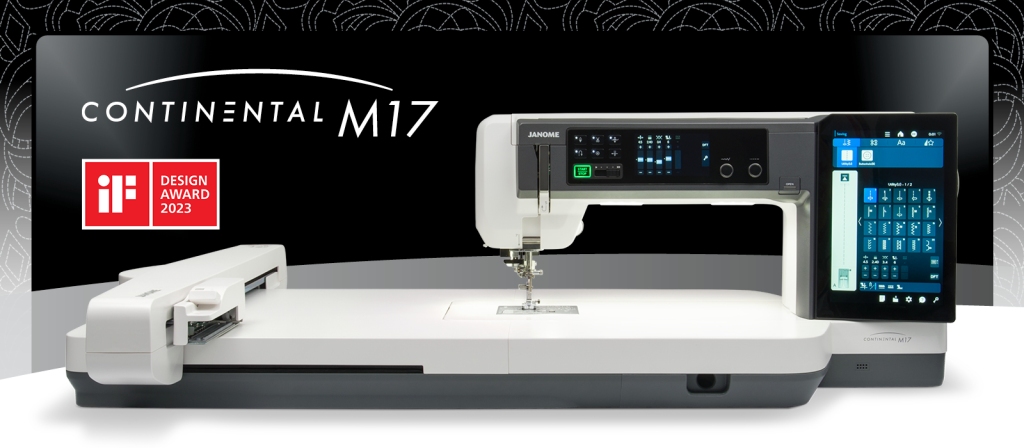
Though Celine uses the Janome Continental M17, many Janome embroidery machines are capable of doing the cutwork technique using the special Janome Cutwork Needles, which is part of the recipe for success.
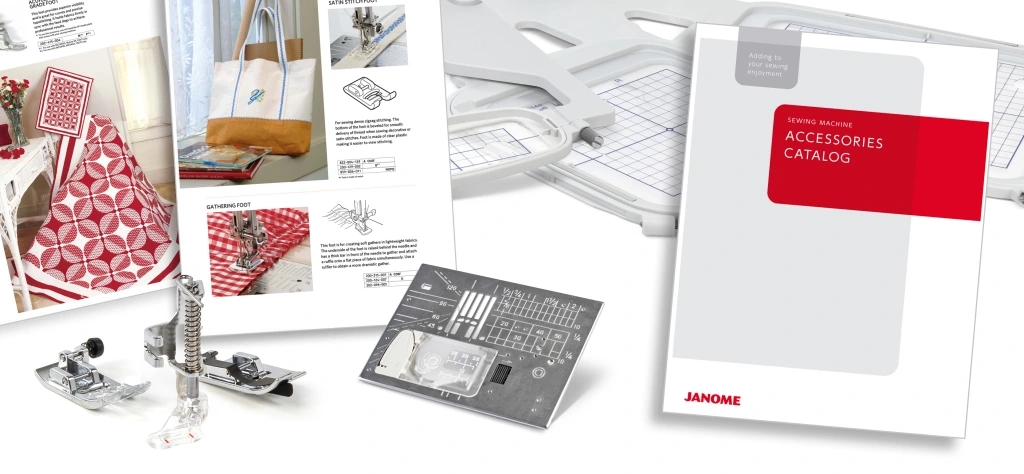
Check out our handy Janome Accessories Catalogue or click on the Accessories Tab onJanome.CA. to find the presser feet and accessories compatible with your machine. Click the Products tab, then scroll down to find “View all Accessories“. Click there to access the Search Box or to scroll through the pages to find the accessories you’d like. Click on the picture/description to find the Part Number and machine compatibility. And, as always, check with your fabulous Janome Dealer!
Don’t have a Facebook account, don’t worry, they will be uploaded to the Janome HQ You Tube channel under the Facebook Live playlist to enjoy whenever you wish!
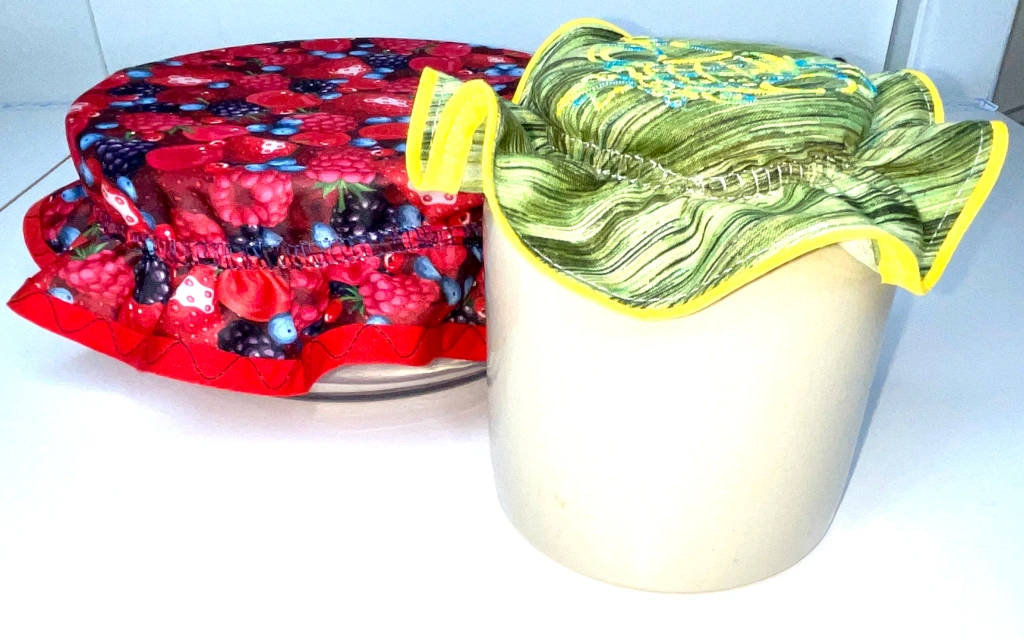
In an effort to use up what we have on hand and to be more environmentally-friendly, making a set of these Fabric Bowl Covers is a terrific way to use up our stash of fabrics and an eco-alternative to using plastic wrap or tin foil. Most of us have reusable containers of some sort, but not all of our glass dishes come with lids, however, so let’s make our own! These would make great hostess gifts, or a cute and practical accessory to your picnics this summer.
Since each of us has different creative ideas, here are the techniques and optional presser feet I used for each of these fabric bowl covers.
Janome Taping Guide Foot, Part Number: 202-311-009 for 5mm/7mm machines
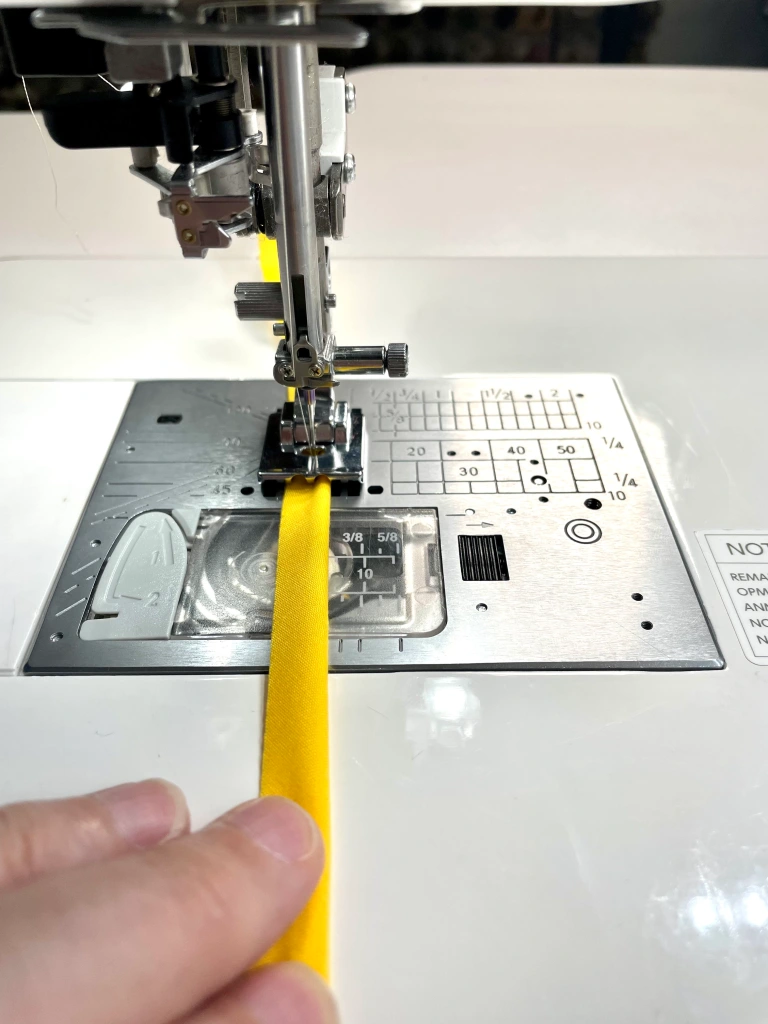
Cut a circle the diameter equal to the top of the bowl PLUS 8cm (3”). My fabric is waterproof so I don’t have to worry about leaks and can be wiped off easily.
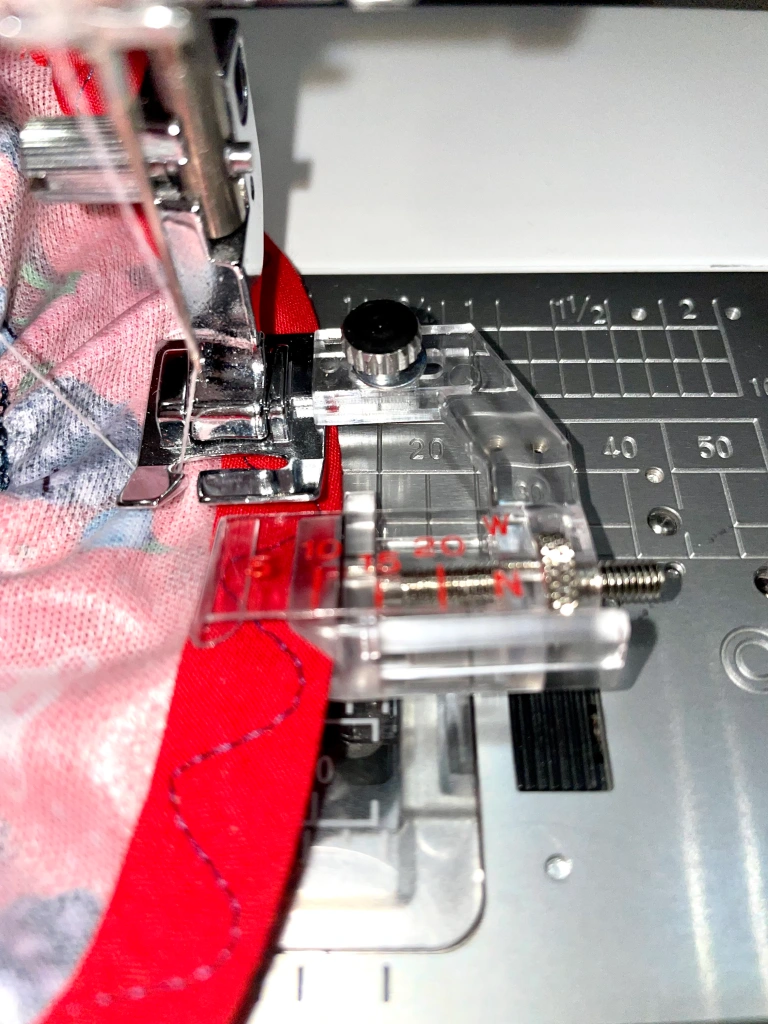
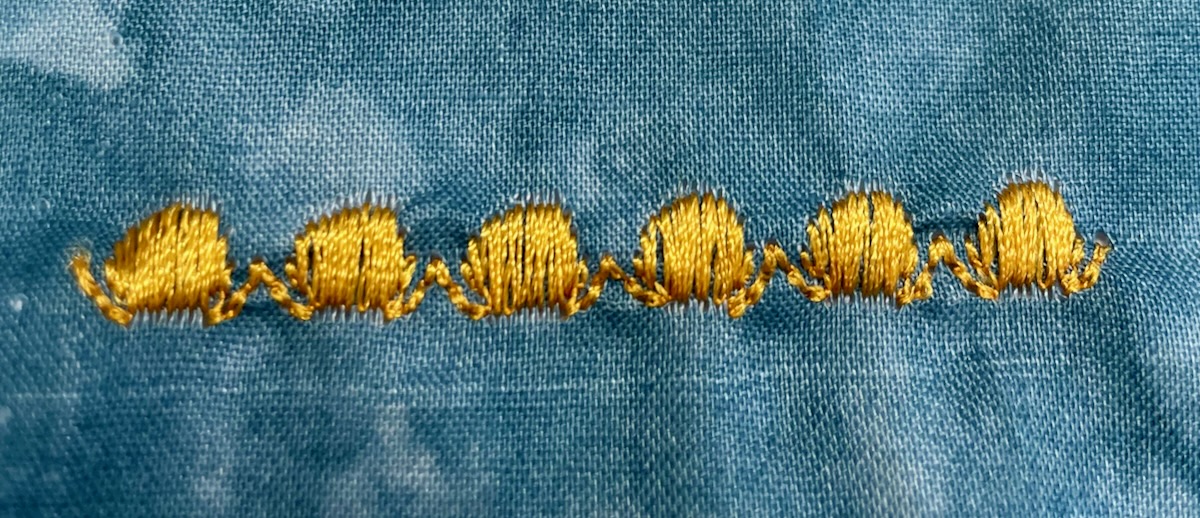
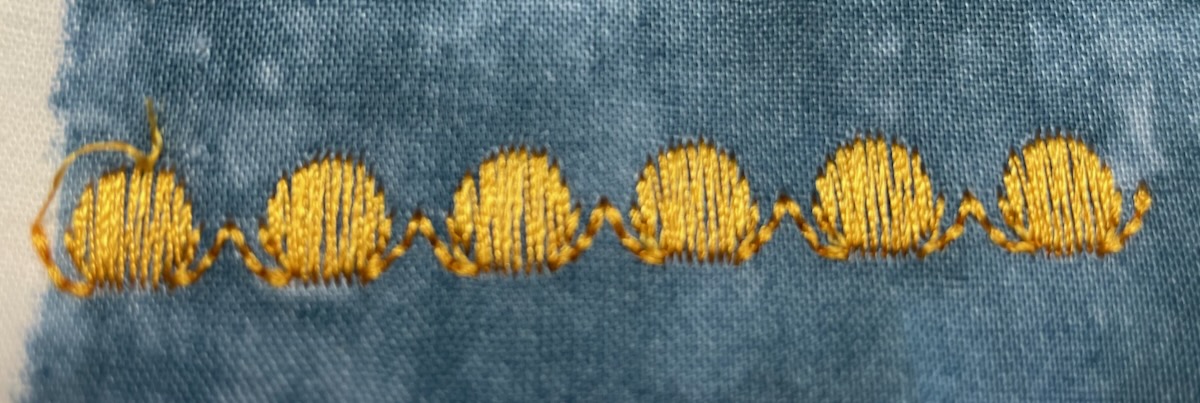
Choose your stitch pattern, I sewed a Serpentine stitch, which is like a curvy zig-zag, and adjusted the width to 9mm.
Janome Taping Guide Foot, Part Number: 202-310-008 for 9mm machines
Mark 2.5cm (1”) from the edge inside the circle all the way around.
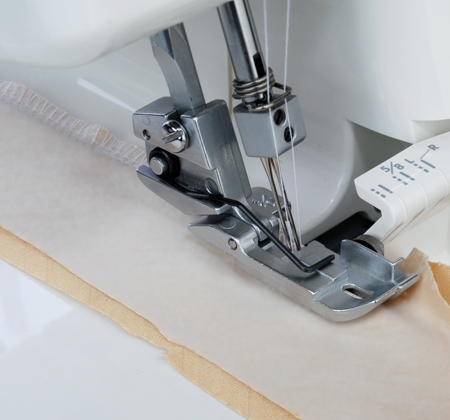
Use the Janome Satin Stitch foot (F)which has a groove on the underside of the foot allowing the extra dense decorative stitches to pass easily under the foot.
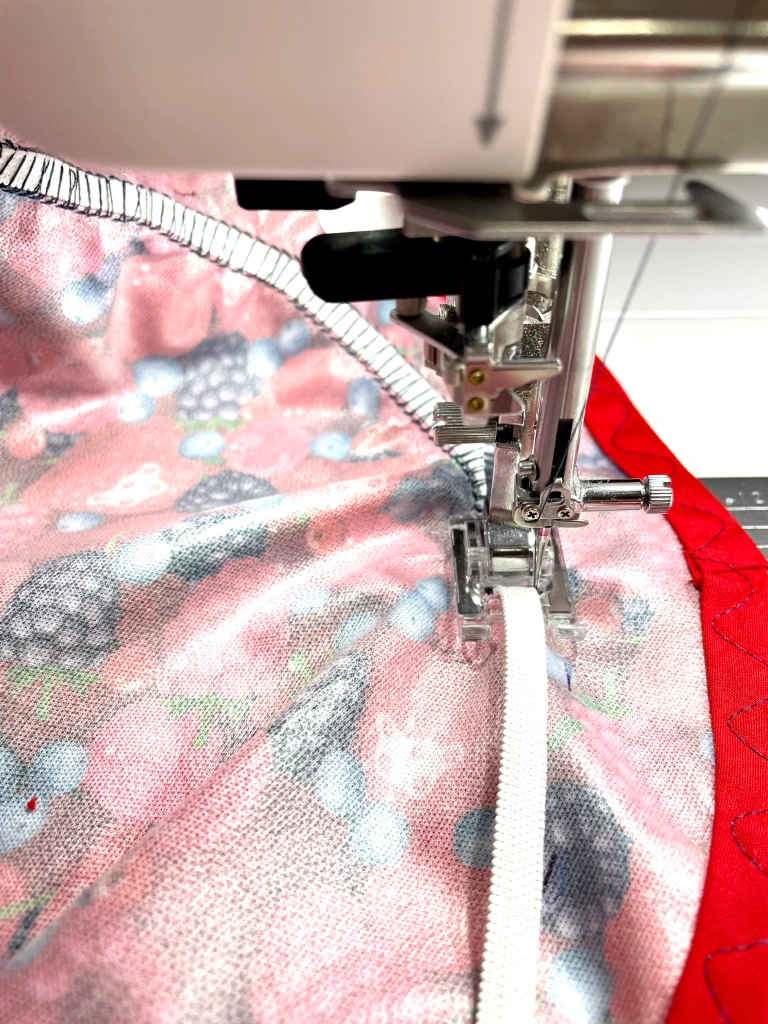
Thread the 6mm elastic over the foot’s tab and sew the stitch, adjusting the stitch width to avoid sewing the elastic as it needs to remain free for adjustment. I used a stitch from the Heirloom category of the Janome CM17, but you could use a wide zig-zag stitch, as well.
And there you have it! It’s simple, fast, practical, and eco-friendly!
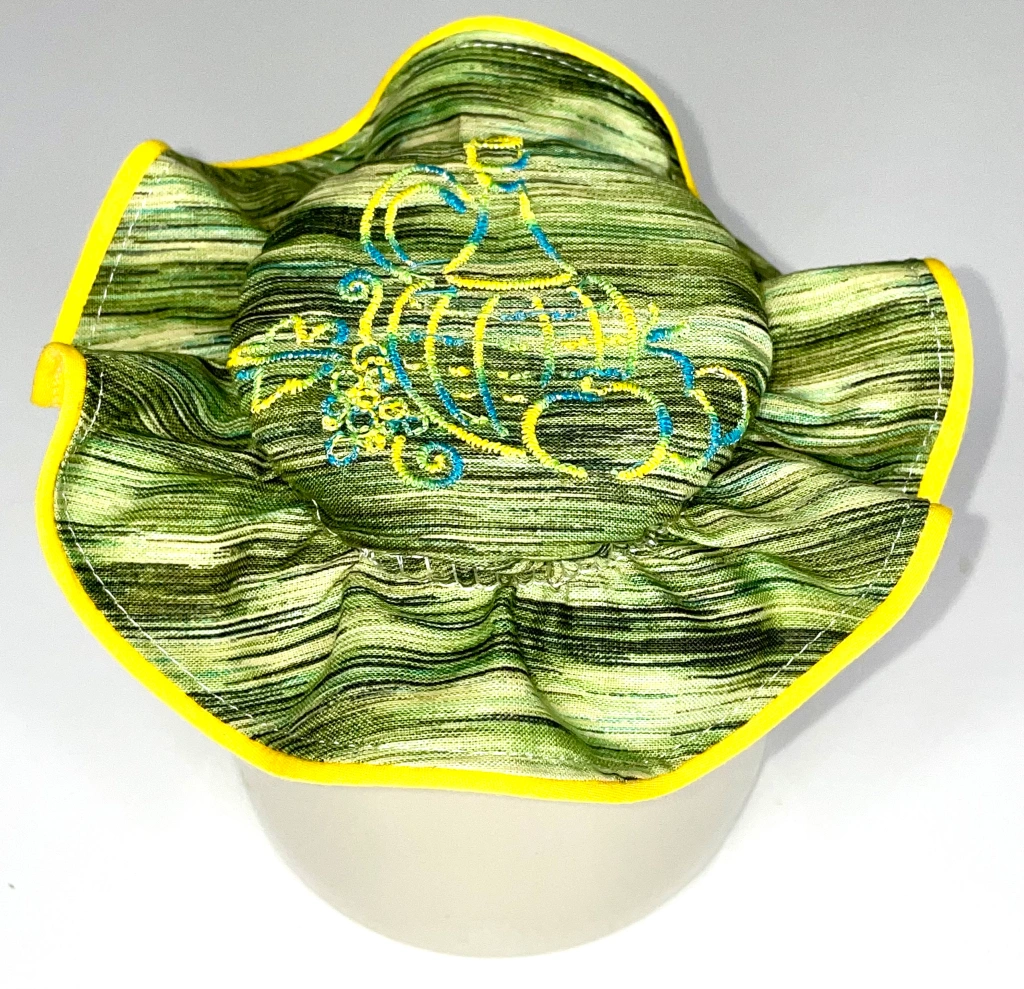
To go a step further, with one of my lovely Janome embroidery machines, I first embroidered a design in the center of the circle using variegated thread colors coordinating with the fabric.
Cut the fabric following the previous instructions.
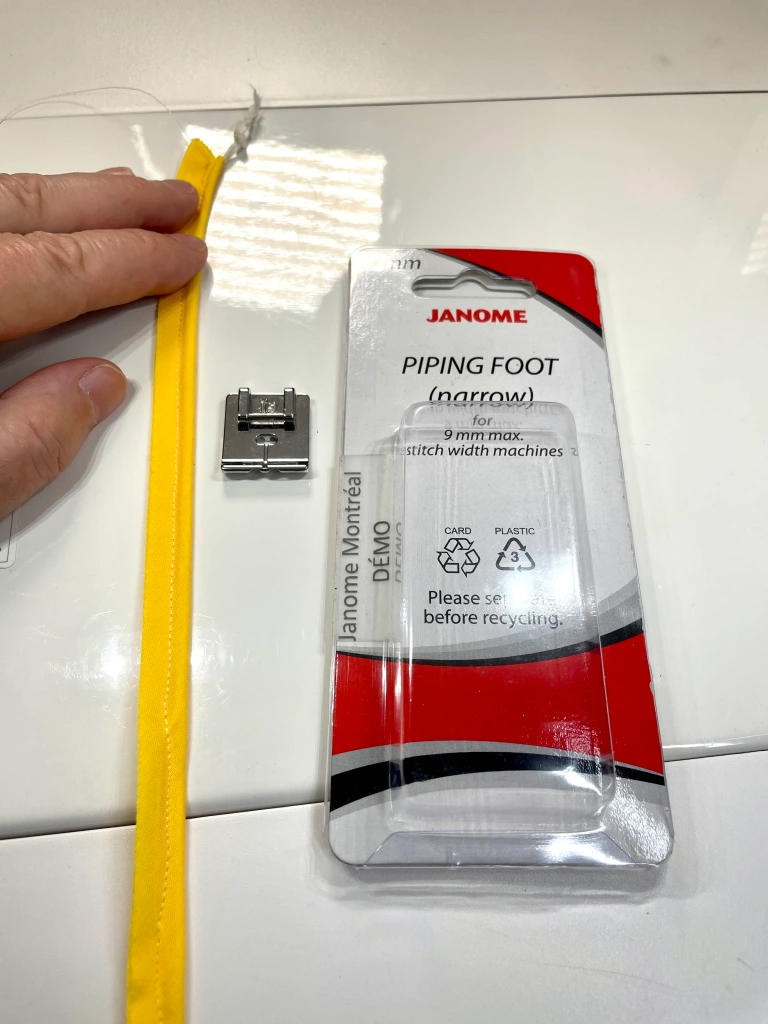
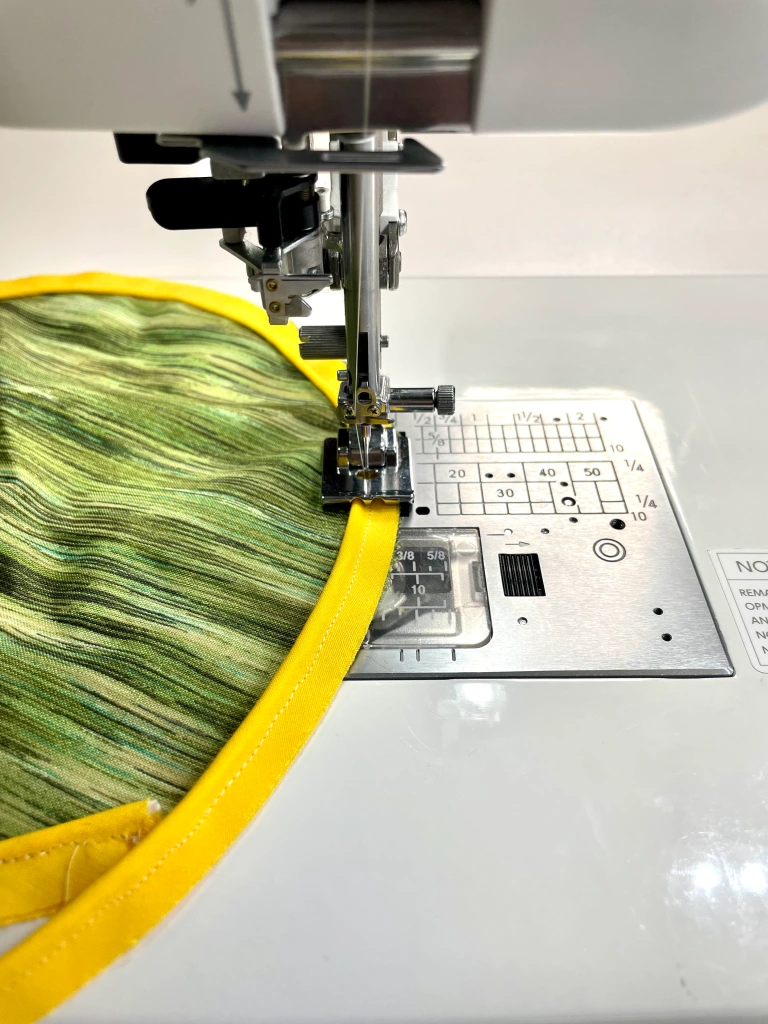
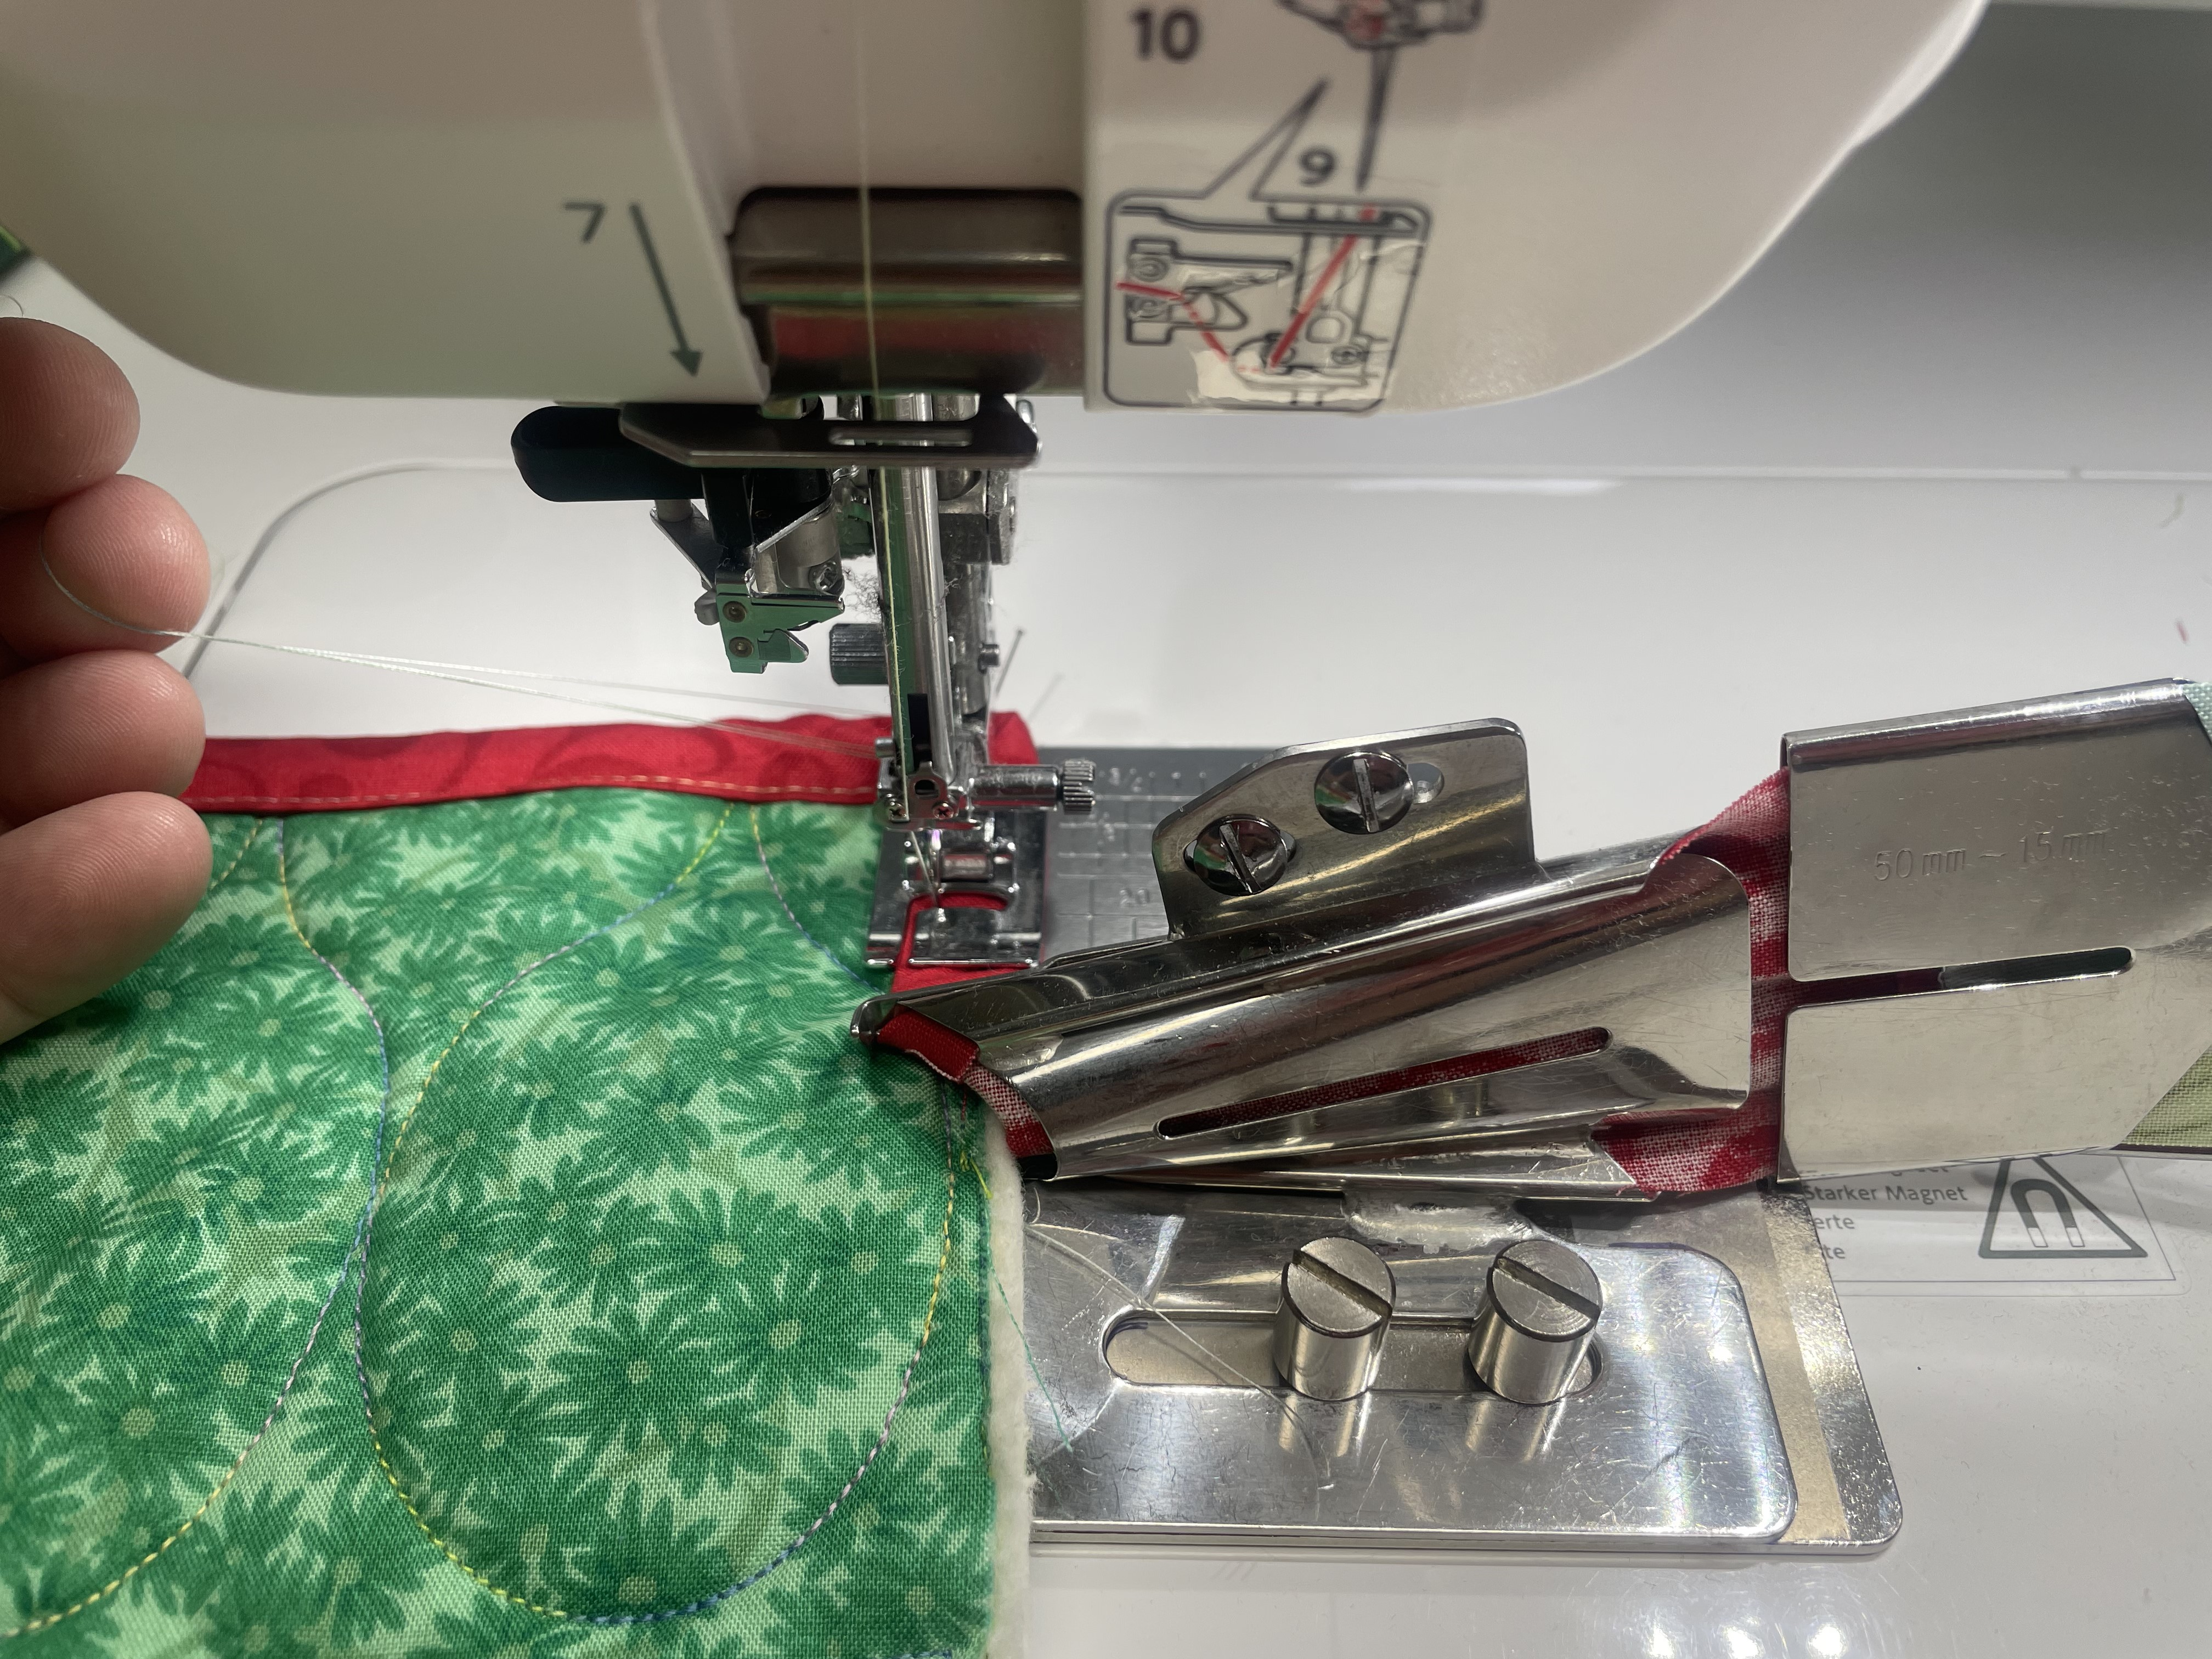
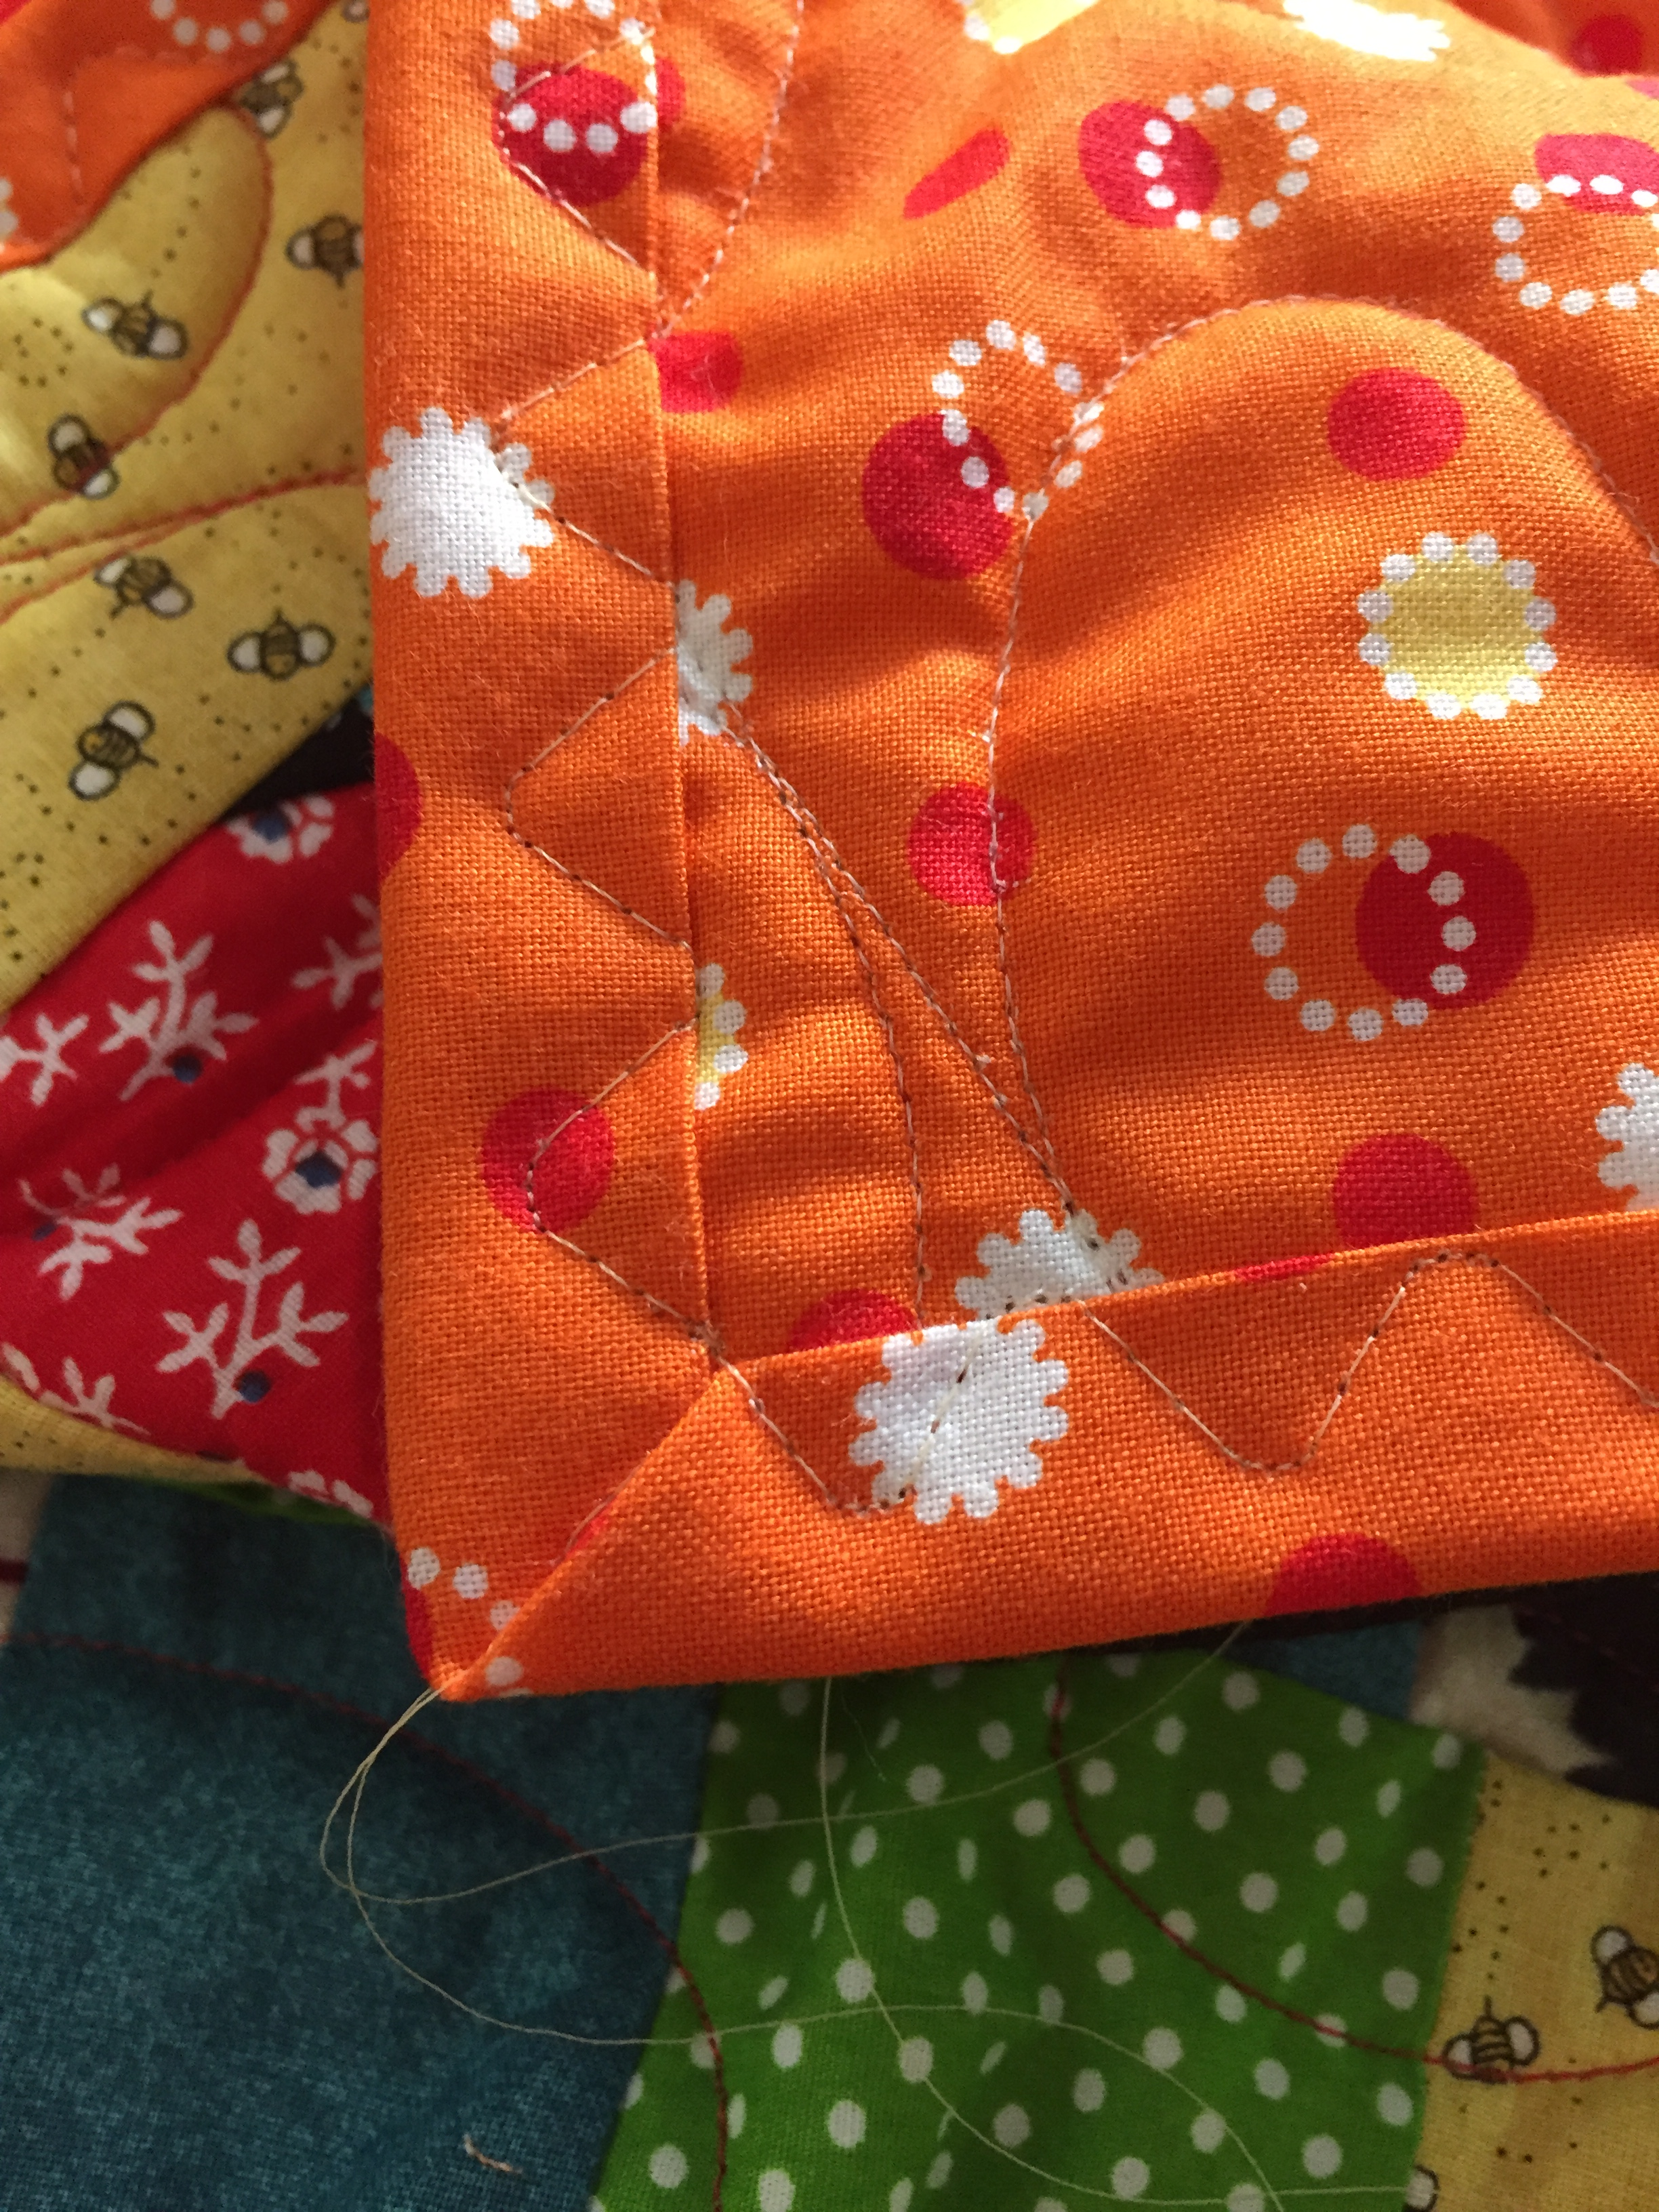
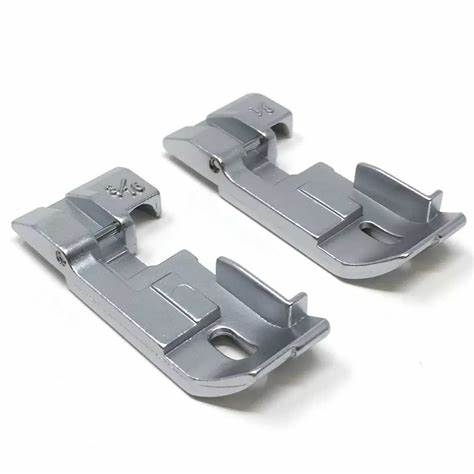
Create the mini-piping with bias tape in colors coordinated with the fabric using the right groove of the Janome Narrow Piping foot,Part Number:202-462-006 for 9mm machines, Part Number: 202-502-009for 5mm-7mm models.
Attach the mini-piping around the circle using the same foot using the left groove.
Follow the steps above to sew the elastic, adjusting the stitch width to avoid sewing through the elastic as it needs to remain free for adjustment.
There’s a lot of features on the Janome CM17, Janome’s top-of-the-line sewing/quilting/embroidery machine. There’s a bit of learning to do the various applications on this machine, but I find that I get a lot of questions about the simple things and wanted to address some of these in this blog post.
Why won’t my needle threader work?
One of the first things you need to do before you can start stitching with the Janome CM17 is to thread the needle. The Janome CM17 has an automatic needle threader that is a dream to use and such a timesaver. I really don’t think I could thread the machine needle without a lot of “special” words if it didn’t have this feature, but you need to use it correctly. It’s not hard, but there are a few things you need to do to ensure that the automatic needle threader can thread your needle.
First, don’t use a needle smaller than a 75/11with the machine’s needle threader. Most of the time you are probably using needles at least this large but keep this in mind. If you have want to thread a smaller needle, like a sz9, for example, don’t use the automatic needle threader. The little wire hook of the needle threader and the two strands of thread looped over the wire hook can not make it through the smaller eye of the needle. the
Instead, thread the needle by hand using the Janome AcuView Magnifiers which comes with the machine, but are also available separately for certain machines. See your Janome Canada dealer for details.
Janome AcuView Magnifier with 3 magnification lenses; 20/40/60 is included with the Janome CM17
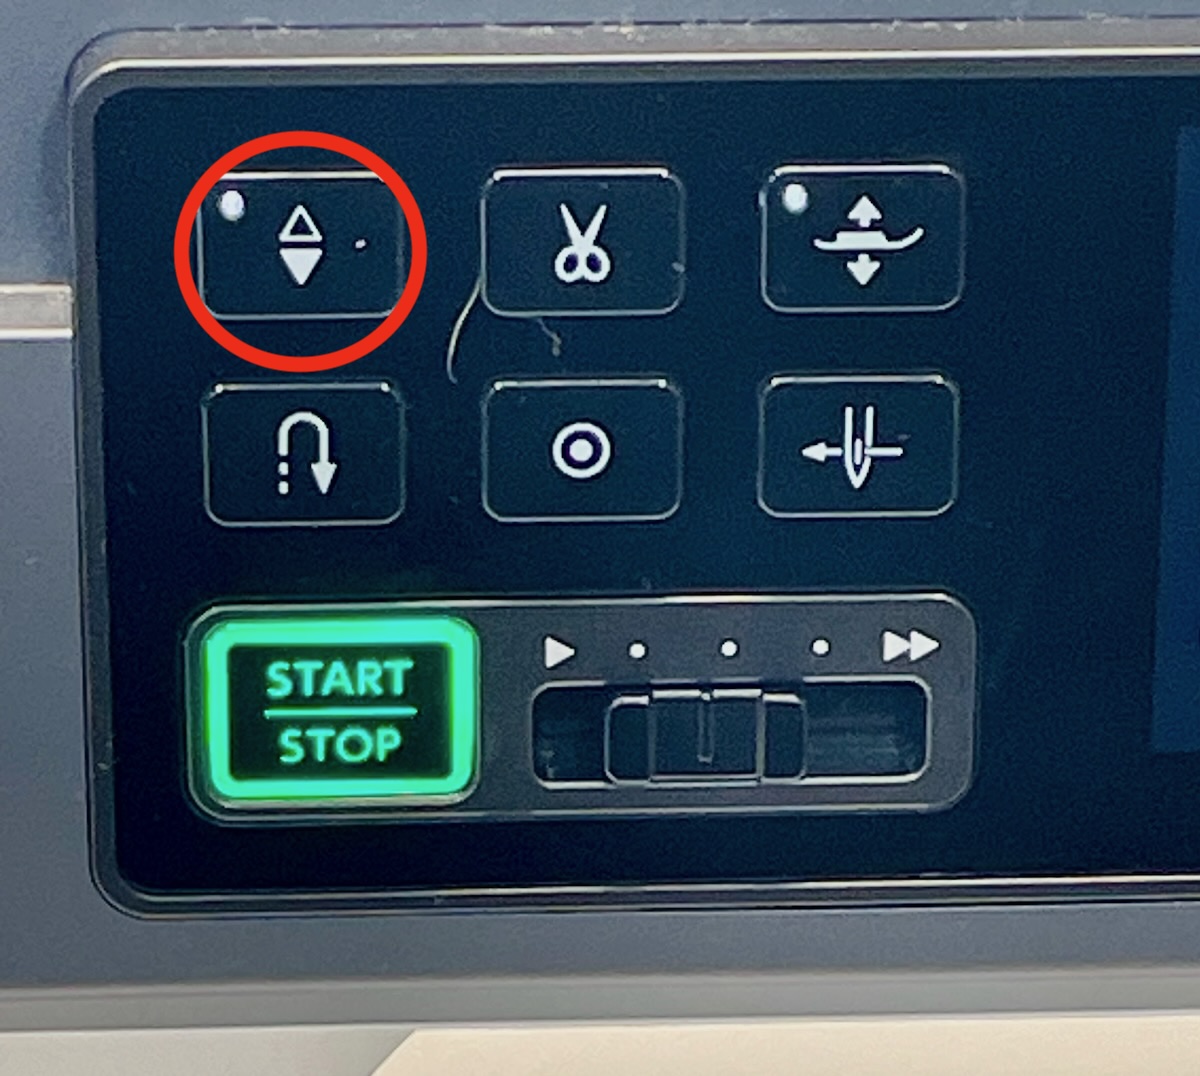
Next, use theneedle up/down button to bring the needle to the top of its rotation. This is a step that many users forget and then wonder why the needle threader won’t thread their needle. The Janome CM17 is a smart machine, but it does need just a little bit of your help sometimes. 😉
Needle up/down button on the JanomeCM17 – and many other machines, as well
Having done this, lock your machine. Again, this is a step that many users neglect and it’s a really important one. Locking the machine prepares for threading through all of the guides and tension disks and ensures that the needle threader can operate properly.
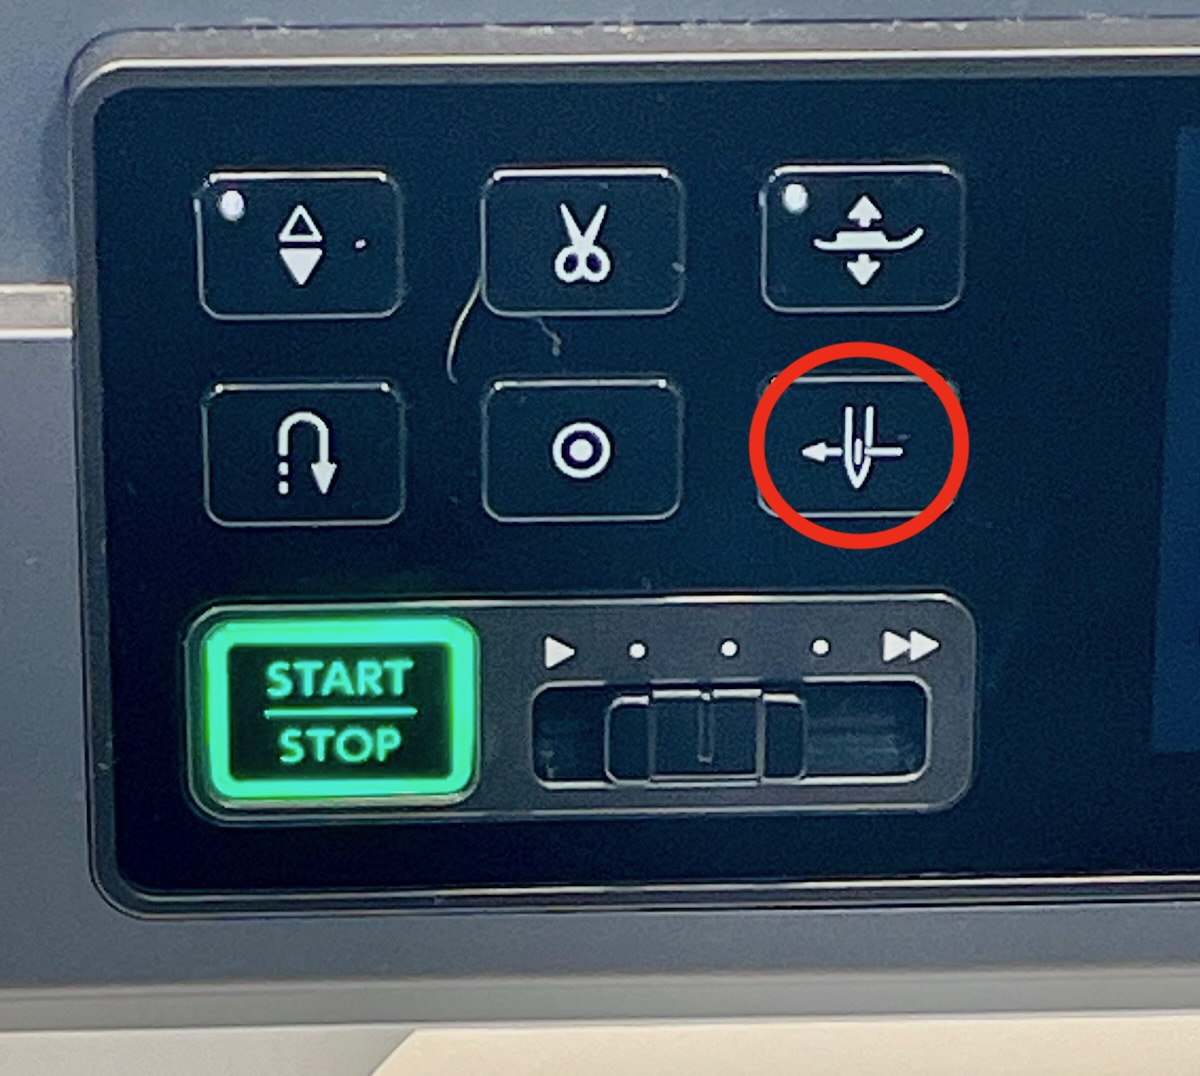
The next step is the most important – and the most fun – press the needle threader button and watch the Janome CM17 thread your needle. The button will not illuminate and will not work if the needle is not in the highest position, or if the machine is not locked, so review the previous steps if it’s not working.
Automatic Needle Threader button on the Janome CM17
I’ve got to admit that it never gets old watching this automatic needle threader work it’s magic. Once the needle is threaded, pull out the thread from the back of the needle eye and you’re ready to start stitching…almost!
I’m having trouble winding my bobbin!🧵
You’ll need a properly wound bobbin to make a proper stitch. There are a few things to keep in mind with the bobbin on the Janome CM17 and other Janome machines, as well.
First, use only Janome “J” bobbins. Many problems are caused when using a generic bobbin which is not quite the same size, or the same composition. Save yourself frustration and use only “real” Janome bobbins, which have a “J” on the centre post. You can get these at your local Janome Canada dealer.
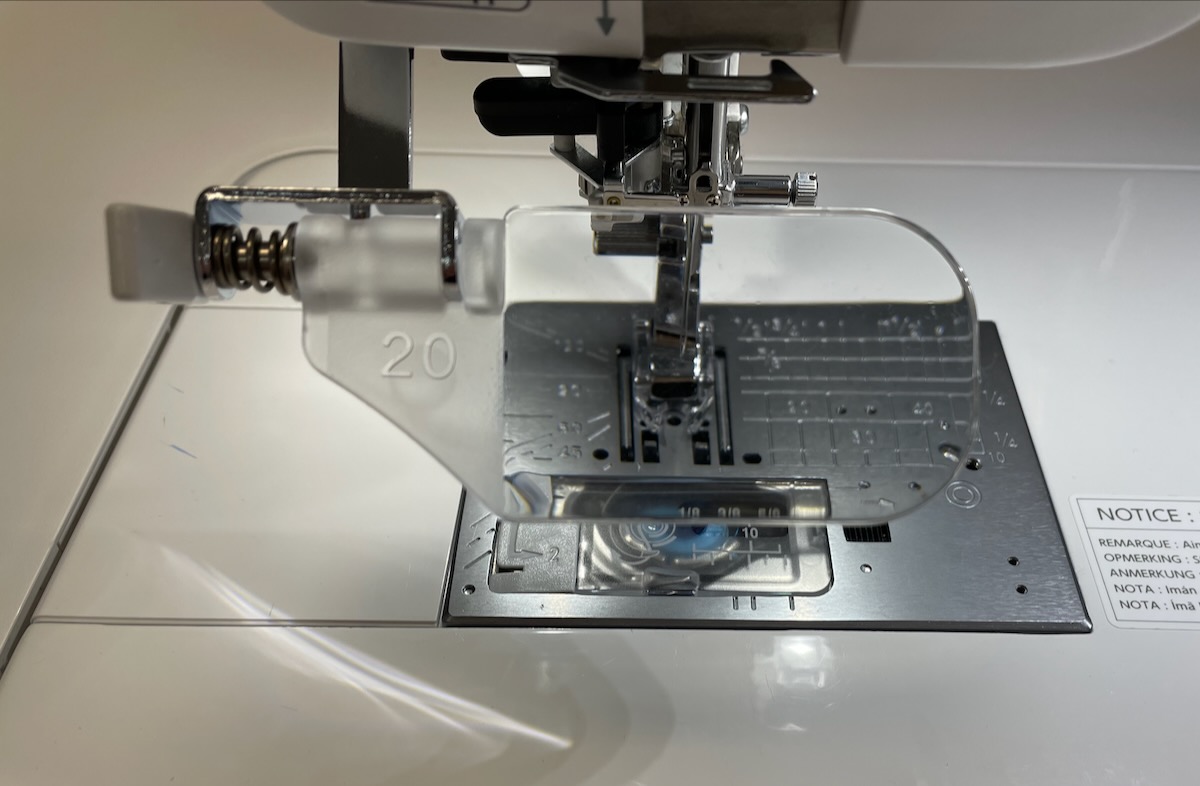
Next, place the spool or cone of thread on the spool pin and follow to the proper thread path to use for winding a bobbin. Consult your machine’s Instruction Manual; review on the freeJanome AcuAssist App; review the onscreen diagrams built-into the machine, or, more information on this can be found HERE!
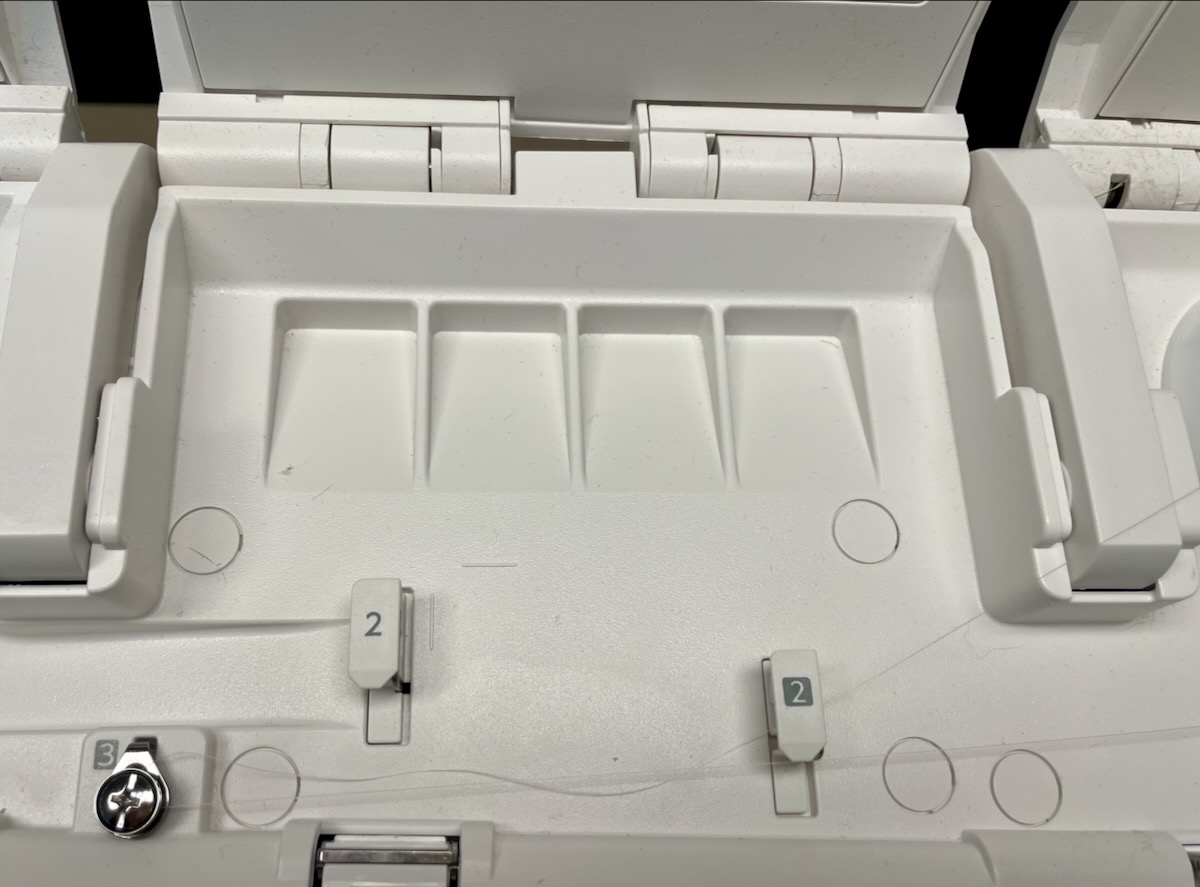
Thread from the cone through the numbered thread guides #2 and #3 for bobbin winding on the Janome CM17
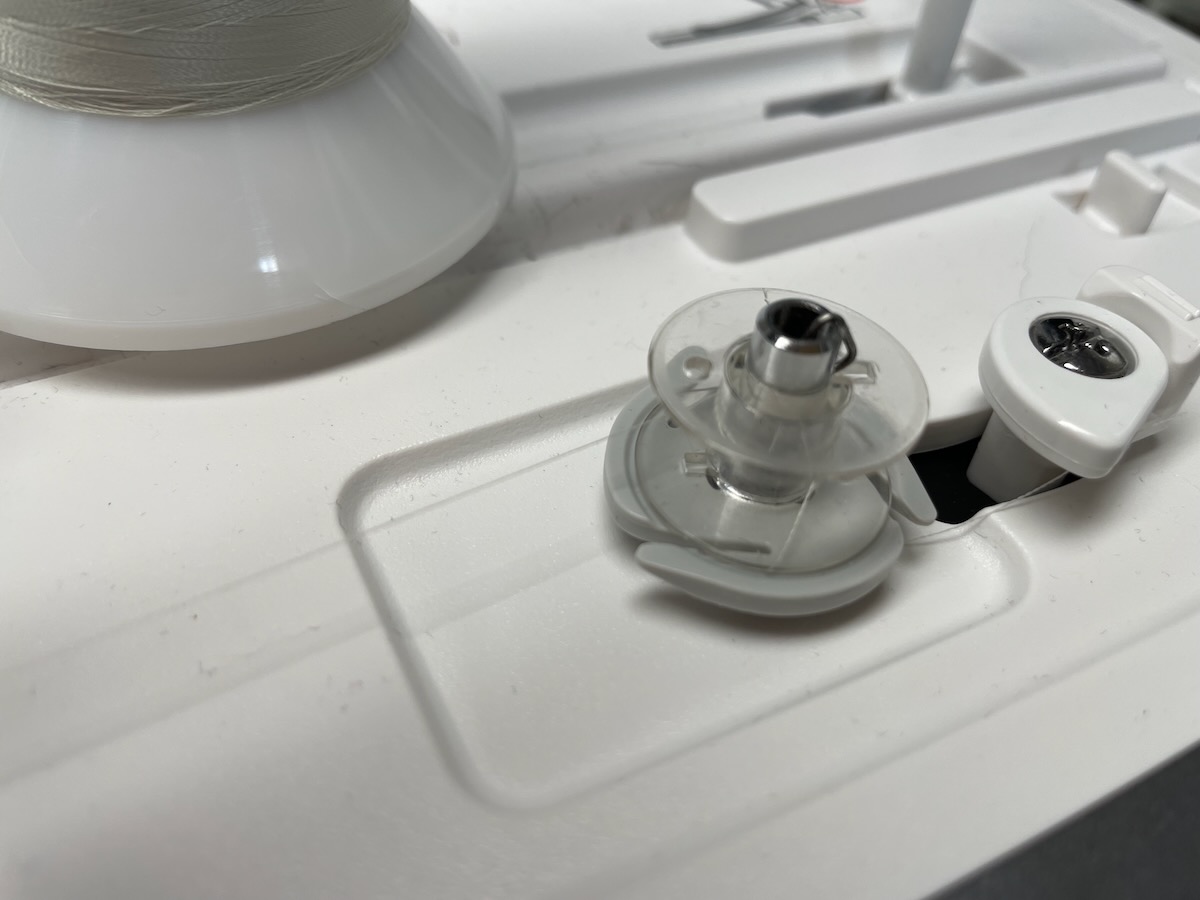
Place the empty bobbin on the bobbin winder spindle and wind the thread clockwise around it about 5 times. Use the cutters on the bobbin plate below the bobbin winder spindle to cut off the excess thread.
Thread wound around bobbin and ready to be wound on Janome CM17
Press the bobbin winder stopper towards the bobbin and press the bobbin winding button. The bobbin winder will stop automatically once the bobbin is full.
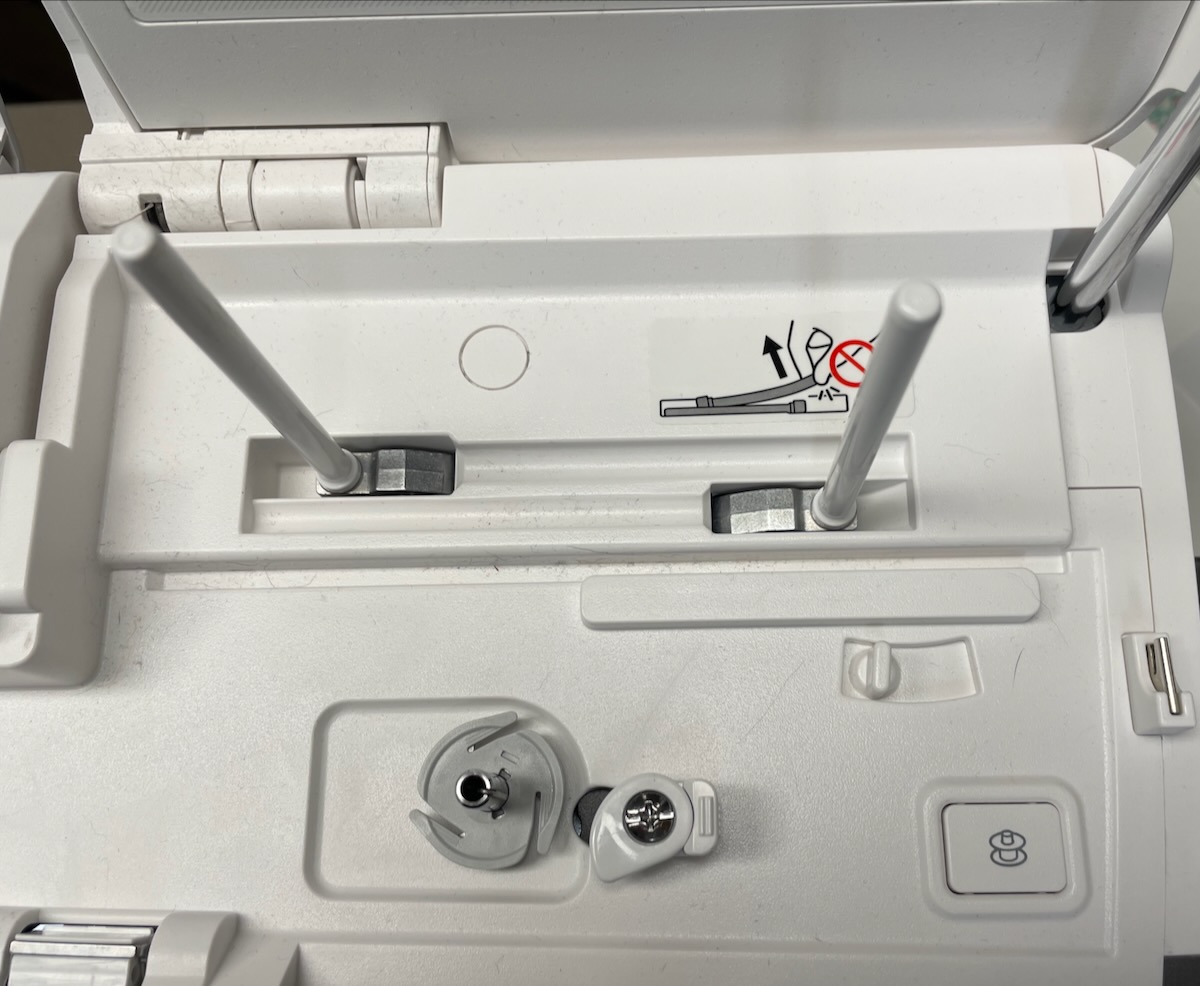
The bobbin plate (grey piece in this photo) can be removed if needed to remove thread wound under it
If you get thread winding underneath the bobbin plate, the thread has likely come out of the thread guides. Stop and cut the thread. The bobbin plate (the grey piece underneath the bobbin pin) can be carefully pulled up and off the bobbin winder spindle. Remove the excess thread and replace the grey piece.
Why can’t I see the stitch I want to use?
Now that the Janome CM17 is all set up for stitching, you need to think about the type of sewing you’ll be doing. On this and other Janome models, there are 3 needle plates and the needle plate rules which stitches you can use. If you have the “wrong” needle plate installed, your stitch choices will be limited. For example, with the straight stitch needle plate installed, you won’t be able to sew decorative stitches.
Sewing menu with straight stitch needle plate installed. Note that no decorative stitches are available
Many users encounter this situation and panic. If you aren’t seeing the stitches you want to use on the Janome CM17, check and replace your needle plate with the appropriate one. If you are still encountering problems, turn the Janome CM17 off and on and this should resolve any machine confusion.
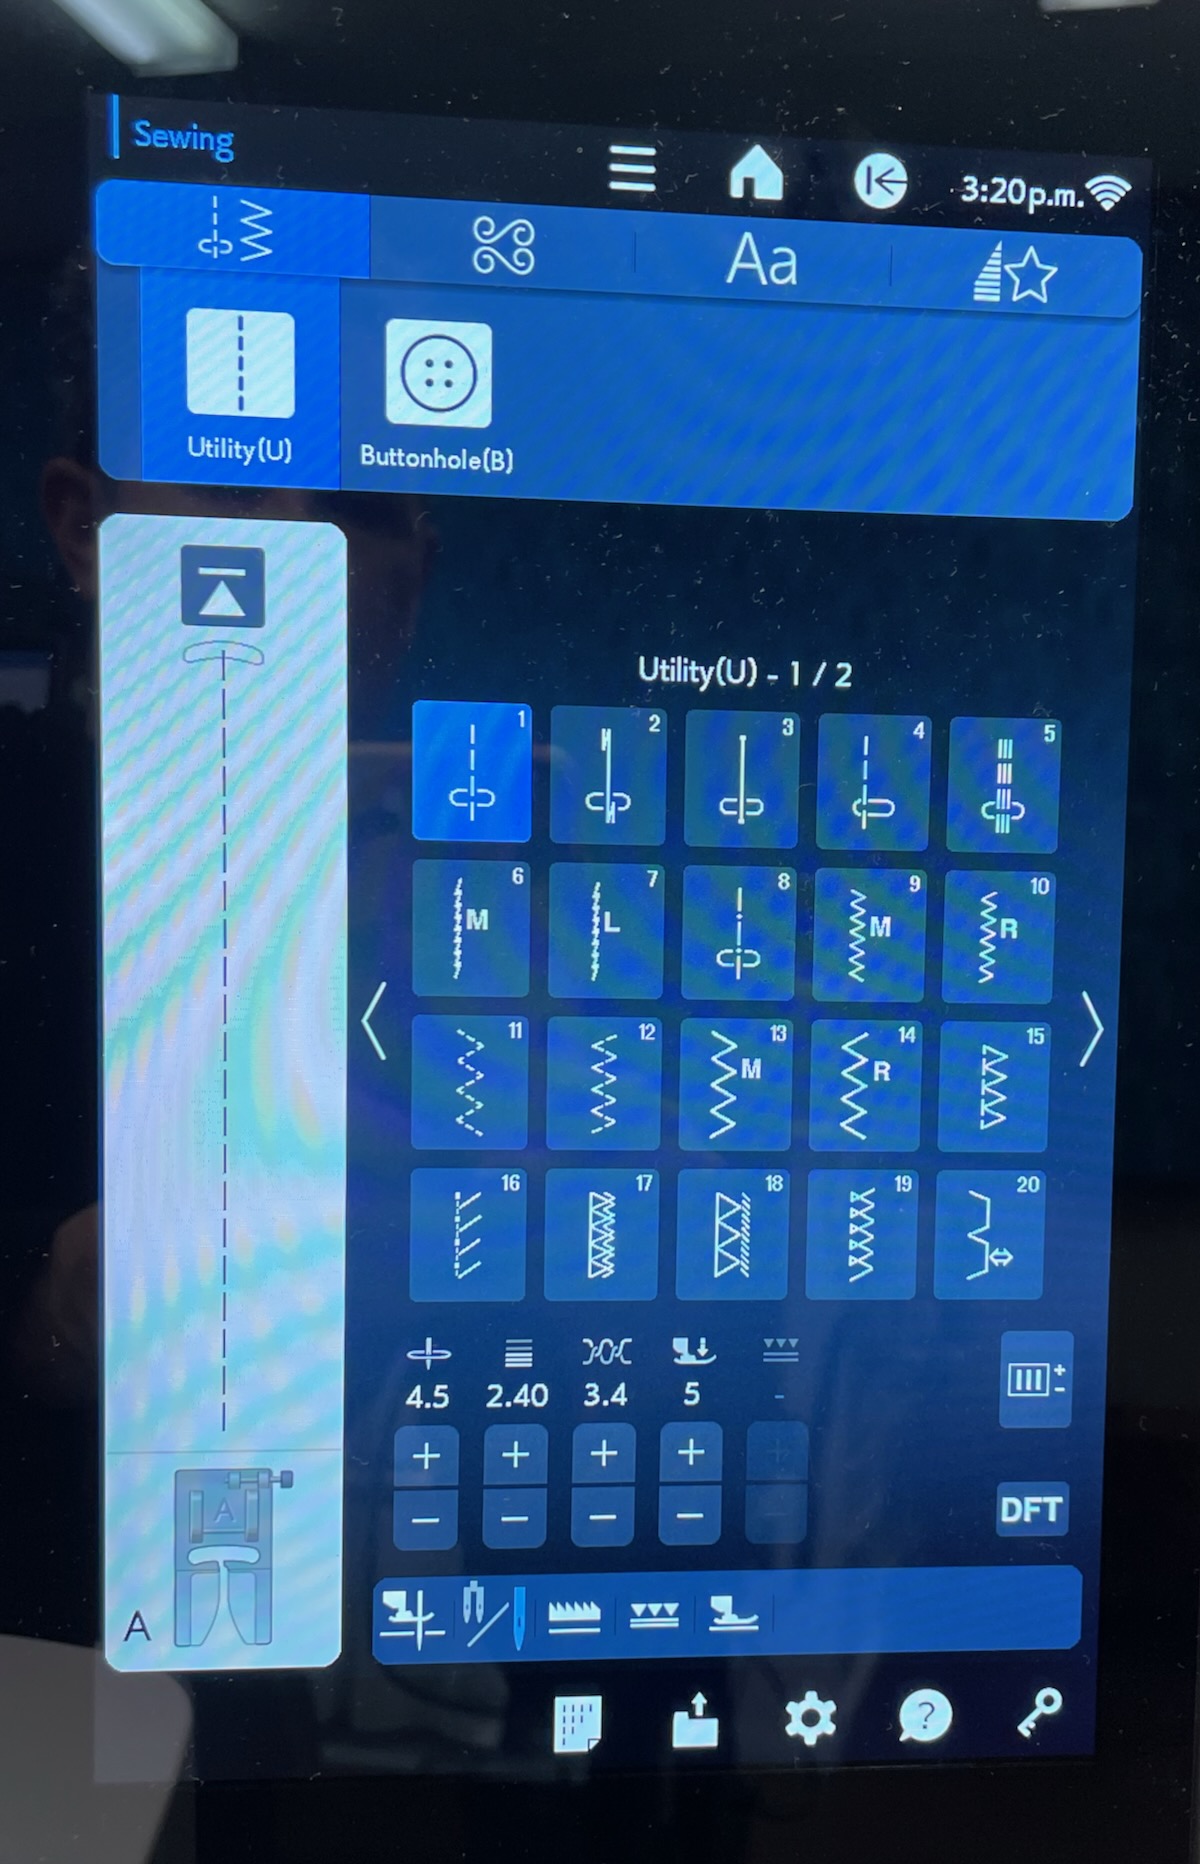
Sewing menu with regular/zigzag needle plate installed. Note that decorative stitches are now available
My decorative stitches are bunching up! ☹️
This is an issue that I hear about very frequently. No matter what Janome machine you are using, you need to use a stabilizer behind your fabric when working with decorative stitches. Fabric alone is not usually enough to produce perfect decorative stitches. The more dense the decorative stitch, the more or heavier stabilizer you will need to use.
Decorative stitches with no stabilizer. Notice the tunneling and bunching up of fabric
I always suggest that you do a test first before committing to your project when using decorative stitches. If your stitches are bunching up with 2 layers of stabilizer, you may need 3 or even 4 layers – this is why you need to do a test piece first. I like to use tear away stabilizer for most of my projects but if you’re a garment sewer, you may prefer to use another type of stabilizer that can be left in the garment, like an iron-on cutaway.
The same decorative stitches with 3 layers of tear away stabilizer. Notice that there is no bunching or tunneling
My free motion quilting stitches are not the same length! 📏
There is a perfect solution to this on the Janome CM17, Janome Continental M8 and the Janome MC 9480QC Professional – the Janome the A.S.R. (Automatic Stitch Regulator)!
The Janome A.S.R. (Accurate Stitch Regulator) ensures that your quilting stitches are the same length. This accessory comes standard on the Janome CM17 and Continental M8, but may be an additional purchase on some Janome models, like the Janome MC9480QC Professional. It does take a bit of practice to learn how to use the Janome A.S.R. (Accurate Stitch Regulator) but, if consistently even quilting stitches are a goal for you, it will definitely help you achieve it! For more information on using the Janome A.S.R. (Accurate Stitch Regulator) click HERE!.
Janome A.S.R. (Accurate Stitch Regulator) free motion quilting feet included with the Janome CM17
I hope this helps you with some issues you may be having with your Janome CM17. It’s a powerful machine that is so helpful in your sewing, quilting and embroidery, but you do need to spend some time learning how to use it.
Knowledge is power and once you have the knowledge, you’ll be able to use the power of the Janome CM17 to create amazing projects in your studio. 😀
Kim Jamieson-Hirst of Chatterbox Quilts, a Janome Canada Artisan in Calgary, Alberta.
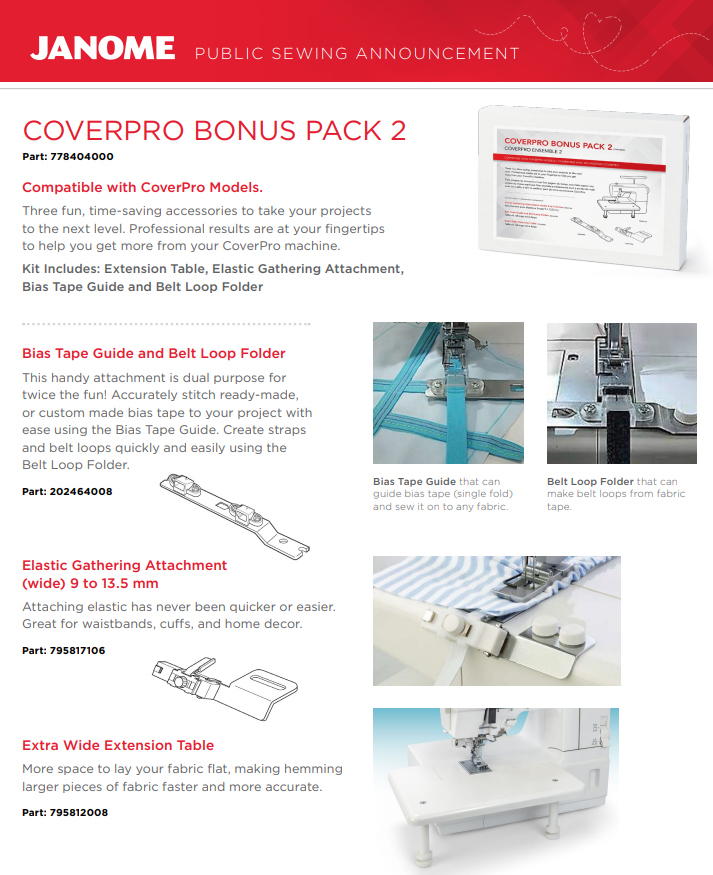
Brand NEW and IN STOCK at our Janome Canada warehouse, the Janome CoverPro Bonus Pack 2 contains three fun accessories which help you get more from your Janome CoverPro machine, regardless which model you have. YES! All three accessories included in the Bonus Pack fit all Janome CoverPro models!
Join us LIVE at 1pm EST @janomecanada Instagram page today as our Janome Canada educator, Tobias Binder, shows you all about the Janome CoverPro Bonus Pack 2, including how to use each accessory. However, don’t worry if you can’t make the LIVE presentations as they’ll be stored in the feed on the Janome Canada Instagram page.
And, be sure to check with and order from your Janome Canada dealer! Ask them about the Janome Canada Red Tag Sale going on till the end of February, 2024. It may be an ideal time to pick up a new CoverPro machine, hint, hint, lol!
Follow us on the Janome HQ Facebook page and the Janome HQ Instagram page to see what’s new at Janome Canada and information about upcoming in-person classes and presentations at our Janome Canada Headquarters, our Janome HQ,!
February is National Embroidery Month, so today you will learn how to embroider a ready-made t-shirt, including how to hoop and what stabilizers to use. Celine is back LIVE every Tuesday at 3pm EST on the Janome Sewing Machines Facebook page for an entire month of sewing fun and education to help you get the most from your Janome machine!
Don’t worry if you can’t make the LIVE as all of the presentations will be saved under the Videos tab of the Janome Sewing Machines Facebook page. Use the Search Box to find all the videos with CelineRoss.
Though Celine will use the Janome Continental M17, which is Janome’s top-of-the-line sewing/embroidery combo machine, there are many other combo models, or stand-alone embroidery models from which to choose! There’s a machine for every experience-level, every space and every budget.
Check with your Janome Canada dealer to see these machines in action to find which is right for you, and be sure to ask about the Janome Canada Red Tag Sale going on through the month of February, 2024.
For more embroidery tips, tricks and techniques, check out previous blogs right here on Janome Life!
Check out our handy Janome Accessories Catalogue or click on the Accessories Tab onJanome.CA. to find the presser feet and accessories compatible with your machine. Click the Products tab, then scroll down to find “View all Accessories“. Click there to access the Search Box or to scroll through the pages to find the accessories you’d like. Click on the picture/description to find the Part Number and machine compatibility. And, as always, check with your fabulous Janome Dealer!
February is National Embroidery Month, and no matter what the weather outside, it’s always the perfect time to stay inside and sew!
Your participating Janome Canada dealer has some fabulous savings on several Janome embroidery machine models, so check out the special Janome Canada Red Tag Sale which, coincidently, goes on through the month of February.
If you already have a fabulous Janome embroidery machine but would like some new designs, or would like to practice importing designs into the machine, check out the INSPIRE tab on the Janome Canada website, Janome.CA for loads of FREE embroidery designs which are already in the JEF (Janome Embroidery File) format, so they will work in any Janome embroidery machine.
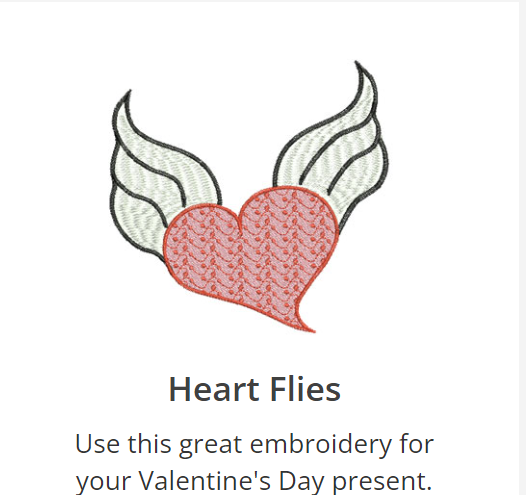
Just in time for Valentine’s Day, you’ll find this Heart Fliesembroidery design on Page 6 in the Embroidery section of the INSPIRE tab. You’ll also see this heart embroidery design used in a special Valentine’s Day project in an upcoming Janome Sewing Machines Facebook Live, Wednesday, February 7th at 3pm. I hope you’ll join me!
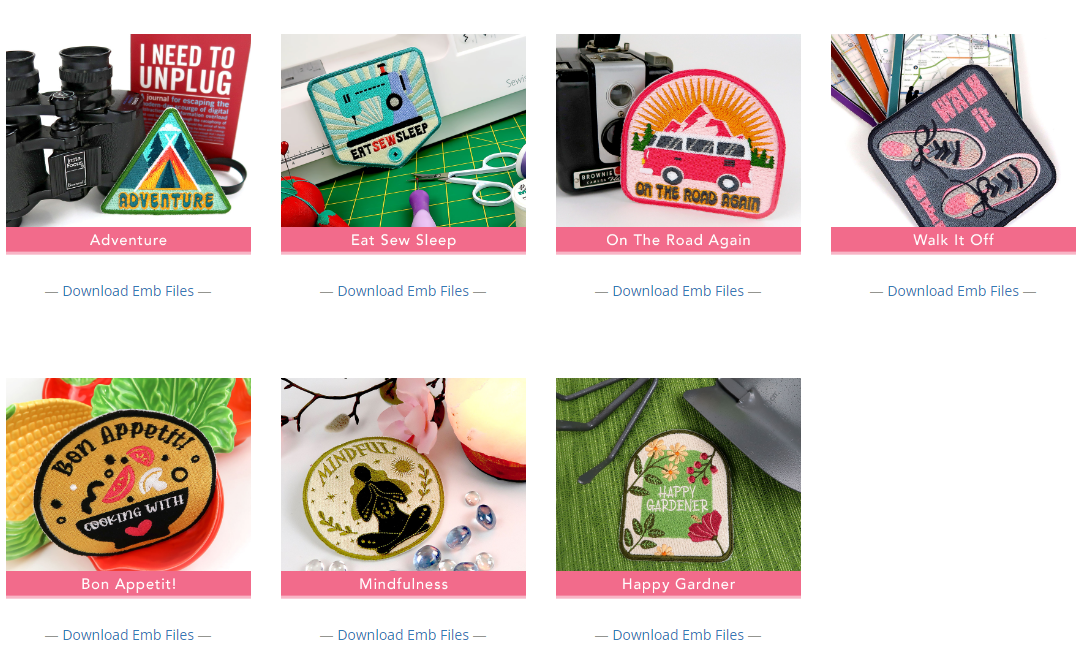
You’ll also find even more free embroidery designs in the Sew4Home tab, also under the INSPIRE tab on Janome.CA. The complete Hobby Patch series is there, for example, including full downloadable instructions in addition to the embroidery designs.
Please note; there are no active links in the photo above
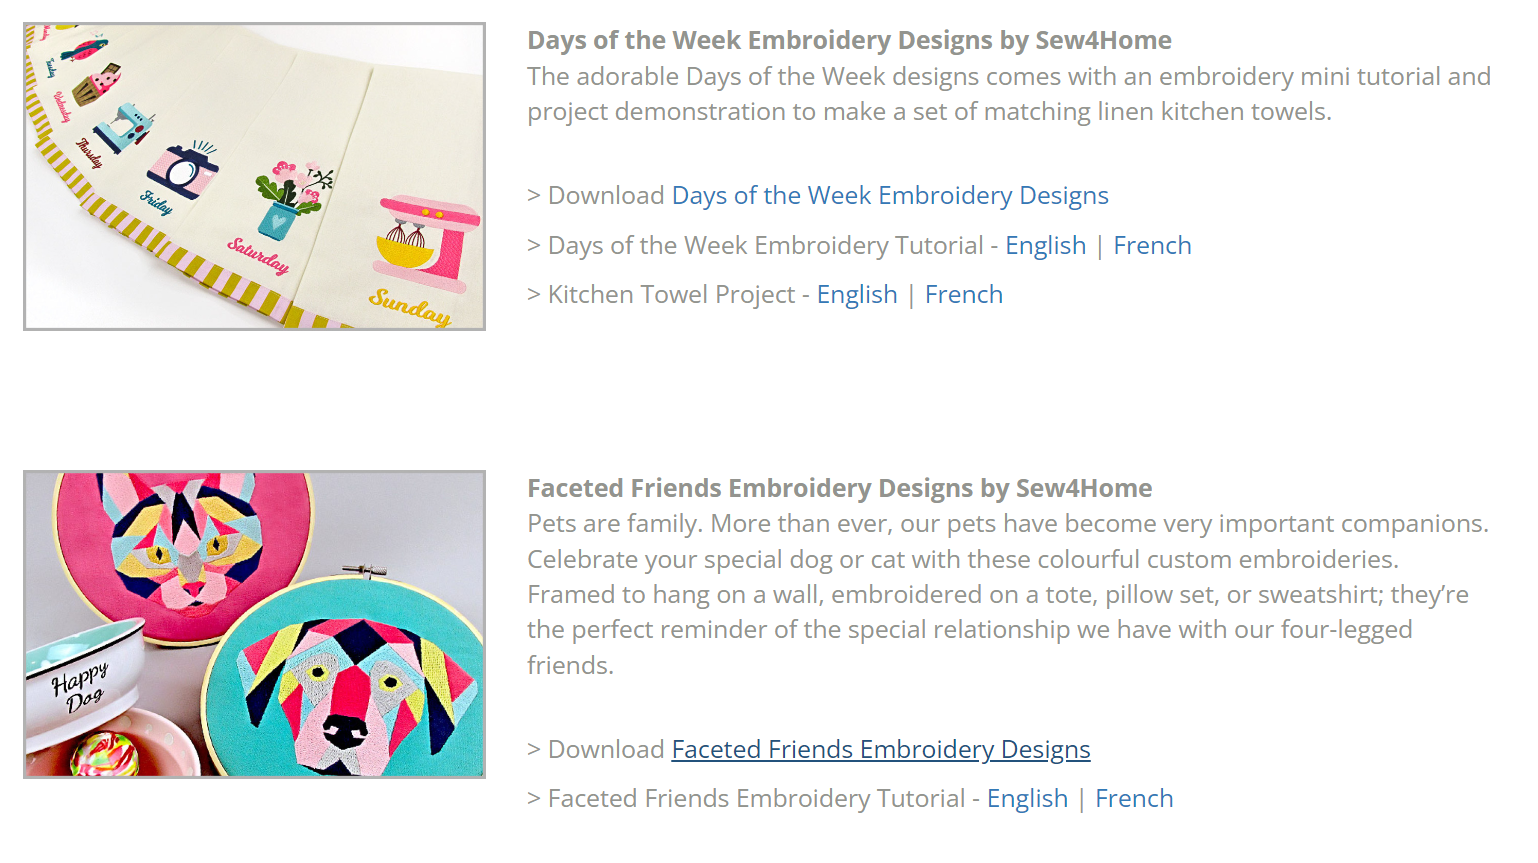
If the Hobby Patches aren’t your thing, how about the Days of the Week or the Faceted Friends embroidery designs? There’s something for everyone, and best of all, they’re FREE on Janome.CA!
Please note; there are no active links in the photo above
Be sure to visit your Janome Canada dealer for a demonstration of the many Janome embroidery machines, including sewing/embroidery combo models and stand-alone embroidery models. There’s a machine for everyone and the creative possibilities endless – well beyond National Embroidery month!
For even more embroidery inspiration; more about the many embroidery machines, and tips on threads, needles, stabilizers and tools to help make whatever the embroidery project quicker, easier and more enjoyable, check out previous blogs right here on Janome Life!
We’re kicking off February with a bang as Janome Canada Instagram celebrates reaching 5000 thousand followers!
A HUGE THANK YOU to all our Janome fans and family who’ve helped Janome Canada grow and supported our efforts to share the Janome love.
If you haven’t already, be sure to follow @janomecanada on Instagram for sewing tips and tricks; to find out what NEW machines, products and promotions are being offered from Janome Canada; and to share in the FUN of all things Janome.
Tune in LIVE every Wednesday at 1pm Eastern to learn about the variety of sewing, quilting, and embroidery machines from the Janome line; learn how to use the many presser feet, accessories and attachments; and pick up a variety of helpful sewing tips, tricks and techniques along the way. There’s something for everyone!
Join us LIVE at 1pm EST @janomecanada Instagram page every Wednesday afternoon to learn about all things Janome! However, don’t worry if you can’t make the LIVE presentations as they’ll be stored in the feed on the Janome Canada Instagram page and later posted as videos on the Janome HQ You Tube channel.
Today’s topic is the Janome Quilt Binder Set, and yes, you will learn how to mitre the corners! Finish your UFOS faster and easier as the binding fabric is folded and stitched down all in one step. It works like a dream!
The Janome Quilt Binder Set is available in two configurations and each is conveniently available from your Janome Canada dealer, For Easy Set models which have a side thread cutter next to the bobbin cover in the needle plate, use Part Number: 202211008. For those with a rectangular bobbin cover which is not Easy Set, like the Janome MC6600 and MC7700, use Part Number: 846421007.
Follow us on the Janome HQ Facebook page and the Janome HQ Instagram page to see what’s new at Janome Canada and information about upcoming in-person classes and presentations at our Janome Canada Headquarters, our Janome HQ,!
Our fabulous Janome Canada Educator, Celine Ross, is LIVE every Tuesday at 3pm EST on the Janome Sewing Machines Facebook page bringing you more sewing fun and education to help you get the most from your Janome machine! However, don’t worry if you can’t make the LIVE as all presentations will be saved under the Videos tab of the Janome Sewing Machines Facebook page. Use the Search Box to find all the videos with CelineRoss so you never miss out of the fun!
Today’s topic is demonstrating how quick and easy it is to embellish and add the designer touch using the Janome Serger Piping Foot which is available in two sizes and fits ALL Janome sergers!
For piping 1/8″ wide use Part Number: 200219103. For piping 3/16″ wide use Part Number:200220107 and if you’d like both sizes of piping feet in one blister pack, use Part Number:202039000, conveniently available from any Janome Canada dealer. If they don’t have these in stock, they can order for you from our Janome Canada warehouse.
Celine will share all the details of how to create and attach the piping all in ONE step on the serger!
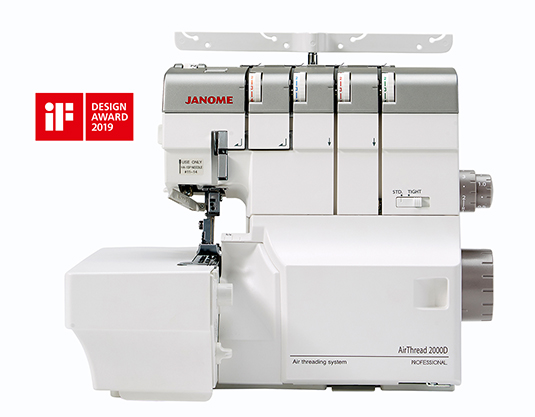
Though Celine often demonstrates on the Top-of-the-Line Janome AT2000D Air Thread serger, all Janome sergers use the same snap on Piping Foot. There are a few exceptions with the 3/16″ wide Janome Serger Piping Foot specifically, however, so be sure to check out our handy Janome Accessories Catalogue for details.
You will find the Janome Accessories Catalogue under the Accessories Tab on Janome.CA to look up all the presser feet and accessories compatible with and available for your machine.
If you’re in the market for a new serger, be sure to check out the fabulous Janome Canada Red Tag Sale going on until the end of February, 2024. Check with your participating Janome Canada dealer for details!
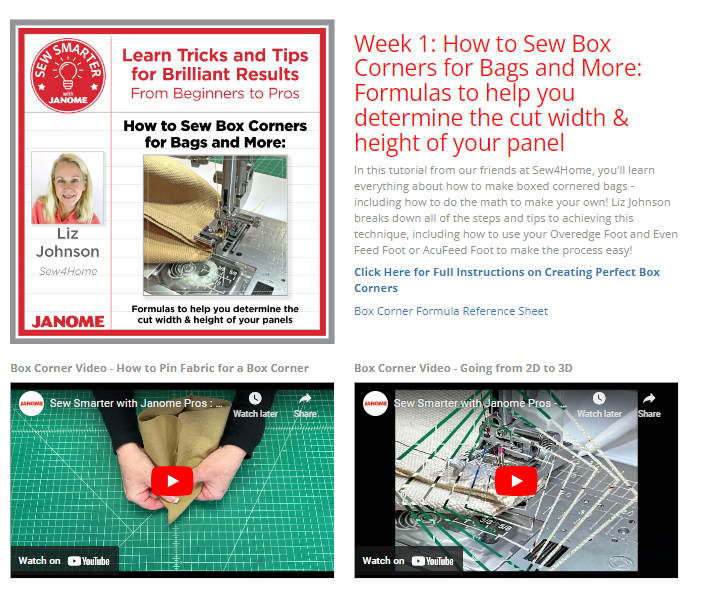
In Janome’s ongoing efforts to bring you MORE resources of all things sewing, quilting, embroidery and creating, our Janome America colleagues have created the “Sew Smarter with Janome” weekly series. For your convenience, there’s a direct link to the page on our website, Janome.CA
There you will find a description of the techniques demonstrated, along with links to download instructions and support materials, as well an informative video to guide you through the process step-by-step. Everything you need to learn a fun new technique, or to learn how to use a specific presser foot is right at your fingertips!
In addition to Janome America Educators, our good friend, Liz Johnson from Sew4Home.Com shares her vast knowledge of bag-making and home décor sewing techniques, so there’s something for everyone, no matter what kind of sewing you do.
Please note: there are no active links in the above photo
Want to learn more about the fabulous Janome Bi-Level Foot, for example? Check out the Sew Smarter with Janome video on the landing page found on Janome.CA or Janome.COM
Please note: there are no active links in the above photo
For even MORE about the Janome Bi-Level foot, and all things Janome, use the SEARCH box right here on the Janome Life blog! Type in whatever you’d like to learn more about and up comes all the related posts! There’s over a decade’s worth of tips and tricks with links to additional support materials and videos right at your fingertips!
Tune in every Wednesday at 1pm Eastern to the Janome Canada Instagram page as we share sewing tips and tricks, answer questions and highlight many Janome machines, presser feet and accessories. Don’t worry if you can’t make the lives; the presentations are stored in the feed for later viewing at your convenience.
For more about the Sew Smarter with Janome series, and to access the wealth of four weekly LIVE presentations, including Artistic Digitizer and the Continental Club,which focuses on the Continental line of machines; CM17, Continental M7 and the NEW Continental M8 and Continental M6, be sure to follow the Janome Sewing Machines Facebook page.
And, lets not forget about the Janome HQ You Tube channel! After a brief hiatus, NEW videos are in the works to be uploaded, so be sure to SUBSCRIBE and ring the NOTIFICATIONS bell so you don’t miss a post!