March is a fun month as it means “March Break” vacation for schools, St. Patrick’s Day celebrations on the 17th, and SPRING!
It also means there’s lots of fun deals with terrific savings to be had from your participating Janome Canada dealer. Check out the flyer on Janome.CA for details!
There’s a variety of machines on special; something for everyone and many of which come with some extra bonus goodies, so now is the time to treat yourself!
As we know, time flies by so quickly these days, so don’t delay in contacting your participating Janome Canada dealer to take advantage of these great savings.
Made of a special slick resin, the Janome Ultra Glide Foot is the ideal optional specialty presser foot to sew stickier materials like vinyl, Ultrasuede, rainwear and leather.
Even better, the Janome Ultra Glide Foot is a snap on presser foot available for almost every Janome sewing machine out there!
5mm machines, Part Number: 200141000
7mm machines, Part Number: 200329004
high speed straight stitch machines, like the Janome HD9/HD9BE,Part Number: 767404028
To see this fabulously fun presser foot in action, click on the video below from Janome America’s You Tube channel.
There’s many blogs here on Janome Life to review for uses and project ideas to use with this presser foot.
For9mmsewing machine models, Janome has a special Ultra Glide Needle Plate and Ultra Glide Foot set available from your fabulous Janome Canada dealer. The Janome Ultra Glide Needle Plate is also made of a special slick resin which helps feed those stickier “fabrics” more easily, as demonstrated in a Janome Canada Instagram LIVE, Sewing with Faux Fur, which is also available to view on the Janome HQ You Tube channel.
There are two configurations of the Janome Ultra Glide Needle Plate, so it’s important to tell your Janome dealer which machine model you have. Continental models, like the Janome Continental M17, Janome Continental M7 Professional, Janome Continental M7 QCS, Janome Continental M8 Professional and the Janome Continental M6 will use Part Number: 202431006.
Other 9mm machines which are Memory Craft models, like all versions of the Janome MC15000, Janome MC12000, Janome MC6700P, Janome MC6650, Janome MC8200QCP SE, Janome MC8900QCP SE, Janome MC9850 SE, Janome MC9400QCP, Janome MC9450QCP, Janome MC9480QC Professional and the Janome MC9410QC will use Part Number:202201005.
If you have a Skyline9mm machine, like the Janome Skyline S9, Janome Skyline S7, Janome Skyline S6 and Janome Skyline S5, you will use the same part number as above, Part Number:202201005.
Be it entry-level, Top-of-the-Line, or a model in between, many of our Janome sewing machines come with the same Utility stitches, which are commonly used, versatile stitches which help get the job done quickly and easily with great results.
Details can be found in your machine’s Instruction Manual, but, for select, higher-end machines, information is also available in the freeJanome apps, AcuSpark, AcuSpark 2 and AcuAssist. Even if you don’t have these machines, you still can glean the basic information found there about the various stitches and presser feet, which are also commonly found in many Janome sewing machines.
Join us LIVE at 1pm EST @janomecanada Instagram page every Wednesday afternoon to learn about all things Janome! However, don’t worry if you can’t make the LIVE presentations as they’ll be stored in the feed on the Janome Canada Instagram page and later posted as videos on the Janome HQ You Tube channel.
Today’s topic will be showing some sewing applications using basic Utility stitches found in many Janome sewing machines, and details of the free Janome apps listed above.
Follow us on the Janome HQ Facebook page and the Janome HQ Instagram page to see what’s new at Janome Canada and information about upcoming in-person classes and presentations at our Janome Canada Headquarters, our Janome HQ,!
February is National Embroidery Month, so today you will learn how to add embroidery to a reversible table cloth, including how to hoop and what stabilizers to use. You will also learn about the amazing Artistic Digitizer embroidery software, which offers you endless fun and creativity at your fingertips!
Celine is back LIVE every Tuesday at 3pm EST on the Janome Sewing Machines Facebook page for an entire month of sewing fun and education to help you get the most from your Janome machine! Don’t worry if you can’t make the LIVE as all of the presentations will be saved under the Videos tab of the Janome Sewing Machines Facebook page. Use the Search Box to find all the videos with CelineRoss.
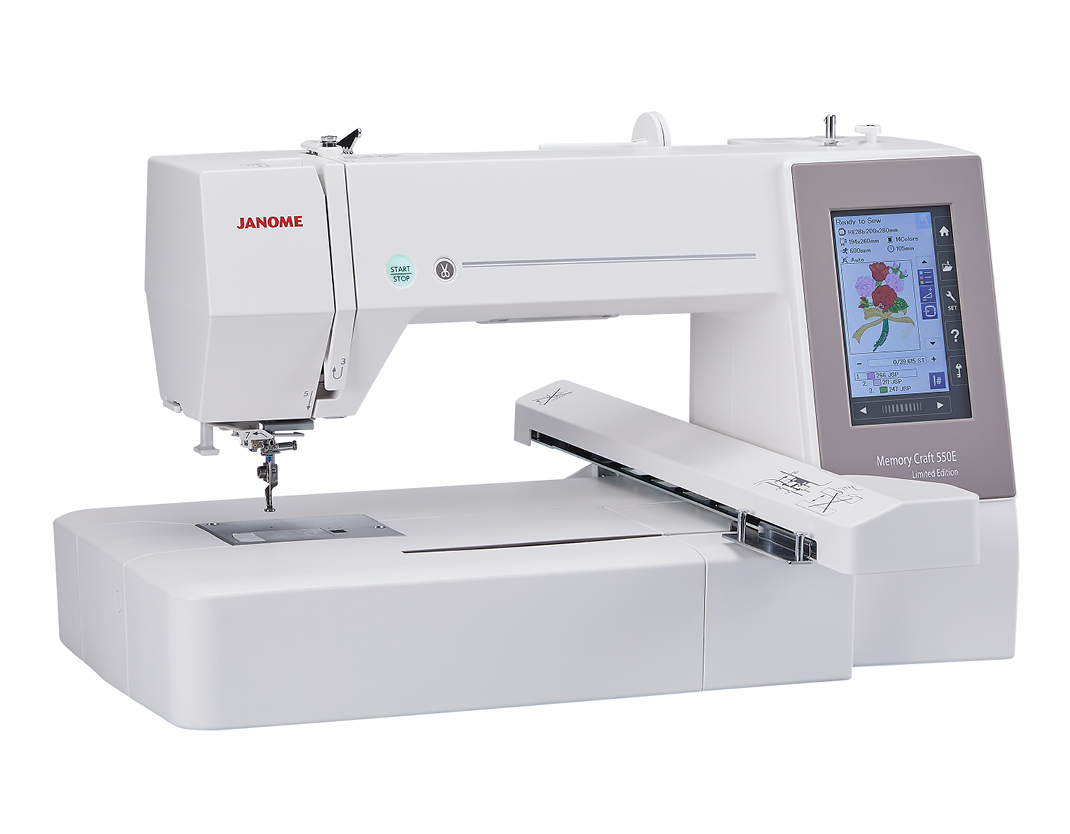
Though Celine will use the Janome Continental M17, which is Janome’s top-of-the-line sewing/embroidery combo machine, there are many other combo models, or stand-alone embroidery models from which to choose! There’s a machine for every experience-level, every space and every budget.
Check with your Janome Canada dealer to see these machines in action to find which is right for you, and be sure to ask about the Janome Canada Red Tag Sale going on through the month of February, 2024.
For more embroidery tips, tricks and techniques, check out previous blogs right here on Janome Life!
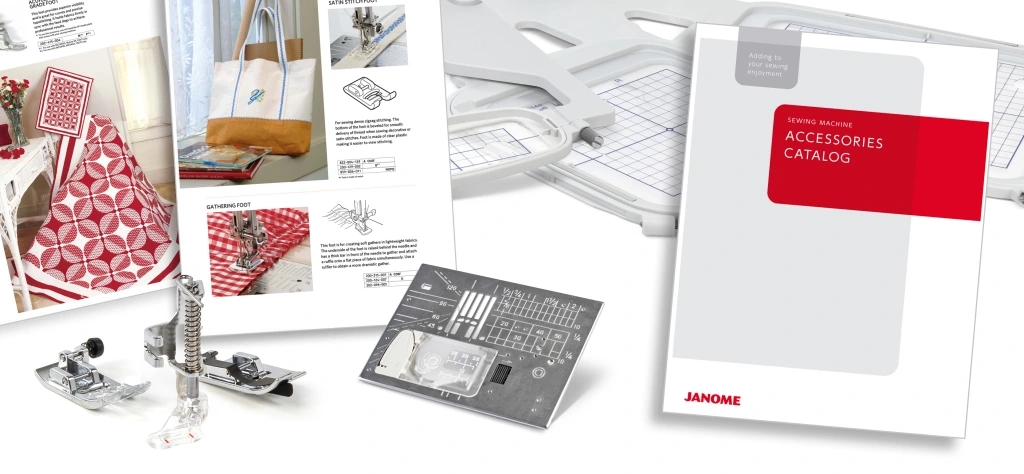
Check out our handy Janome Accessories Catalogue or click on the Accessories Tab onJanome.CA. to find the presser feet and accessories compatible with your machine. Click the Products tab, then scroll down to find “View all Accessories“. Click there to access the Search Box or to scroll through the pages to find the accessories you’d like. Click on the picture/description to find the Part Number and machine compatibility. And, as always, check with your fabulous Janome Dealer!
By definition, understitching is a line of straight stitching sewn just beyond the seam line of two pieces that have been sewn together to create a seam along an edge. One of the pieces is the outside of your project, the other is the inside. In order to keep that seamed edge sharp and clean, you understitch the inside piece to the seam allowance so it won’t roll to the outside along the edge seam and look all messy and unprofessional.
It’s used to make a sharp edge and keep facings and linings out of sight. Although possibly more common in garments, we’ve found plenty of uses for understitching in home décor sewing. Some of our favorites: along the edge of an inverted box pleat on a valance, bed shirt or even a pillow front.
How to Understitch
In order for you to best see the technique, we selected a light fabric for the inside, a dark fabric for the outside, and a bright thread. In your projects, you would use the fabric of your choice (which may or may not be the same for the inside and outside pieces) and thread to coordinate with your selected fabric(s).
If you’re sewing a project with instructions provided, such as an off-the-rack pattern or following an online tutorial, there are likely to be references to understitching where appropriate. If you’re creating an original, you’ll begin to quickly spot where you need to understitch in order to avoid that “inside-rolling-to-the-outside” thing happening along a seamed edge. In our example, we will refer to the “inside” as a lining and the “outside” as the right side.
Set up your sewing machine for regular sewing with a straight stitch.
With right sides together and using the appropriate seam allowance, sew the right side piece to the lining piece. Remember, the dark fabric is our outside fabric and the light fabric is our lining.
Grade the seam allowance to eliminate excess bulk in the seam. This means you trim one seam allowance edge narrower than the other. Grading is optional, you may not use it every time and it will likely depend most on the bulk of your fabric.
Press the seam allowance toward the lining.
Lay the sewn panel flat, right side up. The lining portion should be to the right and the right side portion to the left. The seam allowance should also be laying to the right underneath the lining… since you just pressed it that way.
Place the lining/seam allowance side under the machine’s presser foot. The original seam line should be just to the left of the needle, approximately ⅛”. You are preparing to stitch on the lining side.
NOTE: We’re using a Janome Open Toe Satin Stitch foot so you can see exactly where to stitch. You would use a standard presser foot on your machine.
Sew a straight line of stitching through the lining and the seam allowance underneath. This line of stitching should be as long as the edge seam you want to keep from rolling.
Fold the two pieces back together along seam line (i.e.. wrong sides together) and press for a sharp edge. Here it is from the back.
From the front, your seam edge should look straight and clean, just like the photo below. I can’t see the lining, can you?
For more under-stitching tips and tricks, click on this link HERE.
By: Liz Johnson, Senior Editor, Sew4Home – a Janome Exclusive Studio
After a holiday season of sewing and serging, your machine is likely in need of some TLC! In today’s blog post we’re covering sergers. For tips of cleaning and maintaining top loading sewing machines, check out this previous blog post.
We’re using the Janome AT2000D serger for this blog, but these techniques are applicable to all sergers. Always refer to your machine’s Instruction Manual when cleaning and maintaining your machine. Many of Janome machine manuals are also available online to download and print. Click the SUPPORT tab, then MANUALS on Janome.CA.
Supplies you’ll need: 1) Sewing machine oil, 2) lint brush, 3) cotton swabs, 4) wrench and spare knife blade which come included with your serger, 5) screwdrivers (not pictured). Many of these supplies can be purchased from your Janome Canada dealer.
Part 1: Disassembly
First, disconnect the power by unplugging the machine. You’ll want good lighting from an overhead, or task lamp nearby.
Remove the needles and the presser foot. Review your machine’s Instruction Manual for details.
Next, remove the foot holder/ ankle from the presser foot bar. Unscrew the needle plate and remove it. You might want to keep a magnetic pin dish, like the Janome Pin Pal handy to keep hold of the screws so you don’t loose track of them!
Part 2: Cleaning
Brush out the tension discs with your lint brush. I also like to ‘floss’ the tension discs with a folded piece of clean, lint free fabric. Old t-shirts work great for this!
*Important*: Make sure the presser foot lever is raised up before cleaning the tension discs. If down, the discs will remain closed and won’t get cleaned properly.
Next, brush away dust from the needle bar area (left photo) and be sure to clean around and in between the feed dogs. I like to push the bristles of my brush in between the feed dogs to really clear away all the compacted dust and lint (right photo).
Now we’re tackling the real mess! Here’s a sped up video of me brushing out the dust from the main looper area. I like to use a ‘up and out’ motion with my lint brush to try to prevent dust going further into the machine.
Notice how half way through I give the balance wheel a half turn or so toward me. This moves the loopers to a different position, and exposes more dust and lint I may not have seen before.
Don’t forget to open the side cover and brush out dust from there! After I’m done brushing, I like to give everything a once over with cotton swabs to pick up any tiny particles that stick on the metal parts.
Part 3: Oiling
Now for the most satisfying part: lubricating so everything stays moving as it should! Remember to only use good quality Sewing Machine oil which you can pick up from your Janome Canada dealer.
First, put one drop of oil on the needle bar and put a couple drops in the little hole located to the right of the foot pressure adjustment on the top of the machine. Review your machine’s Instruction Manual for details of where to oil, or consult with your authorized Janome Service Technician.
Don’t mind my music! 🙂
Now to oil the loopers. There are 4 spots to oil here which are clearly shown in the manual. Basically, oil goes on any spot where metal rubs against metal, like in the looper assemblies. Here is a video of me oiling them liberally.
Janome AT2000D Instruction Manual page 55 shows detailed instructions exactly where to oil
For the side of the serger, give a drop or two of oil to each spot where the manual tells you to. This will differ by model, so consult your machine’s Instruction Manual for this step.
Part 4: Replacing the cutting blade!
Now we’re going to replace the cutting blade! Please only do this if your blade is old and no longer cutting well. A good cleaning can often resolve cutting issues.
Removing the blade is very easy. Loosen the screw with the wrench often provided with the machine, then, use a Phillips head (star) screwdriver to fully remove the screw. The blade will slide right off with it!
Now, place the new blade into the slot. It will conveniently stay it place until you tighten the screw all the way back in!
As you’ll see in the video, there’s a bit of back and forth ‘play’ in the positioning of the blade. As you tighten the screw, hold the blade so that it’s leaning more towards you (or to the left in the video perspective). Then, finish it off by tightening the screw fully with the wrench. Make sure to give this screw an extra turn so it’s firmly secured in place.
Rotate the balance wheel by hand a few cycles to be sure everything is moving freely. Lower and raise the knife blade a few times to be sure it easily moves up and down.
Congratulations! You now have a clean and lubricated serger that is ready for your next project! I recommend cleaning after every project, and oiling every 3 projects or so.
Consistent cleaning and oiling will prolong the life of your serger, but it’s still no substitute for a proper tune-up at your Janome dealer. There are many internal parts which need to be oiled and adjustments to be made which only your authorized Janome Service Technician should do. Janome recommends an annual service at least once a year for all machines.
February is National Embroidery Month, so today you will learn how to add embroidery to a cushion cover, including how to hoop and what stabilizers to use. You will also learn about Janome’s fabulous A.S.R.(Accurate Stitch Regulator) which allows for consistent stitches when Free Motion Quilting and Ruler Quilting.
Celine is back LIVE every Tuesday at 3pm EST on the Janome Sewing Machines Facebook page for an entire month of sewing fun and education to help you get the most from your Janome machine!Don’t worry if you can’t make the LIVE as all of the presentations will be saved under the Videos tab of the Janome Sewing Machines Facebook page. Use the Search Box to find all the videos with CelineRoss.
Though Celine will use the Janome Continental M17, which is Janome’s top-of-the-line sewing/embroidery combo machine, there are many other combo models, or stand-alone embroidery models from which to choose! There’s a machine for every experience-level, every space and every budget. There are also now a few additional machines in the Janome line which are compatible with the A.S.R. (Accurate Stitch Regulator). Check with your Janome Canada dealer for details.
Janome Continental M17.Janome Continental M8 Professional comes included with the A.S.R. (Accurate Stitch Regulator)Janome MC 9480QC Professional is A.S.R. (Accurate Stitch Regulator) compatible
Check with your Janome Canada dealer to see these machines in action to find which is right for you, and be sure to ask about the Janome Canada Red Tag Sale going on through the month of February, 2024.
For more embroidery tips, tricks and techniques, check out previous blogs right here on Janome Life!
Check out our handy Janome Accessories Catalogue or click on the Accessories Tab onJanome.CA. to find the presser feet and accessories compatible with your machine. Click the Products tab, then scroll down to find “View all Accessories“. Click there to access the Search Box or to scroll through the pages to find the accessories you’d like. Click on the picture/description to find the Part Number and machine compatibility. And, as always, check with your fabulous Janome Dealer!
We’ve selected classic Sew4Home.Com projects that would be perfect to try on a variety of entry level, mid-range, and top-of-the-line Janome machines. Of course, you’re welcome to use your favorite model, but it’s also fun to explore how certain techniques, accents, and embellishments become easier as you take advantage of advanced machine features. For a test drive, contact your Janome Canada dealers to see which machine is right for you!
Drawcord Bag Trio with Accent Borders + Sewist 625E Three cute bags come in three handy sizes. So easy, and so useful as gift bags or for any small storage task. The bags are not lined; instead, you’ll finish the interior with a classic French seam finish. It’s a technique you can use again and again. The entry-level Janome Sewist 625E is an excellent choice for this type of beginner-friendly project that combines basic seaming with topstitching as well as seam finishing. The machine’s extra-high presser foot lift, speed control slider, and needle up/down button are all useful features that come into play and make things easier.
Reversible Knit Baby Blanket + Janome 4120QDC-G Soft and sweet describes this easy to assemble knit blanket. Made from 15 wide and narrow panels in three coordinating knits, the blanket layers together in a snap. A stretchable thread helps keep the seams and hem flat and pucker-free, but – of course – a precision machine is the real power behind the project. It’s a great opportunity to use the Janome 4120QDC-G. Its 7-piece feed dogs and extra-high presser foot lift easily handled this reversible blanket’s thicker layers. Extra important for large projects, like blankets, is the model’s included extension table. Spread out and stitch with confidence.
Featured Accessories: The standard Zig-Zag Foot (A) is all that is required, but other presser feet to consider, the Janome Even Feed Foot, which is included in the Bonus Quilting Kit.
Embroidered Teardrop Tote + MC9850 Special Edition This bag’s design is generous in size and style thanks to the combination of bold fabric and striking embroidery (a FREE download). The teardrop shape, narrow at the top and wide at the bottom, carries lots and is easy to load with just one hand. The Janome MC9850 Special Edition is the on-target machine for the job. It’s a space-saving model with all our favorite features for sewing and embroidery, including the large, full color LCD touchscreen. We were particularly impressed with the superior needle threader with Thread Guide 7 – one of the fastest, smoothest threading systems we’ve ever tired.
Oh, do we have a treat for you today as we’re back for another LIVE presentation on the Janome Canada Facebook page with our friend, Liz Johnson, from Sew4Home!
Each month, join us LIVE at 3pm Eastern/ 12pm Pacific on the Janome Canada Facebook Page as Liz shares with us a variety of sewing tips and tricks; sneak peeks of fabulous NEW projects which will later be featured in the Sew4Home INSPIRE tab on Janome.CA, and sew much more!
Don’t worry if you can’t make the LIVE as all presentations will be stored under the VIDEOS tab on the Janome Canada Facebook page, and will be uploaded to the Janome HQ You Tube channel.
Who doesn’t want to run their fingers through this soft, luxurious faux fur infinity scarf? Faux fur is just so soft and cuddly! Working the real fur animal pelts requires some special skills and tools, but working with faux fur is surprisingly easy – with a little know how.
Join us LIVE at 1pm EST @janomecanada Instagram page every Wednesday afternoon to learn about all things Janome! However, don’t worry if you can’t make the LIVE presentations as they’ll be stored in the feed on the Janome Canada Instagram page and later posted as videos on the Janome HQ You Tube channel.
Today’s topic is sewing with faux fur and I’ll share with you some tips and tricks which make the process easier with the finished product a great success!
Any Janome sewing machine which can sew a zig zag stitch, and a couple of items from the office supply store is all you need!
Follow us on the Janome HQ Facebook page and the Janome HQ Instagram page to see what’s new at Janome Canada and information about upcoming in-person classes and presentations at our Janome Canada Headquarters, our Janome HQ,!